Archive | Uncategorized RSS feed for this section

Ultimate Guide to Sushi Cutting Patterns

Ultimate Guide to Sushi Cutting Patterns

Sushi cutting patterns are about precision, artistry, and the right tools. The way you slice sushi doesn’t just affect its appearance but also its texture and taste. Whether you’re preparing simple rolls or aiming for complex designs, mastering these techniques can elevate your sushi game.

Key Takeaways:

  • Precision is crucial: Clean cuts preserve texture and visual appeal.
  • Essential tools: Use sharp knives like the Yanagiba, Usuba, and Deba for specific tasks.
  • Techniques matter: Straight cuts, diagonal cuts, and advanced methods like Usuzukuri create stunning results.
  • Ingredient placement: Strategic arrangement ensures beautiful patterns in every slice.
  • Knife care: Keep blades sharp, clean, and properly stored to maintain performance.

With practice and the right equipment, you can create sushi that looks as good as it tastes. Start with basic techniques and gradually explore advanced methods to hone your skills.

Cutting Nori in Patterns – Sushi Cooking Ideas #2

Tools You Need for Precise Sushi Cutting

The right tools can elevate sushi preparation into a true art form. Sushi knives and equipment are crafted with precision, blending tradition and functionality to meet the unique demands of sushi-making.

Key Knives for Sushi Cutting

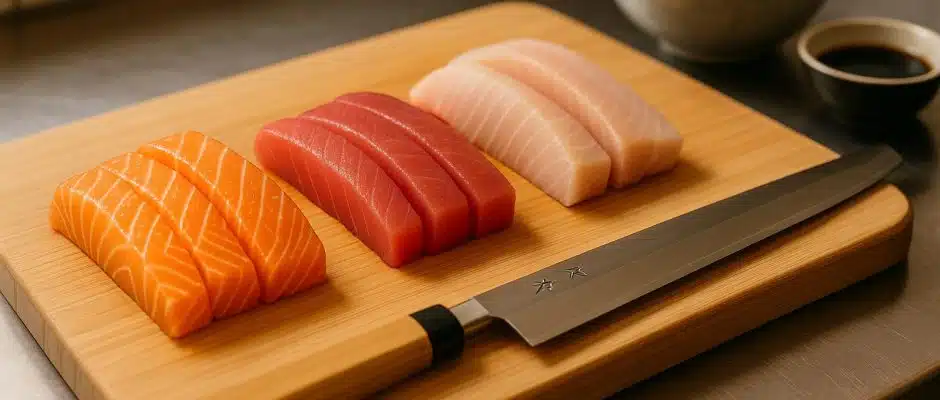
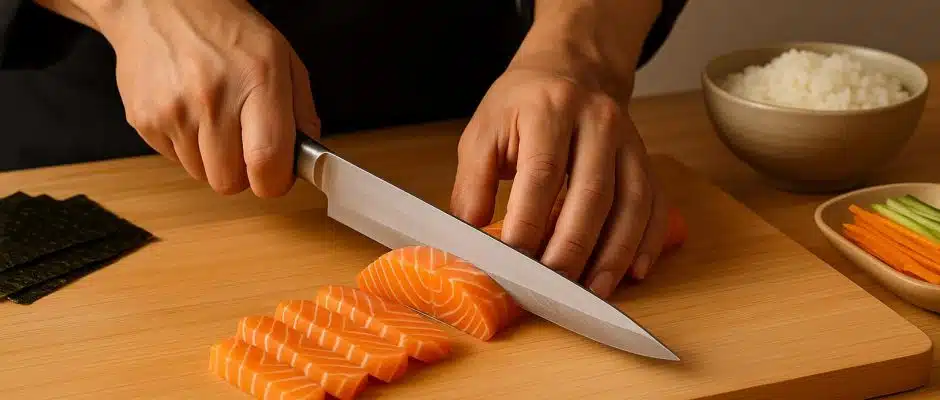
The Yanagiba is the go-to knife for cutting sushi with precision. Its long, slender blade is perfect for slicing sashimi and sushi rolls in a single, seamless motion. Thanks to its single-bevel edge and razor-sharp design, it minimizes damage to delicate fish, preserving both its texture and visual appeal. The extended blade ensures each cut is smooth and clean.

For working with vegetables, the Usuba is indispensable. Its flat, thin blade is ideal for intricate cuts and garnishes. Whether you’re performing katsuramuki (thinly peeling vegetables) or creating julienne strips for decoration, this knife delivers consistent precision every time.

The Deba, on the other hand, is designed for heavier tasks. With its thick, sturdy blade, it’s perfect for filleting whole fish and removing bones. This knife is often used to break down sushi-grade fish before switching to the Yanagiba for the final, delicate slices. Its weight and stability provide the control needed to handle fish without damaging the flesh.

These three knives form the backbone of sushi preparation, each serving a specific role to ensure flawless results.

Additional Tools for Perfect Cuts

A good cutting board is just as important as the knives. Wooden boards are highly recommended because they are gentle on knife edges and provide the stability needed for precise slicing. High-quality plastic boards can also work, but avoid hard surfaces like glass or ceramic, as they can dull your blades quickly.

Keeping your blade clean during use is another key step. A damp towel is essential for wiping the blade between cuts, removing any rice grains or fish oils that might stick. This simple habit ensures each slice is clean and precise, preserving the integrity of your sushi.

To maintain your knives’ sharpness, a quality whetstone is a must. Regular sharpening keeps your blades performing at their best, which is crucial for intricate cutting techniques. Professional sushi chefs often sharpen their knives frequently to achieve the precision required for their craft.

For those aiming for uniformity in their sushi pieces, slicing guides or rulers can be helpful. These tools are especially useful when creating complex patterns that demand consistent sizes and shapes.

Why Sharp Blades Matter

A sharp knife is the cornerstone of successful sushi cutting. It glides effortlessly through ingredients, avoiding the crushing of rice, tearing of nori, or shredding of fish. This precision is especially critical for intricate patterns, where a dull blade can leave jagged edges that ruin the visual appeal of your sushi.

Using a dull knife not only compromises the look of your sushi but also requires more force, which can compress the roll and distort its internal design. It also increases the risk of accidents. In contrast, a sharp blade offers control and precision with minimal effort, making it easier to achieve the delicate cuts sushi demands.

Maintaining sharp knives goes beyond regular sharpening. Cleaning and storing them properly is just as important. Protective sheaths or magnetic strips can prevent edge damage, while immediate cleaning after use helps avoid residue buildup that could affect performance.

For those starting out, Make My Sushi (https://makemysushi.com) provides sushi-making kits that include essential knives and detailed maintenance guides, making it easier to master the art of sushi cutting at home.

Techniques for Creating Detailed Sushi Patterns

Creating intricate sushi patterns starts with mastering both basic and advanced cutting techniques. The secret lies in precise knife control and understanding how each cut influences the final presentation.

Basic Cutting Methods

Straight cuts are the foundation of all sushi slicing techniques. To execute this, hold your knife perpendicular to the cutting board and make a smooth, downward motion. This technique is ideal for standard maki rolls, ensuring clean, even slices that clearly showcase the roll’s interior.

Diagonal cuts bring a touch of flair by creating oval-shaped pieces instead of perfect circles. By slicing at a 45-degree angle, you expose more of the roll’s interior, making this method perfect for thicker rolls like futomaki. The result is an elegant and visually striking presentation.

Pull-cuts involve drawing the knife toward you with steady, gentle pressure. Start with the tip of the blade touching the roll, then pull through in one smooth motion. This technique is especially useful for rolls with delicate ingredients, like soft fish or tender vegetables, as it prevents crushing and ensures clean edges.

For beginners, practicing these basic cuts on softer vegetables like cucumbers is a great way to develop steady knife control and precision before moving on to more challenging ingredients. Once you’ve mastered these, you can explore advanced techniques to create even more intricate patterns.

Advanced Techniques for Detailed Patterns

Advanced cutting techniques take sushi presentation to a whole new level, transforming simple rolls into works of art.

Hirazukuri produces flat slices about 0.4 inches thick and 3 inches long, making it the go-to cut for robust fish like tuna and salmon. To achieve this, position your knife at a 90-degree angle to the fish and slice straight down with confidence.

Sogizukuri creates wider, more elegant slices by cutting at a 45-degree angle. This technique works beautifully with white-meat fish like snapper, as the angled cut enhances the fish’s delicate appearance by exposing more surface area.

Usuzukuri demands exceptional skill to create paper-thin slices, ranging from 0.04 to 0.08 inches thick. This technique is often used for white fish, producing translucent pieces that practically melt in your mouth. Consistent pressure and a smooth slicing motion are key to mastering this method.

Katsuramuki involves peeling vegetables into continuous, paper-thin sheets. Hold the vegetable firmly and rotate it against the blade to create these delicate sheets, which can be used for wrapping or decorative plating.

Cutting TechniqueDescriptionBest For
HirazukuriFlat slices, 0.4 inches thick, 3 inches longRobust fish like tuna and salmon
Sogizukuri45-degree angled slicesWhite-meat fish like snapper
UsuzukuriPaper-thin slices (0.04–0.08 inches)Translucent cuts for white fish
KatsuramukiRotary peeling for thin sheetsWrapping or decorative plating

"Kazarigiri is not just about creating beautiful food, but it’s also about respecting the natural beauty of the ingredients and presenting them in a way that elevates their flavor and texture." – Chef Hiroki Sakai

How Ingredient Placement Affects Patterns

The arrangement of ingredients within a sushi roll plays a huge role in the final pattern revealed by your cuts. Strategic placement of colorful vegetables, fish, and other components creates a visual story with each slice.

Think of the roll as a canvas where every ingredient adds to the overall design. Placing contrasting colors – like bright orange carrots next to deep green cucumber or vibrant red tuna paired with white rice – creates bold and eye-catching patterns. Careful planning also ensures a balance of flavors, textures, and colors.

For consistent patterns, symmetrical placement works best. Arrange ingredients at regular intervals around the roll’s circumference so each slice reveals a uniform design, perfect for formal presentations. If you’re looking for something more dynamic, try asymmetrical placement. Clustering ingredients on one side or arranging them in a spiral can create a unique and artistic effect.

The texture and thickness of ingredients also matter. Thin, flexible items like cucumber or avocado can be shaped and positioned with precision, while firmer ingredients like cooked shrimp or tempura provide structure and bold focal points. By considering the natural characteristics of each ingredient, you can better predict and control the final visual outcome.

Carefully intertwining components not only creates a stunning presentation but also enhances the dining experience, showcasing the quality of the ingredients and the thoughtfulness behind their preparation.

sbb-itb-7b591fe

Step-by-Step Guide to Cutting and Revealing Patterns

Creating intricate sushi patterns requires a mix of preparation and precision. The final result – whether it wows or disappoints – often depends on following the right steps in the right order.

Preparing the Roll for Cutting

Start by cooling the roll for about 15–20 minutes. This helps firm up the rice and keeps the ingredients stable.

Next, loosely wrap the roll in plastic wrap or a damp paper towel (if using nori) and place it seam-side down on a clean, spacious cutting board. Before you begin slicing, take a moment to visually inspect the roll. Look for spots where the ingredients are evenly distributed, avoiding areas that seem too sparse or overly packed. This ensures every slice showcases the desired design.

These steps are essential for setting the roll up for precise cutting and maintaining its pattern.

Techniques for Slicing Without Distortion

Once the roll is prepped, the key to cutting cleanly lies in your technique.

  • Use one smooth, decisive motion for each cut. Avoid sawing back and forth, as this can ruin the roll’s shape. Position your knife where you want to cut, and slice in a fluid motion that takes about 2–3 seconds.
  • To ensure uniform slices, lightly mark the roll before cutting. Use the tip of your knife to score the surface at even intervals. For a typical maki roll, aim for slices that are about 0.75–1 inch thick – especially important if you’re preparing a presentation platter.
  • Keep your knife vertical and start at the top of the roll, slicing down in one steady motion. Apply only minimal pressure; a sharp knife should do most of the work without compressing the roll.

Cleaning the Knife Between Cuts

A clean knife is crucial for maintaining precision and preventing flavors from mixing.

Rinse the blade under warm water after each cut, then dry it immediately with a lint-free towel. If any residue builds up, quickly rinse and dry again. This is especially important when switching between rolls with different fillings, as it prevents flavor transfer and keeps cuts clean.

Once you’re finished, wash the knife with mild dish soap and warm water. Rinse thoroughly and dry completely before storing it. Keeping your knife clean not only ensures better performance but also helps maintain its sharpness and accuracy over time.

Troubleshooting and Best Practices

Even experienced sushi chefs encounter challenges when slicing rolls. Using the right techniques can help you achieve smoother, more precise cuts.

Common Cutting Problems and Solutions

Ragged edges are often caused by a dull knife or applying too much pressure. A dull blade crushes the rice instead of slicing cleanly, leaving the roll looking uneven. To prevent this, sharpen your knife regularly and let the blade glide effortlessly through the roll.

Compressed rolls happen when you press down too hard while cutting. This can flatten the roll and disrupt the placement of the ingredients. Use a gentle, steady slicing motion instead. If rolls are still compressing, they may be overfilled or not sealed tightly enough before slicing.

Rice sticking to the blade can make cuts messy and pull grains out of the roll. To avoid this, dip your knife in water before slicing and wipe it with a damp towel periodically.

Uneven slice thickness stems from inconsistent technique or rushing. Focus on making each cut in one smooth, fluid motion to ensure uniform slices that look polished.

Ingredients falling out during slicing usually means the roll is either overfilled or not sealed properly. Keep your filling amounts manageable and ensure the roll is tightly wrapped to maintain its structure.

Tackling these issues is key to achieving clean, precise cuts and ensuring safety while working.

Safety Tips for Sushi Cutting

Beyond troubleshooting, safety should always be a priority. Keeping your tools sharp, as mentioned earlier, is essential for avoiding accidents.

Sushi Chef Sushi Rik stresses the importance of immediate knife care:

"As soon as I finish cutting, I rinse my knife under warm water. Waiting is not an option because food residue can corrode the blade."

Proper knife storage is equally important. Avoid tossing knives into a drawer where they can get damaged or cause injuries. Instead, use a knife block, magnetic strip, or knife roll to keep blades protected and accessible.

Choose the right cutting surface. Wooden or plastic cutting boards are ideal, providing stability without wearing down the knife’s edge. Avoid hard materials like glass or marble, which can dull the blade and increase the risk of slipping.

Pay attention to hand positioning. Use a claw grip with your non-cutting hand, keeping your fingertips tucked under to guide the roll safely while cutting.

After slicing, rinse the blade right away, dry it thoroughly with a soft cloth, and store it properly. As Sushi Rik advises:

"Never soak your knife in water, even for a few minutes. Even stainless steel cannot withstand prolonged contact with water."

Conclusion and Key Takeaways

Creating stunning sushi patterns relies on sharp tools, precise techniques, and careful preparation. A razor-sharp knife is essential – it glides effortlessly through sushi rolls, preserving the intricate designs within.

Take the Sogizukuri technique, for example. This slanted slicing method not only increases the surface area of each piece but also highlights the internal patterns in a more visually appealing way. Pairing this method with cuts made against the grain enhances both the texture and the presentation of your sushi. When combined with intentional ingredient placement, the results can be truly eye-catching.

As discussed earlier, arranging ingredients thoughtfully is key. Symmetry in the placement of fish and vegetables ensures that each slice reveals a striking design. A classic example is the chrysanthemum pattern, where ingredients are centered to create a flower-like appearance in every piece.

For clean and precise cuts, use a single, fluid motion – avoid sawing – and keep your blade clean between slices to maintain the clarity of each pattern.

Thanks to the growing popularity of making sushi at home, these techniques are easier to learn than ever. Resources like Make My Sushi provide step-by-step guides that simplify even complex patterns, helping you achieve professional-quality results in your own kitchen.

Start with the basics before moving on to more intricate designs. With practice, you’ll build muscle memory and gain a deeper understanding of how your knife interacts with the ingredients.

With the right tools, proper techniques, and consistent practice, you can create sushi patterns that look as impressive as those served in high-end restaurants. Dedication and attention to detail will help you consistently craft beautiful, professional-looking sushi.

FAQs

What knives are essential for sushi cutting, and how are they used differently?

The Yanagiba and Deba knives are must-haves for sushi-making, each crafted for specific tasks. The Yanagiba, with its long and slender blade, is perfect for slicing raw fish and sashimi. Its design allows for precise, smooth cuts in a single forward motion, preserving the fish’s delicate texture.

In contrast, the Deba is a robust, heavier knife made for tougher jobs. It’s ideal for filleting fish and cutting through bones or cartilage with ease. While the Yanagiba focuses on precision and finesse, the Deba is all about strength and durability. Together, they form the backbone of tools needed to prepare exceptional sushi and sashimi at home.

What’s the best way to slice sushi rolls without ruining their shape or design?

To keep your sushi rolls neatly intact and preserve their beautiful design, it’s essential to chill the rolls thoroughly before slicing. This helps the ingredients stay firmly together, reducing the chance of them falling apart.

When it’s time to cut, use a sharp knife and lightly dampen the blade with water. This ensures smooth, clean slices. Instead of pressing straight down, use a gentle sawing motion – this reduces pressure on the roll and helps maintain those intricate patterns.

What mistakes should I avoid when cutting sushi rolls with intricate patterns?

When slicing sushi rolls with intricate designs, using a dull knife is a mistake that can completely ruin your efforts. A blunt blade tends to crush the rice and fish, making it impossible to achieve those clean, precise cuts. To avoid this, always ensure your knife is sharp and ready for the task.

Another common oversight is forgetting to wet the knife before each cut. This simple trick keeps the blade from sticking to the rice and fish, preserving the roll’s appearance. Also, be mindful of how much pressure you apply. Pressing too hard or overhandling the roll can distort the design you’ve worked so hard to create. Instead, aim for gentle, steady motions to keep everything looking sharp and intact.

Related posts

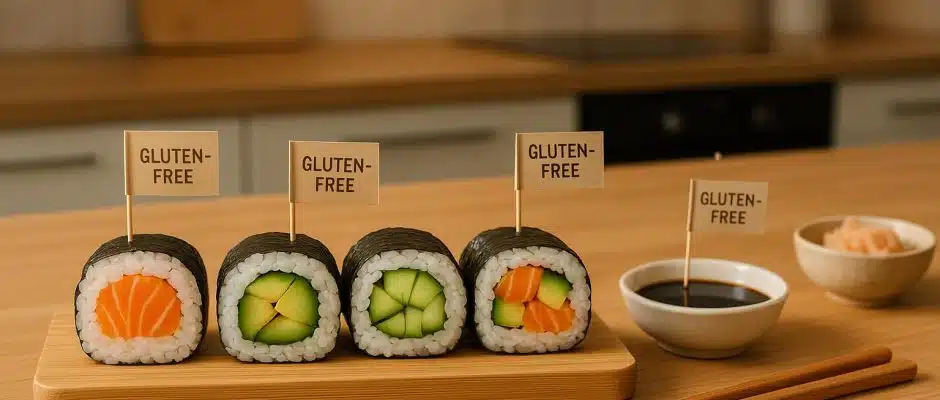
Gluten-Free Sushi: Preventing Cross-Contact

Gluten-Free Sushi: Preventing Cross-Contact

Making sushi gluten-free at home is the best way to ensure safety. While sushi may seem naturally gluten-free, hidden gluten sources – like soy sauce, imitation crab, and certain seasonings – can pose risks. Cross-contact in shared kitchen spaces is another concern, especially in restaurants. Here’s how you can enjoy sushi safely:

  • Key Risks: Soy sauce (contains wheat), imitation crab (wheat-based fillers), and sauces like eel or teriyaki often have gluten. Even sushi rice seasonings and some nori sheets may include gluten.
  • Cross-Contact: Shared knives, cutting boards, and surfaces can transfer gluten.
  • Home Prep Tips: Use tamari instead of soy sauce, real crab instead of imitation, and certified gluten-free products. Clean tools and surfaces thoroughly.
  • Eating Out: Communicate clearly with staff, ask for clean utensils, and bring your own gluten-free sauce.

Summary: Preparing sushi at home gives you full control over ingredients and reduces cross-contact risks. Restaurants can be safe with proper precautions, but homemade sushi remains the most reliable option.

How To Make Sushi Rice and Sushi Gluten Free

Finding Gluten Risks in Sushi Making

Spotting hidden gluten sources and understanding how cross-contact happens are key steps to making gluten-free sushi safely. Even with the best intentions, gluten can sneak in through certain ingredients or kitchen practices. Let’s break down some common culprits.

Ingredients That Contain Gluten

Some sushi ingredients may seem harmless but can hide gluten. For instance, imitation crab often includes wheat-based starches and fillers. Other problematic ingredients include:

  • Soy sauce: Most regular soy sauces contain wheat.
  • Tempura batter: Used for fried sushi toppings or fillings, it’s made with wheat flour.
  • Eel sauce, teriyaki, and ponzu: These sauces often have gluten in their recipes.
  • Sushi rice seasonings: Pre-mixed seasonings sometimes include wheat or barley derivatives.
  • Wasabi and pickled ginger: These can contain wheat-based additives, especially in mass-produced versions.
  • Nori sheets: While rare, some are dusted with flour to prevent sticking.

Even rice vinegar, used to season sushi rice, might contain added wheat or barley. In the U.S., imitation wasabi is common and may rely on wheat starch instead of pure wasabi root. Always check labels to be sure.

How Contamination Happens in the Kitchen

Beyond ingredients, cross-contact in the kitchen is a major concern. Gluten-free foods can pick up gluten from shared tools, surfaces, or improper cleaning practices. Here’s how it happens:

  • Shared tools: Knives, cutting boards, gloves, and rolling mats can transfer gluten if not sanitized after touching gluten-containing foods.
  • Surface contamination: Gluten particles from flour (like during tempura prep) can settle on countertops and nearby equipment.
  • Invisible risks: Gluten contamination can’t be seen or tasted, making it especially tricky to catch.

To minimize these risks, it’s crucial to use separate preparation areas and tools exclusively for gluten-free sushi. Proper cleaning and dedicated equipment can make all the difference in preventing cross-contact.

How to Prevent Contamination at Home

Making gluten-free sushi at home gives you complete control over the ingredients and preparation process. With the right setup and mindful ingredient choices, you can enjoy sushi without stressing over hidden gluten or cross-contact.

Preparing a Clean Sushi Work Area

Start by thoroughly cleaning your workspace. Wipe down countertops and utensils with hot, soapy water, followed by a disinfectant. If you’re using shared tools, sanitize them carefully between uses or, better yet, dedicate specific tools for gluten-free cooking.

For bamboo mats, scrub them with a brush under hot water and let them air dry. To add an extra layer of protection, consider wrapping the mat in plastic wrap. This simple step can help prevent contamination and make cleanup easier.

Keep your hands clean throughout the process, and if you’re using gloves, change them frequently to avoid transferring residue. Once your workspace is ready, it’s time to focus on ingredient swaps to keep your sushi gluten-free.

Gluten-Free Ingredient Alternatives for Sushi

Making smart ingredient swaps is key to safe, gluten-free sushi. Here are a few tips:

  • Soy Sauce Substitute: Use tamari instead of regular soy sauce. It delivers the same flavor but without the gluten.
  • Rice Vinegar: Stick to certified gluten-free brands like Kikkoman rice vinegar, which is widely available in the U.S. Always double-check labels for added gluten-containing ingredients.
  • Crab Meat: Avoid imitation crab, as it typically contains wheat-based fillers. Opt for real crab meat – fresh or frozen – for a safer alternative.
  • Wasabi and Pickled Ginger: Many commercial versions of these contain wheat-based additives. Look for products labeled "gluten-free", or make your own pickled ginger using rice vinegar, sugar, and salt.
  • Nori Sheets: While most nori is naturally gluten-free, some brands dust their sheets with flour to prevent sticking. Choose certified gluten-free nori to be safe.

"Sushi is often gluten-free. It’s usually just a few fillings and soy sauce you’ve got to worry about." – Wendy Stoltz, Gluten-Free Palate

These swaps not only ensure your sushi is gluten-free but also allow you to enjoy it with peace of mind.

Why Homemade Sushi Is a Safer Option

When you make sushi at home, you’re in complete control of the ingredients and preparation methods. Unlike restaurant kitchens, which often use shared equipment and spaces, your home setup minimizes the risk of cross-contact.

Another perk? It’s often more affordable in the long run. While gluten-free specialty items like tamari or certified nori may seem pricey initially, they can make dozens of sushi rolls – far more cost-effective than dining out at restaurants with gluten-free menus.

If you’re new to sushi-making, it’s easier than you might think. Resources like Make My Sushi provide step-by-step tutorials that simplify the process, making it approachable even for beginners. Plus, homemade sushi offers endless possibilities for customization. Experiment with gluten-free fillings, try fusion-style rolls, or adjust seasonings to suit your taste. This flexibility is especially helpful if you’re managing other dietary restrictions.

sbb-itb-7b591fe

Tips for Eating Gluten-Free Sushi at Restaurants

Dining out for gluten-free sushi can feel tricky, but with clear communication and a few smart strategies, it’s absolutely doable. While restaurants might pose a higher risk of cross-contact compared to your home kitchen, being proactive can make all the difference. Here’s how to navigate it safely.

How to Tell Restaurant Staff About Gluten-Free Needs

When discussing your dietary requirements, clarity is key. Instead of saying you’re "avoiding gluten", use the term gluten allergy. This terminology is often better understood by restaurant staff. Be sure to explain that even small amounts of gluten can make you seriously ill and stress the importance of using uncontaminated cookware.

Start by asking if the restaurant offers a gluten-free menu or has specific protocols for gluten-free dining. If your server seems uncertain, don’t hesitate to ask for the manager or head chef – they’re more likely to know the details of ingredients and preparation methods.

"When dining out it is your job to be the Food Detective. You have to be." – Goodie Goodie Gluten-Free®

Request specific precautions to avoid cross-contamination. For example, ask the sushi chef to change gloves before preparing your order and to use clean utensils, especially knives, when cutting your sushi. Make it clear that cross-contamination can have serious health consequences.

"Remember, YOU as a Celiac or Gluten-Free Eater will know much more then the restaurant staff, so please listen to your gut and follow your intuition." – Goodie Goodie Gluten-Free®

Bringing Your Own Gluten-Free Sauces

One way to further protect yourself is by bringing your own gluten-free sauces. Most restaurants only stock regular soy sauce, which contains wheat, so carrying a small bottle of tamari or gluten-free soy sauce can be a lifesaver. Travel-sized bottles are easy to pack and ensure you have a safe option on hand. While some restaurants might offer tamari, it’s always good to have your own backup just in case.

Avoid dark sauces like teriyaki, ponzu shoyu, or eel sauce, as these often contain wheat. If you’re unsure, it’s safer to skip the sauce altogether or use your own gluten-free alternative.

"Be suspicious of any sauces, especially dark sauces that are likely to contain regular soy sauce." – nogluten-noproblem.com

Interestingly, spicy mayo-based sauces are usually safe. The orange spicy sauce on many spicy tuna rolls typically contains just mayonnaise and Sriracha. That said, always double-check with your server to confirm the ingredients.

Sushi Menu Items to Avoid

Certain sushi items are more likely to contain gluten and should be avoided. These include:

  • Tempura rolls or anything labeled as "crunchy", as these typically include wheat-based ingredients.
  • Rolls made with imitation crab, as many versions use wheat-based fillers. Opt for real crab meat or different proteins like salmon or tuna instead.
  • Pre-made sushi, which often contains additives or gluten-containing ingredients and lacks transparency about preparation methods.

Be cautious with "spicy" rolls. While basic spicy mayo is generally gluten-free, additional seasonings or sauces might not be. Always ask about all ingredients before ordering.

"There’s so much more to eating gluten-free sushi than avoiding soy sauce (but please do not eat the soy sauce)." – Hannah Drown, cleveland.com

Condiments like wasabi can also be a concern. While authentic wasabi is gluten-free, imitation versions may not be. Check if the restaurant uses 100% real wasabi.

As registered dietitian Rachel Begun explains:

"If the sushi maker isn’t changing cutting boards, knives and gloves between preparing different sushi rolls, cross contamination is likely. To avoid cross contamination, precise communication with the sushi maker is necessary. Ask about the ingredients and be clear about how important it is for the sushi maker to use sterilized cutting surfaces and utensils when preparing your sushi."

Home vs Restaurant Sushi Safety Comparison

The safety of gluten-free sushi can depend significantly on whether you’re making it at home or dining out. Knowing the pros and cons of each option can help you manage gluten cross-contact risks more effectively.

When preparing sushi at home, you have full control over the ingredients and equipment, which makes it easier to avoid cross-contact with gluten. On the other hand, restaurants often follow general protocols that may not meet the strict standards required for a gluten-free diet. This difference highlights the importance of understanding the environment where your sushi is being made.

Dining out brings its own challenges. It requires clear communication with restaurant staff, as they may not be fully trained in gluten-free practices. Shared kitchen spaces and equipment can also increase the risk of cross-contact.

"To avoid cross contamination, precise communication with the sushi maker is necessary. Ask about the ingredients and be clear about how important it is for the sushi maker to use sterilized cutting surfaces and utensils when preparing your sushi." – Rachel Begun, Registered Dietitian

Here’s a quick look at how home preparation compares to eating sushi at a restaurant:

Home vs Restaurant Safety Comparison Table

FactorHome PreparationRestaurant Dining
Ingredient ControlFull control; you can ensure every item is gluten-freeLimited control; depends on the restaurant’s sourcing
Cross-Contamination RiskMinimal, with dedicated tools and clean surfacesHigher risk due to shared spaces and equipment
Communication RequiredNone, since you manage the environmentEssential; clear instructions to staff are critical
Sauce SafetyTotal control; you can choose gluten-free optionsRecommended to bring your own gluten-free soy sauce

This comparison highlights the stronger safeguards available when making sushi at home. That said, dining out can still be a safe and enjoyable option with the right precautions. Starting with home preparation can help you build the skills and confidence needed to navigate restaurant settings more comfortably.

Conclusion: Making Safe Gluten-Free Sushi

After examining the potential gluten sources and strategies to avoid them, here’s the takeaway: making gluten-free sushi at home is your best bet for ensuring safety. By preparing it yourself, you have full control over the ingredients and how they’re handled, significantly reducing the chances of cross-contact. Key sushi components – like sushi rice, fresh fish, seaweed, and vegetables – are naturally gluten-free. The real concerns lie in hidden culprits such as soy sauce, imitation crab, and certain seasonings.

Homemade sushi offers both safety and flexibility. As Wendy Stoltz from Gluten-Free Palate puts it:

"Sushi is one of those dishes where you can change up the ingredients and feel like you are eating something completely different just by changing the inside filling."

This versatility turns gluten-free sushi-making into a creative and enjoyable process.

By carefully following the preparation tips and ingredient substitutions discussed earlier, you can craft sushi that’s not only safe but also rivals restaurant quality. Plus, the confidence you gain in making sushi at home can help you make smarter, safer decisions when dining out.

Creating gluten-free sushi at home isn’t just about avoiding gluten – it’s about savoring a favorite cuisine without stress. With gluten-free ingredient swaps and proper preparation, you can enjoy delicious, worry-free sushi. For more tips and ideas, check out Make My Sushi.

FAQs

What hidden sources of gluten should I watch out for in sushi?

When you’re enjoying sushi, it’s easy to overlook hidden sources of gluten that might sneak into your meal. For instance, imitation crab (also known as surimi) often contains wheat as a binding ingredient. Tempura is another potential issue since the batter is usually made with wheat flour. And don’t forget about soy sauce, which typically contains wheat unless it’s specifically labeled as gluten-free.

Other potential gluten traps include sauces like teriyaki or fish sauce, which may have gluten in their ingredients. Even sushi rice isn’t always safe – it’s sometimes seasoned with malt vinegar, which could contain gluten. To stay safe, always check ingredient labels or ask your sushi chef to verify that your meal is gluten-free.

How can I let restaurant staff know I need gluten-free sushi to stay safe?

To make sure your sushi is gluten-free and safe, it’s crucial to communicate your dietary needs clearly with the restaurant staff. Let your server or the chef know about your gluten allergy or intolerance, and ask detailed questions about the preparation process. For instance, check if the sushi rice includes any gluten-containing ingredients like specific vinegars or soy sauce.

You can also ask for your sushi to be made separately using clean utensils and surfaces to prevent cross-contact with gluten. Being polite but firm about your requirements can help create a safer and more pleasant dining experience.

How can I avoid cross-contact with gluten when making gluten-free sushi at home?

To make gluten-free sushi at home without worrying about cross-contact, start by setting aside dedicated utensils, cutting boards, and prep surfaces specifically for gluten-free ingredients. Be sure to wash your hands thoroughly before handling these items, and store them in clearly labeled containers to avoid any mix-ups.

Keep gluten-free essentials like sushi rice and fillings completely separate from products containing gluten. Also, take a close look at sauces and condiments – especially soy sauce – and confirm they’re certified gluten-free to ensure your sushi is safe to eat.

Related posts

Checklist for Making Inside-Out Rolls at Home

Checklist for Making Inside-Out Rolls at Home

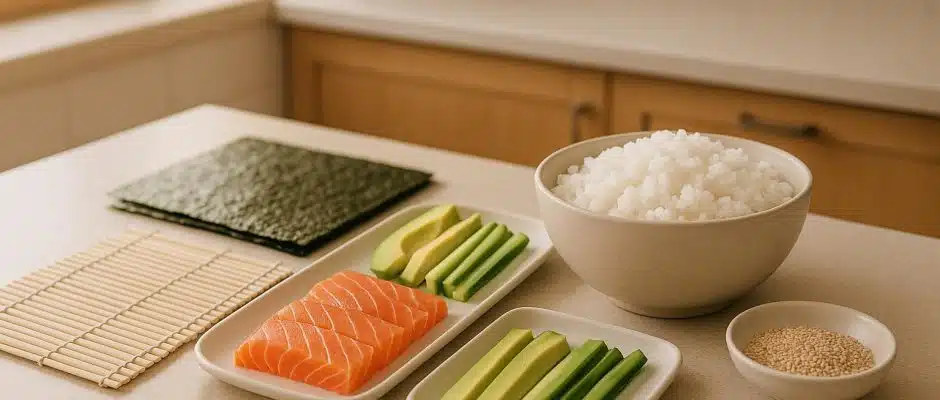
Making inside-out rolls, or uramaki, at home is simpler than you might think. These sushi rolls, with rice on the outside and nori tucked inside, originated in Los Angeles during the 1960s. They’re beginner-friendly and allow for endless filling and topping combinations, from seafood to vegetarian options. Here’s a quick summary of what you’ll need and the steps to follow:

What You’ll Need:

  • Ingredients: Sushi rice, nori sheets, fillings (like avocado, cucumber, crab, or fish), and toppings (sesame seeds, fish roe, etc.).
  • Tools: Bamboo mat wrapped in plastic, sharp knife, rice paddle, and small bowls of water.

Steps to Follow:

  1. Prepare the Rice: Use Japanese short-grain rice, rinse thoroughly, cook, and season with sushi vinegar.
  2. Set Up the Nori and Bamboo Mat: Cut nori sheets to size and wrap your bamboo mat in plastic wrap.
  3. Assemble and Roll: Spread rice on the nori, flip it, add fillings, and roll using the bamboo mat.
  4. Slice and Serve: Use a sharp, wet knife for clean cuts and serve with soy sauce, wasabi, and pickled ginger.

Key Tips:

  • Keep your hands wet to prevent rice from sticking.
  • Avoid overfilling for easier rolling.
  • Use high-quality ingredients for the best flavor and presentation.

With some practice and the right preparation, you can create sushi rolls that look and taste amazing. The process is fun, and experimenting with different fillings and toppings can help you find your favorite combinations.

How To Make Uramaki Sushi (INSIDE-OUT ROLL) with The Sushi Man

Required Ingredients for Inside-Out Rolls

To craft perfect Uramaki, you’ll need the right ingredients to ensure the proper texture, flavor, and structure. Here’s what you’ll need:

Sushi Rice

Japanese short-grain white rice is the gold standard for sushi because of its stickiness and firm texture.

"With a higher moisture content than other varieties, Japanese rice has the slight stickiness and signature firm texture you want for sushi. I strongly discourage using long-grain rice, jasmine rice, brown rice, or other varieties, as your sushi will fall apart." – Namiko Hirasawa Chen, Just One Cookbook

If Japanese rice isn’t available, Korean rice can work as a substitute since it shares similar qualities. For each roll, you’ll need about ¾ cup (110 g) of cooked sushi rice. To prepare it, use a 1:1 water-to-rice ratio, rinse the rice thoroughly, and let it soak for 20–30 minutes before cooking. Once cooked, season the hot rice with sushi vinegar using a slicing motion, then cool it quickly for the best results.

Nori Sheets

Nori, or dried seaweed sheets, forms the inner layer of an inside-out roll. Because the rice covers the outside, you might need to trim the nori sheets to match your desired roll size. Always use fresh, crisp nori to maintain the roll’s structure and avoid sogginess when it contacts the rice.

Fillings and Toppings

Common fillings include avocado, cucumber, crab (or imitation crab), and sushi-grade fish. For toppings, you can use sesame seeds, fish roe, thin slices of fish, crunchy onions, or spicy mayo. Toasted sesame seeds add a nutty flavor, while crunchy toppings balance softer fillings. Popular combinations include smoked salmon with cream cheese or vegan-friendly options like avocado and cucumber. Cutting fillings into thin strips makes them easier to roll, and adding spring onions can provide a refreshing contrast.

Serving Condiments

Pair your rolls with soy sauce, wasabi, and pickled ginger. Soy sauce is available in light and dark varieties, while ponzu can offer a citrusy alternative. For extra heat, some enjoy hot mustard sauce or chili oil. Use wasabi sparingly – it’s potent – and let pickled ginger cleanse your palate between bites. To round out the meal, consider a bowl of warm miso soup or a cup of green tea, which is not only soothing but also known for its antibacterial properties.

Needed Tools and Equipment

Having the right tools on hand is just as important as using top-quality ingredients. The right equipment can turn a frustrating experience with sticky rice into a smooth process that results in professional-looking inside-out rolls. The good news? You don’t need to break the bank – just a few essentials will do the trick.

Bamboo Mat with Plastic Wrap

The bamboo mat, or makisu, is your go-to tool for rolling sushi. If you don’t have one, a clean tea towel can work as a substitute. However, the key to success is wrapping your bamboo mat in plastic wrap. This step keeps your mat clean and prevents rice from sticking in the gaps between the bamboo slats. Plus, the plastic wrap helps lock in moisture, making the nori softer and easier to handle.

To use, cover the bamboo mat with plastic wrap, lay the nori on top, and spread the rice evenly. When rolling, lift the edge of the mat with your thumbs while curving your fingers over the top. Gently press along the length of the roll, pulling the edge toward you for a smooth, continuous motion.

Sharp Knife

A sharp knife is non-negotiable for achieving clean, precise cuts. A dull blade can tear the roll and leave you with uneven slices. Some great knife options include Yanagi knives (ideal for slicing fish), Gyuto knives (perfect for cutting rolls), and Sujihiki knives, which function like carving knives and are easier to maintain than traditional single-bevel Japanese knives.

Before each cut, wet the knife blade to prevent sticking. Use a smooth slicing motion, and clean the blade between cuts with a damp towel or a mix of water and rice vinegar for the best results.

Rice Paddle and Small Bowls of Water

Once you’ve rolled your sushi, handling the rice properly is key to bringing everything together. A rice paddle, or shamoji, is perfect for evenly spreading rice without crushing the grains. Its flat, wide surface applies gentle pressure, and wooden or bamboo paddles are less sticky compared to metal utensils.

Keep a bowl of water nearby to wet your hands as you work. This prevents rice from sticking to your fingers. Dip your hands frequently while spreading the rice and shaping your rolls for a seamless process.

sbb-itb-7b591fe

Step-by-Step Preparation Checklist

Ready to make restaurant-style inside-out rolls at home? With your ingredients and tools in place, follow these steps to turn your kitchen into a sushi-making workshop. Each step builds on the last, so take your time and enjoy the process.

Prepare Sushi Rice

Start with Japanese short-grain white rice for the best texture and flavor. Rinse the rice under cold water until the water runs clear to wash away excess starch. Cook the rice using your preferred method – whether that’s a rice cooker, Instant Pot, or stovetop.

While the rice is still hot, gently fold in a mixture of rice vinegar, sugar, and salt. The heat helps the rice absorb the seasoning more effectively. Next, spread the rice out in a wide bowl to cool it quickly, folding and fanning it as you go. This technique creates that glossy, professional look. Use a slicing motion to mix, avoiding any mashing of the grains. Cover the rice with a damp cloth to keep it moist while you prepare the other components.

Prepare Nori and Bamboo Mat

Take standard nori sheets (about 7 inches × 8 inches) and cut them in half along the longer side, creating pieces roughly 7 inches × 4 inches each.

Wrap your bamboo mat in plastic wrap to prevent sticking and make cleanup a breeze. Place a half-sheet of nori on the plastic-covered mat, with the rough side facing up and the longest edge closest to you. This setup ensures the rice sticks properly when you start assembling.

Assemble and Roll

Before handling the rice, wet your hands with water to prevent it from sticking. Spread about ¾ cup of sushi rice evenly over the nori, creating a thin layer that just covers the sheet. Sprinkle sesame seeds or tobiko over the rice for added texture and flavor.

Carefully flip the nori sheet so the rice faces down, touching the plastic wrap on the bamboo mat. Add your chosen fillings in a straight line across the center of the nori, keeping them about an inch away from the edge closest to you. Using your thumbs, lift the edge of the bamboo mat and roll it over the fillings, applying firm but gentle pressure. Continue rolling while shaping and compressing the roll with the mat.

Slice and Serve

Once your roll is formed, it’s time to slice and serve. Wet a sharp knife with water or a mix of water and rice vinegar to keep the rice from sticking. Use a smooth, sawing motion to cut the roll into neat pieces, cleaning the knife between each cut.

Slice the roll into 6–8 pieces, depending on your preferred size, and arrange them on a serving plate. Serve immediately with soy sauce, wasabi, and pickled ginger on the side. Inside-out rolls are best enjoyed fresh, while the nori retains its texture and the rice is at room temperature. Bon appétit!

Tips for Better Inside-Out Rolls

Perfecting inside-out rolls at home takes some practice, but with the right techniques, you can create rolls that rival those from your favorite sushi spot. These tips tackle common challenges and help you achieve impressive results.

Avoid Overfilling

When it comes to filling inside-out rolls, less is definitely more. Leave about an inch of space around the edges, and cut your fillings into thin, even strips. This ensures a balanced bite every time.

Once you’ve rolled your sushi, wrapping it in cling wrap can make a big difference. It helps tighten the roll and makes slicing much easier. This simple step keeps everything intact and gives you neat, professional-looking pieces.

Use Quality Ingredients

The quality of your ingredients can make or break your rolls. Start with premium sushi rice and season it properly with sushi vinegar. Cook the rice about two hours before assembling your rolls so it has time to cool to room temperature. This step is key for getting the right texture and making the rice easier to handle.

To keep your rice from drying out, cover it with a damp tea towel while you work. As for nori, choose fresh sheets that are crisp and have a deep green color. If the nori feels soft or chewy, it might be too old and could complicate the rolling process.

For the fillings, freshness is non-negotiable. Opt for the best fish and vegetables you can find. If you’re using raw fish, make sure it’s sushi-grade and purchased from a trusted source. High-quality ingredients not only improve the flavor but also ensure food safety.

Practice Rolling Technique

Even with great ingredients, your rolling technique is what brings it all together. Consistent pressure and proper hand placement are key to creating tight, uniform rolls. One of the biggest hurdles for beginners is dealing with sticky rice, but there’s an easy fix.

"Sushi rice sticks to everything including your hands. This can make the rolling process difficult. However, if you keep a small bowl of water nearby and continually moisten your hands, you’ll find the rice doesn’t stick to you." – Shogun Japanese Steakhouse

Keep a bowl of water or a vinegar-water mix nearby to keep your hands and tools from sticking. Apply steady, firm pressure as you roll, and when it’s time to slice, use a sharp knife dipped in water. A smooth, continuous sawing motion works best. Don’t forget to clean the knife frequently to prevent rice buildup, which can tear the nori and lead to uneven pieces.

Conclusion

Making inside-out rolls at home becomes much easier when you follow a well-organized plan. Preparation is everything – having your sushi rice perfectly seasoned and cooled, fresh nori sheets ready to go, and all your fillings prepped ahead of time sets you up for success. Pair that with the right tools, like a plastic-wrapped bamboo mat and a sharp knife, and you’re already on track to create sushi that rivals your favorite restaurant.

The secret to great sushi lies in the ingredients. Fresh nori, expertly seasoned sushi rice, and high-quality fillings make all the difference. Since sushi rice is the foundation of every roll, spending time to perfect your rice-making skills will reward you with better-tasting results every time.

Rolling sushi takes practice, and with each attempt, your technique will improve. Even seasoned sushi chefs have spent years honing their craft, so don’t be discouraged if your first rolls aren’t perfect. Trying out different fillings and toppings not only keeps things exciting but also helps you find your favorite combinations while boosting your confidence in the process.

The key to mastering sushi is consistent practice and a willingness to experiment. For even more guidance, explore the step-by-step tutorials and resources available on Make My Sushi. From basic techniques to advanced rolling methods, their guides cover everything you need, including tips on sourcing sushi-grade fish and choosing the best tools for your kitchen. By reviewing your process after each attempt, you’ll progress faster and enjoy the journey of perfecting your homemade sushi. Whether you’re refining your inside-out rolls or branching out into new styles, these resources will inspire and support your sushi-making adventures.

FAQs

What are the most common mistakes to avoid when making inside-out sushi rolls at home?

When making inside-out rolls (Uramaki) at home, a few common missteps can lead to rolls that don’t quite hit the mark. One frequent issue is overfilling the roll. Adding too much filling makes it tricky to roll tightly and often results in the roll falling apart. The fix? Keep the filling modest and spread it evenly across the nori.

Another challenge comes from improperly handling the nori (seaweed). If it’s too dry, it can crack or fail to stick to the rice. A simple solution is to lightly moisten the edges with water, which helps seal the roll securely. Also, don’t overlook the importance of rinsing your rice thoroughly before cooking. This step removes excess starch, ensuring the rice has the right texture for rolling.

Finally, technique matters. When rolling, apply gentle yet firm pressure – enough to keep everything compact without squashing the ingredients. By focusing on these details and practicing a bit, you’ll soon be crafting inside-out rolls like a pro!

How do I prepare sushi rice with the perfect texture and flavor for inside-out rolls?

To make sushi rice with the perfect texture and flavor for inside-out rolls, start by rinsing the rice under cold water. Keep rinsing until the water runs clear – this step removes extra starch so the rice doesn’t turn overly sticky. For cooking, use the standard ratio of 1 cup of rice to 1 1/4 cups of water to achieve a soft, slightly sticky consistency.

After the rice is cooked, season it while still warm. Mix rice vinegar, sugar, and salt, then gently fold this seasoning into the rice. Be careful not to mash the grains as you mix; the goal is to coat the rice evenly. Allow the rice to cool to room temperature before using it. Properly prepared sushi rice should hold together easily without being mushy, making it just right for rolling inside-out sushi.

What are some creative fillings and toppings I can use for inside-out rolls at home?

If you’re ready to experiment with your inside-out rolls, there are so many tasty filling and topping ideas to explore! Classic fillings include avocado, cucumber, cream cheese, smoked salmon, shrimp, and thin slices of raw fish like salmon or tuna. Want to mix it up? Try adding mango for a touch of sweetness or a drizzle of spicy mayo or sriracha for a kick of heat.

To take your rolls to the next level, consider toppings like sesame seeds, fish roe (such as tobiko or ikura), jalapeño slices, radish, cilantro, or a sprinkle of furikake for extra flavor and crunch. Play around with different combinations to discover your new go-to roll!

Related posts

How to Tell if Sushi Fish Is Fresh

How to Tell if Sushi Fish Is Fresh

Here’s how to quickly determine if sushi fish is fresh enough to eat:

  • Smell: Fresh fish smells like the ocean – clean and mild. Avoid fish with strong, sour, or ammonia-like odors.
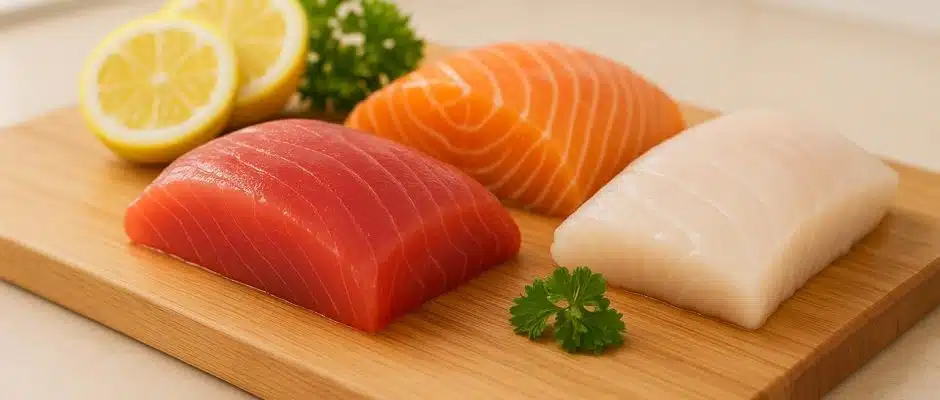
  • Appearance: Look for vibrant colors and a glossy surface. Tuna should be deep red, and white fish should appear translucent. Avoid dull, cloudy, or discolored fish.
  • Texture: Fresh fish feels firm, smooth, and slightly bouncy. If it’s slimy, sticky, or mushy, it’s not fresh.

To ensure safety, store fish below 40°F, freeze it to FDA-recommended temperatures to kill parasites, and use clean tools during preparation. Always buy from reputable suppliers and inspect fish before use.

Freshness is key to great sushi – use your senses and proper handling to enjoy it safely at home.

How to Pick Fish | Sushi Lessons

How to Use Your Senses to Check Fish Quality

When it comes to choosing sushi-grade fish, your senses are your most trustworthy guide. Fresh fish reveals its quality through its smell, appearance, and texture. By honing these sensory skills, you can confidently identify fish that’s fresh enough for sushi.

The Smell Test

Fresh sushi fish should remind you of the ocean – a clean and mild sea scent, like the refreshing breeze of salty air by the shore. This subtle aroma often has an appetizing quality. On the other hand, if the fish has a strong, sour, or unpleasant odor, it’s a clear sign that it’s no longer fresh.

"Fresh sushi should have a mild, fresh sea air odor that will make your mouth water. If you notice a strong, unpleasant, or sour smell, it’s a clear indication that the sushi is no longer fresh and it’s time to say goodbye."

Stay away from fish that smells metallic, sour, or even like ammonia – these are red flags. A good sushi restaurant will never have a heavy fishy smell lingering in the air. Also, if your sushi is served very cold, let it sit for a minute or two at room temperature. If an unpleasant odor develops as it warms up, it’s best to avoid eating it.

Visual Inspection

Your eyes can tell you a lot about the quality of fish. Sushi-grade fish generally has vibrant colors and a glossy, almost reflective surface. As Paul Johnson, owner of Monterey Fish Market, explains:

"Looking for a fresh fish is akin to looking for a fresh tomato: vibrant colors, firm and bouncy texture, and a lovely reflection are the indicators of freshness – just like with fish."

  • Paul Johnson, Owner, Monterey Fish Market

For tuna, look for a deep, clear red color. If the red appears muddy or dull, it’s likely past its prime. White fish should have a translucent, almost glowing quality, not a cloudy or dull appearance. If you’re examining a whole fish, check the gills – they should be bright red. Over time, gills darken, and the fish’s eyes may become cloudy or sunken, which are signs of aging.

Texture Assessment

Touch is another reliable way to judge freshness. Fresh sushi fish should feel smooth and slightly firm, with no slimy or overly soft spots. When you press it lightly, the flesh should spring back quickly, leaving no lasting indentation. This elasticity comes from the high water content in fresh fish cells. As fish ages and dries out, the flesh becomes softer and loses its bounce. Avoid fish that feels sticky, slimy, or breaks apart easily – these are clear indicators that it’s no longer at its best.

How Proper Storage Maintains Fish Quality

Once you’ve selected fresh sushi-grade fish, how you store it plays a huge role in preserving its flavor and ensuring it’s safe to eat. Proper storage not only keeps your fish tasting fresh but also helps avoid potential health risks.

Temperature Control

When it comes to seafood storage, the number one rule is simple: keep it cold. Fish should be stored below 40°F (4°C) to maintain its quality. For specific types, tuna and salmon thrive between 32°F and 38°F (0°C–3°C), while shellfish prefer slightly cooler conditions, around 32°F–35°F (0°C–2°C). More delicate options, like mackerel and sardines, demand ultra-low temperatures – below –76°F (–60°C) for short periods – to retain their quality.

Always transport fish on ice and refrigerate or freeze it as soon as possible. When it’s time to thaw, do so in the refrigerator to prevent the fish from entering the “temperature danger zone,” which is anything above 40°F (4°C).

Failing to store fish properly can lead to bacterial contamination, including harmful strains like Salmonella, E. coli, and Listeria. It also heightens the risk of histamine poisoning. For instance, a 2012 Salmonella outbreak linked to sushi sickened 425 people across 28 states and Washington, D.C.. Even under proper refrigeration, sushi-grade fish doesn’t last long – it’s best consumed within two days. The FDA also warns against leaving leftovers at room temperature for more than two hours. Keeping fish consistently cold is crucial for reducing parasite risks as well.

Freezing for Parasite Safety

Freezing isn’t just about preserving fish – it’s also a key safety measure for raw consumption. The FDA has strict guidelines to eliminate parasites from sushi-grade fish. Fish intended for raw dishes must be frozen using one of the following methods:

Freezing MethodTemperatureDuration
Standard freezing–4°F (–20°C) or below7 days total
Flash freezing method 1–31°F (–35°C) until solidMaintain at –31°F (–35°C) for 15 hours
Flash freezing method 2–31°F (–35°C) until solidMaintain at –4°F (–20°C) for 24 hours

Most home freezers only reach 0°F (–18°C), which isn’t cold enough to meet FDA parasite elimination standards. Because of this, many people prefer fish like tuna or farmed salmon, which are generally considered lower-risk for parasites.

To keep things safe during preparation, always ensure your fish stays cold, and use clean tools and surfaces to avoid contamination.

sbb-itb-7b591fe

How to Source High-Quality Sushi-Grade Fish

Once you’ve nailed proper storage and safety measures, the next step is finding fish that meets high standards for sushi preparation. Keep in mind that the term "sushi-grade" is largely a marketing phrase, so it’s essential to dig deeper when assessing quality.

"It’s a marketing term that has little significance [with respect] to actually being able to consume raw fish." – Davis Herron, director of the retail and restaurant division at The Lobster Place

In other words, it’s on you to confirm the quality of the fish, regardless of how it’s labeled. Coupled with safe storage, sourcing high-quality fish is key to creating exceptional sushi.

Choosing Reputable Suppliers

Start by asking local sushi restaurants about their fish suppliers. These businesses depend on high-quality fish and often work with suppliers who understand the unique demands of raw fish preparation.

If possible, visit the supplier in person. Look for clean facilities, proper ice storage, and clear separation of fish types. The staff should be well-informed about their products and able to answer questions about sourcing and handling. Key questions to ask include:

  • How do they define "sushi-grade fish"?
  • How long has the fish been in their shop?

Make sure the supplier complies with local safety regulations and follows proper freezing practices. You can also check reviews or talk to other customers who buy fish for raw consumption to gauge the supplier’s reliability.

Wild-Caught vs. Farmed Fish

Your choice between wild-caught and farmed fish can influence both the flavor and safety of your sushi. Wild-caught fish, known for richer flavors and firmer textures, are often preferred by sushi enthusiasts. However, some wild fish – like salmon – carry a higher risk of parasites.

Farmed salmon, on the other hand, are raised in controlled environments with parasite-free feed, reducing this risk significantly. They can be a safer choice for home sushi-making. Nutritionally, wild fish typically have less saturated fat, but farmed fish raised on high-quality, marine-based feed may offer higher levels of omega-3 fatty acids. For example, a 2018 study found that farmed salmon fed premium diets had significantly more EPA and DHA compared to their wild counterparts.

Cost and availability often come into play as well. Wild-caught fish are generally pricier due to the labor-intensive methods used to catch them, but many sushi lovers believe the enhanced flavor and texture are worth the extra cost. Farmed fish, by contrast, tend to be more affordable and consistently available, with the added benefit of lower parasite risks.

Regardless of your choice, always ask your supplier about the fish’s origin and handling. For wild-caught fish, inquire about where and how it was caught. For farmed fish, ask about feed quality and farming conditions to ensure both safety and nutritional value. Once you’ve secured quality fish, proper handling techniques will help you craft sushi that stands out.

For more tips and in-depth guides on sourcing sushi-grade fish, check out Make My Sushi.

Best Practices for Making Sushi at Home

Even the freshest sushi-grade fish can pose health risks if mishandled. By following key safety practices, you can enjoy restaurant-quality sushi in the comfort of your home while minimizing any potential hazards.

Proper Handling and Storage

Maintaining the right temperature is crucial to prevent bacterial growth. Always keep your fish below 42°F throughout the entire preparation process. Work with small portions at a time, keeping the rest refrigerated until needed.

When transporting fish, use ice to keep it cold, and refrigerate or freeze it as soon as you arrive home. If you need to thaw frozen fish, do so safely by leaving it in the refrigerator overnight or by submerging the sealed package in cool water, changing the water every 30 minutes. Avoid thawing fish at room temperature, as this increases the risk of contamination.

Cleanliness is equally important. Sanitize your work surfaces and tools with a bleach solution (1 tablespoon bleach per gallon of water) both before and after handling raw fish. These steps ensure a safe environment for preparing sushi.

Inspect Fish Before Use

Before you start preparing sushi, take a moment to inspect the fish. Your senses are your best tools for judging freshness. Fresh fish should have a clean, ocean-like smell – anything overly fishy or unpleasant is a red flag.

Pay attention to the color and texture as well. Look for bright, vibrant colors like rich red for tuna or deep orange for salmon. Dull or discolored fish may indicate spoilage. The texture should feel smooth and slightly firm, not slimy or mushy. These checks can help you catch potential quality issues that might not be obvious at first glance.

Paul Johnson, owner of Monterey Fish Market, highlights the importance of building a rapport with your fish supplier:

"Trust your fishmonger, just like you trust the sushi chef at a sushi restaurant. When you buy fish, you should do the same. Develop a relationship with a fishmonger at a small market and ask many questions about what’s good. When you find something good, tell them the next time you visit."

Once you’ve completed your inspection, follow strict food safety steps to ensure a safe preparation process.

Follow Food Safety Guidelines

Freezing raw fish is a key step to eliminate parasites. Freeze your fish at -4°F for 7 days or -31°F for 15 hours before consumption. However, some tuna species – like Albacore, Yellowfin ahi, Blackfin, Bluefin, Bigeye, and Bluefin northern – are exceptions and don’t require freezing before being eaten raw.

Dr. Judy Sakanari, a parasitologist at the University of California, San Francisco, reminds home cooks of their responsibility:

"It depends on how much you love the dish. There are always risks to eating anything raw and improperly prepared or washed, so it is incumbent upon consumers to be aware of the risks and how to prevent the infections."

Good hygiene is non-negotiable. Wash your hands thoroughly before and after handling raw fish. If you’re feeling unwell, skip making sushi altogether. Always keep raw fish separate from ready-to-eat foods to avoid cross-contamination. If you’re using a bamboo rolling mat, line it with food-grade plastic wrap, and replace the wrap every two hours or after it has come into contact with raw fish.

Prepared sushi should be refrigerated immediately and never left at room temperature for more than two hours. If the weather is warm, this window shortens, so plan accordingly.

Lastly, certain groups – like pregnant women, young children, the elderly, and individuals with weakened immune systems – should avoid homemade sushi with raw fish. Instead, consider making cooked sushi, which offers a safer option without compromising on flavor.

For step-by-step guides and additional tips, check out Make My Sushi to refine your sushi-making skills while prioritizing safety.

Conclusion: Quality Fish as the Foundation of Great Sushi

The secret to exceptional sushi lies in using fresh, high-quality fish. Not only does it enhance the taste with its clean, ocean-like flavor and tender texture, but it also provides essential nutrients like omega-3 fatty acids, vitamins, and minerals. Plus, paying close attention to quality helps reduce the risk of foodborne illnesses.

But freshness isn’t just about how recently the fish was caught. Proper storage and careful handling throughout the supply chain play a huge role in maintaining its quality. This dedication to excellence ties together every aspect of sushi-making.

Every detail matters – from choosing the right fish to ensuring it’s stored correctly. By focusing on quality at every step, you can create sushi that’s not only authentic but also incredibly satisfying. Using the best ingredients and mastering your technique can transform your kitchen into a space for crafting restaurant-worthy sushi.

Prioritizing top-notch ingredients isn’t just about taste – it’s about creating a sushi experience that’s both enjoyable and safe.

FAQs

How can I tell if sushi fish is unsafe to eat, even if it looks fresh?

Even if sushi-grade fish looks fresh, there are several warning signs to watch out for that could indicate it’s unsafe to eat. Start with the smell – a strong, sour, or off-putting odor is often a red flag for spoilage. Next, check the texture – if the fish feels slimy, sticky, or unusually soft, it may point to bacterial growth. Take a good look at the color – fresh sushi fish should have bright, natural tones. Steer clear of fish with dull, faded, or discolored patches.

Fresh fish should also feel firm and bounce back when you press it lightly. However, even when these signs aren’t obvious, improper storage or handling can allow harmful bacteria or parasites to thrive. Always focus on high-quality fish and safe food preparation to make sure your sushi is both delicious and safe to eat.

How can I make sure the fish I buy is safe and fresh for sushi?

To make sure your fish is safe for sushi, always opt for sushi-grade fish from reliable suppliers. This type of fish is specially handled and frozen according to FDA standards, which involve freezing at -4°F for at least 7 days or at -31°F until solid, followed by storage at -4°F for 24 hours. These steps are crucial for eliminating harmful parasites.

Pay attention to freshness indicators: look for fish with a bright, vibrant color, a firm texture that springs back when touched, and a clean, ocean-like scent. Steer clear of fish that appears dull, has mushy flesh, or carries a strong, fishy smell.

If you’re unsure, don’t hesitate to ask your supplier about the fish’s handling and freezing process to confirm it’s safe for raw consumption.

How should I store sushi fish to keep it fresh and safe to eat?

To keep sushi-grade fish fresh and safe, proper storage is essential. Start by refrigerating it immediately at a temperature between 32°F and 38°F to maintain its quality. If you’re not planning to use the fish within a day, freeze it at -4°F or lower for at least 7 days. This helps eliminate parasites while preserving the fish.

When storing, wrap the fish securely in plastic wrap or aluminum foil to reduce air exposure and prevent it from drying out. For raw fish, aim to consume it within 1–2 days of refrigeration. Also, be mindful to keep sushi fish out of the temperature danger zone (40°F to 140°F), where bacteria can quickly multiply. By following these guidelines, you’ll keep your sushi fish fresh, safe, and ready to enjoy.

Related posts

Ultimate Guide to Seasonal Sushi Ingredients

Ultimate Guide to Seasonal Sushi Ingredients

Want to make better sushi at home? Start by using seasonal ingredients. Here’s why it matters:

  • Better Taste: Seasonal fish and produce are fresher and more flavorful.
  • Cost Savings: In-season ingredients are often cheaper and more abundant.
  • Sustainability: Choosing local, in-season options supports responsible farming and fishing.
  • Variety: Each season brings unique ingredients – spring herbs, summer cucumbers, fall salmon, and winter yellowtail.

Key Tip: Ask your fishmonger or local farmers what’s in season. For example, Pacific salmon is best in fall, while sea urchin peaks in summer. Use this knowledge to plan your sushi menu.

Ready to dive in? Keep reading for seasonal ingredient breakdowns, sourcing tips, and recipe ideas to elevate your sushi game.

How to Make 12 Types of Sushi with 11 Different Fish | Handcrafted | Bon Appétit

Bon Appétit

Understanding Seasonality in Sushi

Seasonality shapes the peak quality of ingredients. Both seafood and agricultural products follow natural cycles, and knowing these patterns can elevate your sushi-making at home.

How Marine and Agricultural Seasons Work

Water temperature plays a key role in the quality of seafood used for sushi. As ocean temperatures shift throughout the year, fish adapt their fat content and feeding habits. Cold-water fish, for instance, develop higher fat levels to stay warm, resulting in richer flavors and that sought-after buttery texture.

Take Pacific salmon as an example. In the fall, they accumulate fat reserves in preparation for spawning, enhancing their flavor and making them ideal for sushi. Similar changes occur in other sushi staples, as their fat content and muscle structure adjust with water temperature and feeding cycles.

On the agricultural side, produce follows a predictable seasonal rhythm that’s just as important for sushi. Spring delivers tender greens and fresh herbs; summer offers crisp cucumbers and shiso leaves; autumn brings heartier vegetables; and winter provides earthy root crops. By understanding these seasonal shifts, you can select the best fish and produce to complement your sushi.

These natural patterns don’t just impact ingredient quality – they directly influence the flavor, texture, and overall experience of your sushi, while also supporting sustainable practices.

Why Seasonal Ingredients Matter

The difference between using seasonal and out-of-season ingredients in sushi is dramatic. Peak-season seafood and produce offer a level of freshness that simply can’t be replicated when ingredients are forced out of their natural cycles.

"Some restaurants are adapting to what’s available during the season locally. You can apply that a little bit more to seafood also. Ask the question to the chef, to the fishmonger, and they’ll tell you what’s local in season."

Seasonal choices go beyond taste. They support sustainability by promoting responsible harvesting and reducing strain on seafood populations.

There’s also an economic upside. When ingredients are abundant, they’re typically more affordable, freeing up your budget to splurge on high-quality sushi-grade fish or other premium items. By aligning your sushi-making with what’s in season, you can also support local producers. Many U.S. coastal areas offer a wide variety of seasonal seafood, strengthening domestic production while delivering fresh, flavorful options.

"It doesn’t matter if it’s a vegetable or fish, you kill something when you harvest something. That means that you don’t waste things. Say thank you for it dying for us to eat, respect it, use it, and eat it."

This philosophy of respecting seasonal cycles ensures that ingredients are used thoughtfully, minimizing waste and maximizing flavor. Building your sushi around seasonal availability ensures every bite is fresh, purposeful, and deeply satisfying.

Seasonal Ingredient Breakdown by Season

Understanding which ingredients are at their peak each season can take your home sushi game to the next level. Every season offers its own unique flavors and textures, influenced by natural cycles in both the ocean and on land.

Spring Ingredients

Spring is all about renewal, and that’s reflected in the fresh, vibrant ingredients it brings. Shad is a standout seafood during this time, offering a delicate flavor that pairs beautifully with spring vegetables. Bonito, which begins its peak season in spring and lasts through fall, develops rich, meaty flavors perfect for nigiri. Calamari also shines from winter through spring, boasting a tender texture and subtle oceanic taste.

On the vegetable side, snow peas (saya endou) add a satisfying crunch and a pop of green to your sushi. Turnips (kabu) bring a mild, refreshing flavor, ideal for pickling or slicing thin as a garnish. Meanwhile, eggplant (nasu) offers versatility and can be used in a variety of creative sushi dishes.

For a sweet touch, strawberries (ichigo) are a springtime treat. They can be incorporated into sushi for a surprising twist or enjoyed as a light, fruity palate cleanser.

Summer Ingredients

Summer builds on spring’s freshness with ingredients that are bold and full of character. This is the prime season for bluefin tuna, with its luxurious toro (fatty belly) offering a melt-in-your-mouth experience. Horse mackerel peaks throughout summer, bringing rich oils and a distinctive flavor. Octopus thrives in these warmer months, delivering a firm texture and clean taste that’s perfect for traditional sushi preparations. Additionally, sea urchin reaches its creamy, briny best from June to August, while conger eel stands out during the rainy season with its rich, satisfying flavor.

Summer vegetables like cucumbers (kyuri) and edamame bring crisp, refreshing elements to rolls and side dishes. Seasonal fruits also shine during this time – watermelon (suika) offers a refreshing contrast to savory flavors, while peaches (momo), cherries (sakuranbo), citrus fruits like yuzu and mikan, and grapes add bright, sweet notes to your sushi creations.

Autumn Ingredients

Autumn is a season of richness, with many ingredients reaching their peak flavor and fat content. Salmon is at its best in the fall, offering a deep, oily flavor that works beautifully in sashimi and nigiri. Mackerel also hits its stride, delivering robust taste and high fat content into the winter months. Gizzard shad has a short but spectacular peak from September to October, providing a unique flavor profile. Toward the end of fall, sweet shrimp and salmon roe come into season, bringing delicate sweetness and bursts of oceanic flavor, respectively.

Autumn vegetables add hearty, comforting elements to sushi. Sweet potatoes (satsumaimo) bring natural sweetness and a creamy texture, while matsutake mushrooms add earthy, aromatic depth. Kabocha (Japanese pumpkin) offers nutty flavors and a vibrant orange hue. Seasonal fruits like chestnuts (kuri), figs (ichijiku), and pears (nashi) provide warm, nuanced flavors that can be used as garnishes or in creative sushi combinations.

Winter Ingredients

Winter’s colder temperatures bring out the richness in many sushi staples. Yellowtail (hamachi) is at its peak, offering a buttery texture and rich flavor. Tuna also shines in winter, with cold waters enhancing its fat content and flavor. Sea bream remains in its prime from late fall through winter, delivering a clean, sweet taste. Other highlights include fluke, prized for its delicate texture, and scallops and arc shell, both of which offer sweet, briny notes during the colder months.

Winter vegetables bring balance and warmth. Daikon radish adds a sharp, clean flavor that pairs well with richer fish, while cabbage (kyabetsu) provides crunch and mildness. Lotus root (renkon) offers a unique texture and visual appeal. For fruits, apples (ringo) deliver a crisp, sweet bite, and strawberries (ichigo) make a welcome appearance in winter markets, adding brightness to the season’s offerings.

Sourcing Seasonal Sushi Ingredients in the U.S.

Finding fresh, seasonal ingredients for homemade sushi can be simpler than you might think. By tapping into local markets and prioritizing sustainable seafood, you can recreate the quality of restaurant-grade sushi right in your own kitchen.

Local Farmers Markets and Specialty Stores

Farmers markets are treasure troves for fresh, seasonal produce. To locate one near you, check out the USDA National Farmers Market Directory. These markets often feature the freshest fruits and vegetables, harvested at their peak.

When shopping for produce, pay attention to color – brighter hues often indicate ripeness. Avoid items showing signs of wilting or wrinkling, as they may be past their prime. For fruits, a gentle press should reveal a slight give, while tomatoes should remain firm.

"The more pigmented the product, the riper it is."

Don’t hesitate to chat with vendors. Many are eager to share details about their produce, including harvest dates and tips for storage or preparation. If tasting is allowed, take advantage – especially with items like stone fruits, tomatoes, and melons. For melons, a creamy yellow field spot and a sweet aroma are signs of ripeness.

Building relationships with local growers can elevate your shopping experience. Regular customers often get early access to the best produce and insider knowledge about upcoming harvests. One vendor summed it up well:

"When you shop local, you contribute to the bottom line of local businesses and help keep your dollars in the community where you live."

While fresh produce is essential, sourcing sustainable seafood is just as important for creating high-quality sushi.

Responsible Seafood Choices

Just like seasonal produce, responsibly sourced seafood is key to both quality and sustainability. With 71% of global consumers now considering sustainability when purchasing seafood, the industry has stepped up with improved sourcing practices and clearer labeling.

Several online retailers specialize in sushi-grade seafood with convenient overnight shipping options:

  • Oceanside Seafood: Norwegian Salmon ($29.95 for two 8-oz portions), Yellowfin Tuna Steaks ($39.95 for four 6-oz steaks)
  • Catalina Offshore Products: Mt. Cook SAIKOU Sashimi Grade Salmon ($48.99), Hamachi (ranging from $75.99 to $224.99)
  • Nordic Catch: Icelandic Salmon ($29.00), Japanese Yellowtail ($54.00)
  • SoPo Seafood: Sea Scallops ($44.99), Fresh Ahi Tuna ($44.99)

When selecting seafood, look for certifications like MSC, ASC, BAP, or Friend of the Sea. The Monterey Bay Aquarium‘s Seafood Watch program also offers helpful guidance, categorizing seafood into Green (Best), Yellow (Good Alternative), and Red (Avoid) categories.

Here’s a quick guide to some popular options:

Fish SpeciesSustainability LevelRecommended Options
SalmonGenerally good options availableWild-caught Alaskan salmon, ASC-certified farmed salmon
TunaVaries by typeAlbacore and skipjack are better choices than bluefin
ShellfishLow environmental impactMussels, clams, and oysters from sustainable sources

The numbers highlight why sustainability matters. Fish stocks have declined from 90% of biologically sustainable levels in 1974 to just 65% in 2017. Considering that over 3.3 billion people depend on seafood as a primary protein source, responsible choices are crucial.

Professional chefs stress the importance of asking questions about seafood origins. Chef Hajime Sato encourages consumers to be proactive:

"I always ask the public to question the chef. Ask the chef, ‘Where’s that come from? How’s it cut? Is it in season?’"
"You’re the one who is paying. You’re the consumer. I love when a customer challenges me."

This advice extends to seafood retailers. Asking questions not only ensures quality but also pushes businesses toward sustainable practices. As Ryan Bigelow, Seafood Watch Senior Program Manager, notes:

"One of the chief reasons that businesses make sustainable changes is that their customers are asking for it. Your voice matters."

If you’re unsure about a product’s sustainability, verify its source. Since 2010, the consumption of sustainable seafood has more than doubled, proving that informed choices can make a difference.

For beginners, try expanding beyond the usual options like shrimp, tuna, and salmon. Regional seafood guides can help tailor your shopping habits. Many online retailers even offer free shipping for larger orders, making it easier to stock up on high-quality, responsibly sourced ingredients.

sbb-itb-7b591fe

Using Seasonal Ingredients in Sushi Recipes

Seasonal sushi shines when ingredients are carefully prepared and thoughtfully balanced. By focusing on the availability of seasonal ingredients, your preparation techniques can bring out the best in each component.

Basic Preparation Methods

The secret to exceptional seasonal sushi lies in how you handle each ingredient. For vegetables, a delicate touch is key – thinly peel and slice them to preserve their natural texture and flavor.

Heartier vegetables like kabocha squash, sweet potato, or asparagus work wonderfully as tempura. The light, crispy coating not only provides a satisfying crunch but also enhances the natural sweetness of these vegetables.

When it comes to seasonal fish, marination is a classic technique to amplify flavor while keeping the fish fresh. A traditional marinade made with soy sauce, sake, and mirin can soften the sharpness of plain soy sauce and let the fish’s natural taste take center stage.

Sushi rice, the backbone of any sushi dish, can also be tailored to complement seasonal ingredients. Regional preferences in Japan offer inspiration – Kanto-style rice features red vinegar, while Kansai-style rice is seasoned with rice vinegar and sugar. Adjust your rice to harmonize with the flavors of the season.

These techniques provide a strong starting point for crafting seasonal sushi recipes that celebrate the best of nature’s offerings.

Seasonal Sushi Recipe Ideas

Spring is a time for renewal, and your sushi can reflect that with fresh, vibrant garnishes like shiso leaves, cherry blossoms, or thin slices of asparagus for a pop of color and subtle flavor.

In summer, focus on cool, refreshing ingredients with bright accents. Myoga ginger, cucumber ribbons, and citrus zest make excellent garnishes. For a fun twist, try hollowed-out cucumbers filled with sushi rice, smoked salmon, avocado, red peppers, and carrots to create a refreshing summer roll.

Autumn calls for richer, earthier tones. Thinly sliced shiitake mushrooms and gingko nuts deliver a deep umami flavor that pairs beautifully with the season’s mood.

Winter sushi can bring warmth and comfort to the table. Ingredients like grated daikon radish, yuzu peel, and winter herbs such as chives or mitsuba brighten up richer dishes, creating a balanced and satisfying experience.

Chef Alexandre Dupont captures the art of sushi flavor balance perfectly:

"Understanding sushi flavors is like learning an intricate dance of taste profiles."

The Rule of Five – sweet, sour, salty, bitter, and umami – serves as a guide for creating well-rounded seasonal sushi. Start with perfectly seasoned sushi rice and a high-quality seasonal protein, then layer in complementary flavors and textures. Adding elements like crispy tempura flakes or crunchy cucumber can elevate your dish by introducing additional dimensions.

Dupont further emphasizes:

"The key to sushi flavor balance is to harmonize these colors, these tastes, without letting one overpower another."

Don’t overlook the finishing touches. Wasabi, pickled ginger, or soy sauce should enhance, not overshadow, your seasonal creations. Even your plating can reflect the season – add cherry blossom petals in spring or maple leaves in autumn to create a visually stunning presentation.

Each season offers endless possibilities to explore. With these techniques and ideas, you can craft sushi masterpieces that celebrate the beauty and bounty of nature. For more recipes and expert tips on seasonal sushi-making, visit Make My Sushi at https://makemysushi.com.

Conclusion: Improving Sushi Through Seasonality

Throughout this guide, we’ve seen how seasonality can elevate every aspect of sushi. Using peak-season ingredients brings out flavors that off-season options just can’t replicate. Think of the difference between a summer tomato, bursting with sweetness and juice, and a bland, watery one from winter – it’s a game-changer.

Choosing seasonal ingredients also benefits your local community and the planet. By sourcing from nearby farmers’ markets, you’re cutting down on transportation emissions and supporting regional farmers. Plus, seasonal produce is often more affordable since it’s abundant and easier to find. This makes it more accessible for home chefs to experiment with top-notch ingredients.

Seasonal sushi-making sparks creativity, too. It’s a chance to try unique flavor combinations and techniques – like using watermelon as a tuna alternative in summer or pairing rich fall salmon with earthy mushrooms.

There’s also a nutritional bonus. As Julianna Lyle from Clemson Cooperative Extension points out:

"When we eat foods picked at harvest, we are consuming them at their optimal nutritional value, as they are picked at the peak of their cultivation season."

For example, broccoli harvested in the fall can have nearly double the vitamin C compared to spring broccoli. Fruits and vegetables that ripen naturally on the plant also pack more nutrients.

Seasonal sushi blends bold flavors, sustainability, and creativity. It’s a way to honor nature’s rhythms while crafting dishes that are as delicious as they are thoughtful. Each season brings fresh opportunities to experiment, support local growers, and tread lightly on the planet.

Ready to dive into seasonal sushi-making? Check out Make My Sushi at https://makemysushi.com for recipes, tips, and expert advice on using the best ingredients every season has to offer.

FAQs

How do I find out which sushi ingredients are in season near me?

How to Find Seasonal Sushi Ingredients Near You

If you’re looking to make sushi with the freshest, most flavorful ingredients, start by exploring local seasonal produce guides or calendars. These handy resources will clue you in on the best times for fruits, vegetables, and seafood in your area. Another excellent option? Check out your local farmers’ markets. They’re a treasure trove of fresh, in-season produce.

For seafood, a quick chat with your local fishmonger can be incredibly helpful. They’ll know what’s fresh, in season, and even what’s sustainably sourced – perfect for your sushi-making needs.

Incorporating seasonal ingredients doesn’t just elevate the taste of your sushi. It also supports local farmers and fisheries, adding an extra layer of satisfaction to your culinary efforts.

How can I find sustainable seafood for making sushi at home?

To make your homemade sushi more environmentally friendly, start by selecting seafood certified by reputable organizations like the Marine Stewardship Council (MSC) or the Aquaculture Stewardship Council (ASC). These labels indicate that the seafood comes from responsible fishing or farming methods.

Whenever you can, choose seasonal and locally sourced seafood. Not only is it likely to be fresher, but it also tends to have a lower environmental footprint. If you’re unsure, ask your local fishmonger or seafood supplier about their sourcing practices – they’re often a great resource for understanding how the seafood was caught or farmed.

With a little effort, you can enjoy sushi that’s not only delicious but also supports healthier oceans and sustainable fishing practices.

Why are seasonal ingredients important for sushi’s nutritional value?

Seasonal ingredients are a game-changer when it comes to the nutritional value of sushi. Produce and fish harvested at their peak are not only fresher but also packed with more vitamins, minerals, and antioxidants than items that are out of season or have been stored for long periods.

Beyond nutrition, seasonal ingredients elevate the taste and texture of sushi, making each bite more satisfying. Think about it – fresh vegetables and fish in season don’t just taste better; they also deliver key nutrients like omega-3 fatty acids, fiber, and vitamin C, all of which contribute to overall well-being. This approach mirrors traditional Japanese culinary values, which prioritize freshness, balance, and harmony in every dish.

Related posts

Ultimate Guide to Chirashi Sushi Bowls

Ultimate Guide to Chirashi Sushi Bowls

Chirashi sushi bowls are a simple and vibrant way to enjoy sushi at home without the need for advanced skills. This dish features seasoned sushi rice topped with a mix of fresh seafood, vegetables, and garnishes. Here’s a quick overview:

  • Key Ingredients: Sushi rice (seasoned with rice vinegar, sugar, and salt), sushi-grade fish (like salmon or tuna), vegetables (e.g., cucumber, avocado), and garnishes (nori, sesame seeds, roe).
  • Styles: Edomae (Tokyo-style) with raw seafood on top, and Gomoku (Osaka-style) with cooked ingredients mixed into the rice.
  • Customization: Adapt the toppings to your taste – raw fish, cooked proteins, or vegetarian options.
  • Tools You’ll Need: Sharp knife, rice paddle, and a mixing bowl.

Why Make Chirashi Sushi? It’s easier than traditional sushi, customizable, and perfect for showcasing fresh, seasonal ingredients. Ready to get started? Let’s dive into the details of creating your own chirashi sushi bowl.

Chirashi Bowl (ちらし寿司 – Chirashi Sushi Recipe)

Key Ingredients for Chirashi Sushi Bowls

Creating an authentic chirashi bowl starts with a few key ingredients. The charm of chirashi lies in its adaptability, but there are certain essentials that form the foundation of every great bowl. Let’s dive into what you need to craft a balanced and flavorful chirashi experience.

Sushi Rice: The Heart of the Bowl

The base of any chirashi bowl is perfectly seasoned sushi rice. Short-grain Japanese rice is ideal because of its sticky texture and ability to soak up the seasoning. Begin by rinsing the rice thoroughly until the water runs clear, then cook it using a 1:1.2 ratio of rice to water for the best consistency.

Seasoning the rice, or making shari, involves a simple blend of rice vinegar, sugar, and salt. A common recipe calls for 3 tablespoons of rice vinegar, 2 tablespoons of sugar, and 1 teaspoon of salt for every 2 cups of cooked rice. Gently heat the mixture until the sugar dissolves completely.

Once the rice is cooked, transfer it to a large wooden bowl and fold in the seasoning with care to keep the grains intact. Fanning the rice as you mix helps it cool quickly and gives it a glossy finish. Let the rice reach room temperature before adding toppings. With this flavorful base ready, you can move on to choosing the star proteins.

"Chirashi sushi does not have to have raw fish on it. Sushi refers to the rice itself, and not the raw fish on top." – Irvin Lin, Cookbook Author and Food Blogger

Picking Sushi-Grade Fish and Proteins

After preparing the rice, selecting high-quality fish is the next step. But what exactly does "sushi-grade" mean? While the term is widely used, it’s not regulated by the FDA, making it more of a marketing label. As Davis Herron, director of the retail and restaurant division at The Lobster Place fish market, explains:

"It’s a marketing term that has little significance [with respect] to actually being able to consume raw fish."

To ensure safety, buy from a trusted fishmonger and ask specifically for fish suitable for sushi. Confirm how they define "sushi-grade" and whether their fish meets FDA guidelines for parasite elimination through freezing.

Fresh fish should have a clean, ocean-like scent, clear and slightly bulging eyes, bright red gills, and firm flesh that bounces back when pressed. Popular choices include salmon, tuna, yellowtail, and shrimp. Farmed salmon is often considered a safer option because its feed is free from parasites. Keep in mind that most fish intended for raw consumption must be frozen at specific temperatures to kill parasites, though some tuna species are exempt. Always transport your seafood on ice and refrigerate it promptly.

Vegetables, Garnishes, and Other Toppings

The beauty of chirashi is in its versatility, and the toppings are where you can get creative. Traditional ingredients like tamagoyaki (sweet egg omelet), cucumber, and avocado are staples, but modern variations often include carrots, snow peas, or microgreens for added texture and color.

Irvin Lin highlights the wide range of topping options:

"An assortment of toppings, from cooked or raw shellfish, fish, and vegetables to eggs and roe can go on a chirashi bowl. Garnishes are often called for, like black sesame seeds, shredded nori, or microgreens."

To enhance your fish, try marinating it briefly in soy sauce and mirin – about 15 minutes is enough to add depth without overpowering the flavor. For shrimp and lotus root, a sweet vinegar mixture made with equal parts rice vinegar and sugar, plus a pinch of salt, works wonders. Ikura (salmon roe) and tobiko (flying fish roe) add bursts of flavor, while shredded nori and sesame seeds offer classic finishing touches. To keep avocado fresh and vibrant, toss it with a few drops of lemon juice.

For example, in March 2025, Simply Recipes featured a Kanto-style chirashi bowl with sashimi-grade salmon, tuna, and hamachi, along with steamed shrimp, snow peas, tamagoyaki, English cucumber, microgreens, and shiso leaves, all topped with shredded nori. This combination showcases how diverse ingredients can come together beautifully.

The key to a standout chirashi bowl is balancing flavors, textures, and colors. For more advice on sourcing ingredients and perfecting your sushi-making skills, check out Make My Sushi (https://makemysushi.com).

Step-by-Step Assembly of a Chirashi Sushi Bowl

Once your seasoned sushi rice and fresh toppings are ready, it’s time to assemble your chirashi bowl. This step is where individual elements come together to create a harmonious and visually stunning dish. The secret lies in thoughtful layering and precise preparation.

Layering: The Foundation of a Chirashi Bowl

Every great chirashi bowl begins with a solid base of seasoned sushi rice. The rice forms the foundation, so it’s important to layer your toppings generously without overpowering it.

Start by filling each bowl about two-thirds full with room-temperature sushi rice. Pack the rice lightly – just enough to hold its shape without compressing it. This creates a perfect canvas for your toppings.

Different regions in Japan have their own unique approach to layering. In Kanto-style chirashi, toppings are neatly arranged on top of the rice, with each ingredient showcased in its own section. This method highlights the beauty of each component. Kansai-style chirashi, on the other hand, mixes the toppings throughout the rice, ensuring every bite is a blend of flavors.

For a Kanto-style presentation, a great starting point is a layer of kinshi tamago (thinly shredded omelet) to add a pop of color and a subtle sweetness. From there, arrange other toppings like aburaage, shrimp, carrot, and snow peas. As demonstrated in the MasterClass recipe from May 2025, layering in this order creates a visually appealing and well-balanced dish.

Color coordination is key to making your chirashi bowl stand out. As one source notes:

"A good balance of red, yellow, and green will make the dish look exceptional."

Plan your toppings around these colors:

  • Red: Prawns, tuna, salmon, ikura, or carrot
  • Yellow: Kinshi tamago, tamagoyaki, or takuan pickles
  • Green: Snow peas, cucumber, ooba leaves, or edamame

The vibrant colors not only enhance the dish’s appearance but are also thought to bring good fortune.

Arrange proteins and vegetables in distinct sections to create contrast. For example, delicate ingredients like ikura can be placed on shiso leaves for added flair. Finish your bowl with garnishes like shredded nori or sesame seeds to add texture and tie everything together visually.

If any of your toppings are unseasoned, consider adding a light dressing. A simple mix of mirin, soy sauce, rice vinegar, vegetable oil, and a splash of green tea or water works beautifully.

Once your toppings are layered, the next step is to focus on precise slicing techniques to elevate the presentation.

Knife Techniques for Slicing Fish and Toppings

The way you slice your ingredients can make or break the look and texture of your chirashi bowl. Clean, consistent cuts are essential for a polished, professional appearance.

Using a sharp knife is non-negotiable. Dull knives can tear the fish, ruining its texture and presentation. Regularly sharpen your knife with a whetstone or take it to a professional.

Keep your fish well-chilled before cutting. Cold fish is easier to handle and holds its shape better for slicing. When cutting, hold your knife at a 45-degree angle and pull it smoothly toward you in a single motion. This technique ensures clean, uniform slices. As explained by Just One Cookbook:

"Hold the knife at a 45-degree angle to the cutting surface and pull the knife toward you in one motion. This allows for a smoother cut and gives the slices an attractive shape."

For added control, stabilize the knife by placing your index finger along the spine. Always cut against the grain when possible to achieve a more tender texture. After each slice, wipe your knife with a damp cloth to keep it clean.

When preparing vegetables like cucumber or carrot, consider using decorative molds or cookie cutters to create fun shapes. Flower-shaped carrot slices or thin lemon rounds can add pops of color and charm to your bowl. The same approach applies to slicing tamagoyaki – use smooth, single motions to create even rectangular pieces that highlight the egg’s layered texture. Consistency in thickness across all your ingredients ensures a cohesive and professional look.

sbb-itb-7b591fe

Tips for Sourcing Ingredients and Tools

Once you’ve mastered the basics of sushi rice and chosen your toppings, the next step in crafting authentic chirashi sushi at home is sourcing the right ingredients and tools. Knowing where to shop and what to ask for can make the whole process much smoother.

Finding Sushi-Grade Fish and Asian Groceries

In the U.S., the term "sushi-grade" isn’t officially regulated, but it generally means the seller considers the fish safe for raw consumption. The key is to ensure the fish is fresh and properly handled.

Asian grocery stores are a great place to start. For example, H Mart has locations across the U.S. and offers both in-store shopping and online delivery. 99 Ranch Market is another popular chain, known for its fresh produce, authentic Asian ingredients, and specialty items. If you’re looking for Japanese-specific products, Mitsuwa Marketplace is a top choice, offering everything from high-quality nori to Japanese rice and pickled vegetables. These stores make it easy to find the essential ingredients for a delicious chirashi bowl.

If you’re in the Dallas area, check out Kazy’s Gourmet Shop, a family-run Japanese grocery store that’s been around since 1982. They specialize in fresh fish, frozen seafood, and sushi-making supplies.

When buying fish, don’t hesitate to ask the seafood department if they carry sushi-grade or sashimi-grade options. Many mainstream grocery stores now have international aisles stocked with sushi rice, rice vinegar, and nori sheets. For added convenience, online shopping is an excellent alternative. If you’re ordering fish online, try to choose suppliers close to your location to maintain freshness.

Essential Tools for Making Chirashi Sushi

You don’t need a ton of equipment to make chirashi sushi at home – just a few essential tools to get started. Over time, you can expand your collection as you refine your skills.

Key tools include a sharp knife for slicing fish and vegetables, a rice paddle for mixing seasoned rice, and a large bowl for assembling your dish. The rice paddle is particularly helpful because it allows you to blend the rice and seasoning gently without crushing the grains.

For cooling and seasoning sushi rice evenly, a hangiri (a traditional wooden rice tub) is a great addition. If you’re looking to invest in quality tools, the Make My Sushi online store offers a curated selection of essentials tailored for chirashi sushi preparation.

Sushi knives range in price from about $40 to $61, while beginner sets can cost between $14 and $43. Basic tools start as low as $2, with premium options reaching up to $270. This range means you can start small and upgrade as you gain experience.

For beginners, sushi kitchen sets that bundle essentials like a rice paddle and basic knife are a smart choice. You can also add optional tools like sushi mats, decorative molds, or specialized storage containers to improve presentation and organization. Even simple items like cookie cutters can be used to create decorative shapes, such as flower-shaped carrot slices, adding a touch of artistry to your chirashi bowls.

If you’re looking for a one-stop shop, Make My Sushi’s online store offers a variety of tools and kits for both beginners and more experienced home chefs. From starter kits to advanced equipment, they provide options for every level of expertise.

Start with the basics: a sharp knife, a good rice paddle, and a sturdy bowl. These tools will take you a long way in crafting beautiful chirashi sushi bowls. As you gain confidence, you can explore additional tools and techniques to elevate your creations.

Variations and Presentation Ideas

Chirashi sushi is incredibly versatile, making it easy to adapt both ingredients and presentation styles. Whether you’re sticking to tradition or experimenting with modern twists, this dish can be tailored to suit a wide range of preferences and occasions. Its appeal lies not only in its flavors but also in its vibrant and artistic presentation.

Fusion and Modern Adaptations

Chirashi sushi’s adaptability invites creative experimentation. Fusion versions combine traditional techniques with unconventional toppings, offering endless customization possibilities. The beauty of chirashi is that there are no strict rules – your sushi bowl can be as classic or inventive as you like.

Dietary-Friendly Variations

Chirashi bowls can easily be adjusted to accommodate dietary restrictions. For example, Light Orange Bean’s "Keto Rainbow Sushi Bowl" swaps traditional sushi rice for cauliflower rice and pairs it with sashimi-grade fish and fresh vegetables, making it perfect for low-carb diets. Vegetarian versions are equally appealing. In May 2025, Nosh With David shared a "Vibrant Vegetarian Chirashi Bowl" recipe featuring quinoa, vegetables, mushrooms, and tofu. Similarly, Cookie and Kate’s "Veggie Sushi Bowls" (April 2023) use brown rice, edamame, avocado, cucumber, and carrot ribbons. For gluten-free options, replace soy sauce with tamari, and for vegan bowls, try marinated tofu, roasted vegetables, or even a wasabi cashew cream sauce.

Creative Protein and Flavor Combinations

Experiment with cooked proteins for a different take on chirashi. A hearty option could be a Salmon Bowl featuring cooked salmon paired with avocado, cucumber, and edamame. Alternatively, draw inspiration from popular sushi rolls – use crab and avocado for a California Bowl or spicy tuna with shredded nori for a spicy tuna bowl. Enhance flavors with seasonings like furikake and finish with colorful ingredients such as avocado slices, grapefruit, or other citrus fruits. Incorporating seasonal seafood and vegetables keeps your chirashi fresh and exciting.

Visual Presentation Tips

Once you’ve customized your chirashi bowl, elevate it further with thoughtful presentation techniques. Known for its festive and colorful appearance, chirashi sushi is a favorite for celebratory meals. A little attention to detail can make your dish even more striking.

Color and Texture Balance

To create a visually stunning bowl, combine a variety of colors and textures. Pair smooth, delicate fish with crunchy vegetables, like bright orange salmon against the deep green of cucumbers, for a striking contrast [11, 22, 34].

Plating and Arrangement Techniques

The choice of dishware makes a big difference. Simple, elegant plates – white or black – provide a clean canvas that highlights your ingredients. Avoid overcrowding the bowl so each component stands out. Try layering or stacking elements, like placing a small mound of pickled ginger or wasabi for added height. For sashimi, slice the fish evenly at an angle to enhance both texture and appearance. Whether you prefer a symmetrical layout or a more organic arrangement, aim for a harmonious presentation.

Finishing Touches

Add a touch of sophistication with garnishes like shiso leaves, edible flowers, or microgreens. Small bowls of soy sauce or other dipping sauces can double as decorative and functional elements, completing the look of your chirashi sushi.

Next, we’ll dive into the final details to perfect your presentation.

Conclusion and Final Tips

Summary of Key Points

Making great chirashi sushi hinges on getting a few basics right. First, the sushi rice is the heart of the dish. Season it while it’s still hot, and cool it quickly to avoid it becoming sticky – this step can make or break the final result.

Next, prioritize quality when sourcing sushi-grade fish. Handle all ingredients with care, and when slicing raw fish, use a sharp knife with smooth, single motions to maintain its delicate texture .

Finally, serve chirashi immediately after assembling it. This keeps the textures fresh and ensures food safety. Balance is everything – both in color and texture. A well-thought-out arrangement of toppings can transform your dish into a visual and culinary masterpiece.

"The key to a beautiful chirashi is controlled randomness – toppings should look naturally scattered but still balanced. Layering ingredients in a way that highlights their colors, textures, and shapes makes for a stunning presentation."

Encouragement to Explore

Once you’ve got the basics down, don’t hesitate to get creative. Chirashi’s flexible nature makes it a perfect canvas for experimentation . You can mix traditional ingredients with unexpected ones, like seasonal vegetables or unique proteins, to develop your own signature style. There’s no single “right” way to enjoy chirashi – it’s a dish that evolves with personal tastes and ingredient availability .

Start with a simple recipe, then tweak it to suit your preferences. For instance, rely on expert recommendations for sushi-grade fish, but don’t shy away from incorporating cooked options like shrimp or eel . Seasonal ingredients can keep your chirashi fresh and exciting year-round. Play around with different vinegars or seasonings for your rice, experiment with proteins beyond seafood (like roasted beef), and sprinkle on toppings such as furikake to add extra flavor .

For more detailed guidance, check out resources like Make My Sushi. They offer step-by-step tutorials and expert advice on sourcing quality ingredients, helping you refine your chirashi-making skills. With practice and a willingness to experiment, you’ll soon be crafting beautiful, flavorful chirashi bowls that reflect your personal flair while honoring the rich tradition of Japanese cuisine.

FAQs

How can I make sure the fish I buy is safe to eat raw in a Chirashi Sushi bowl?

To make sure the fish in your Chirashi Sushi bowl is safe to eat raw, keep these important tips in mind:

  • Buy from reliable sources: Purchase fish labeled as sushi-grade or sashimi-grade from trusted sellers. These labels indicate the fish has been specially processed for raw consumption.
  • Ensure proper freezing: To eliminate parasites, the fish should have been frozen under strict guidelines. In the U.S., this means freezing at -4°F for at least 7 days or at -31°F for a minimum of 15 hours.
  • Check for freshness: High-quality fish will smell clean and ocean-like, have a bright, vibrant color, and feel firm to the touch. Steer clear of fish that looks dull, smells unpleasant, or feels slimy.
  • Store correctly: Keep the fish refrigerated at 32°F or below until you’re ready to use it. Never eat fish that’s past its sell-by date.

If you’re unsure, don’t hesitate to ask your fishmonger about the fish’s quality and whether it’s suitable for raw dishes like Chirashi Sushi. They’re there to help!

How can I customize chirashi sushi bowls to suit dietary preferences like keto or vegetarian?

Chirashi sushi bowls are incredibly flexible, making it easy to tailor them to different dietary needs like keto or vegetarian.

For a keto-friendly twist, swap out the usual sushi rice for cauliflower rice to cut down on carbs. Then, load up on sashimi-grade fish, shrimp, or even tofu. Be mindful of toppings – skip anything high in carbs, like sweet sauces or tempura, to keep it keto-friendly.

If you’re going for a vegetarian version, let fresh, vibrant veggies take center stage. Think crisp carrots, cool cucumbers, sweet bell peppers, and earthy mushrooms. Add some plant-based protein like tofu or edamame, and season the rice with rice vinegar and just a hint of sugar for that classic sushi flavor. Toppings like creamy avocado, tangy pickled vegetables, and savory seaweed will bring the bowl to life with a mix of flavors and textures.

With a few simple tweaks, chirashi sushi bowls can easily cater to a variety of dietary preferences while staying delicious.

How can I make chirashi sushi bowls look more colorful and appetizing?

To create chirashi sushi bowls that are as beautiful as they are tasty, begin with a base of perfectly seasoned sushi rice. Top it with sashimi-grade fish like salmon, tuna, or yellowtail, and pair it with colorful vegetables such as creamy avocado, crisp cucumber, and thinly sliced radish. If you want to elevate the look, try adding edible flowers or a sprinkle of microgreens for a touch of elegance.

For added flavor and texture, sprinkle on sesame seeds, tobiko (fish roe), or finely chopped scallions. Feeling creative? Use small molds or cookie cutters to shape the ingredients into eye-catching forms. The combination of vibrant colors and contrasting textures – like the glossy fish and crunchy veggies – will make your bowl a feast for both the eyes and the palate!

Related posts

8 Easy Sushi Rolls for Beginners

8 Easy Sushi Rolls for Beginners

Making sushi at home is simpler than it seems. Start with these 8 beginner-friendly sushi rolls that use basic ingredients and tools. You’ll need sushi rice, nori, and a bamboo mat to get started, plus common fillings like imitation crab, cucumber, or avocado. Here’s a quick overview:

  • California Roll: Cooked imitation crab, avocado, and cucumber.
  • Cucumber Roll (Kappa Maki): Simple cucumber and rice.
  • Spicy Tuna Roll: Sushi-grade tuna mixed with spicy mayo.
  • Philadelphia Roll: Smoked salmon, cream cheese, and cucumber.
  • Salmon Roll: Focuses on sushi-grade raw salmon.
  • New York Roll: Cooked or tempura shrimp with avocado.
  • Tekka Maki: Classic tuna roll with sushi-grade fish.
  • Natto Roll: Fermented soybeans for a bold Japanese flavor.

Tools You’ll Need:

  • Bamboo rolling mat (around $2)
  • Sharp knife for clean cuts
  • Short-grain sushi rice (around $14 for 4.4 lbs)

Key Tips:

  • Use damp hands to handle rice.
  • Don’t overfill your rolls.
  • Roll tightly with consistent pressure.

Making sushi at home is fun, affordable, and a great way to practice your skills. Start with these simple rolls and work your way up to more advanced creations!

3 Simple Cooked Sushi Rolls for Beginners

8 Easy Sushi Rolls with Step-by-Step Instructions

Ready to try your hand at sushi-making? These eight beginner-friendly rolls come with simple steps and helpful tips to guide you through the process. Follow along to create delicious rolls with ease.

California Roll

The California roll is a great starting point, thanks to its cooked ingredients and the rice-on-the-outside technique. Gather imitation crab, avocado, cucumber, sushi rice, and nori sheets.

First, wrap your sushi mat in plastic wrap to prevent sticking. Fold a nori sheet in half, then spread a handful of room-temperature sushi rice evenly across one side using damp fingers. Flip the nori so the rice faces down on the mat.

Layer your fillings – imitation crab, avocado slices, and cucumber strips – across the center of the nori. Roll it up using the mat, applying even pressure to keep it firm. Sprinkle toasted sesame seeds over the roll for extra flavor, then slice it carefully with a wet knife for clean cuts.

Cucumber Roll (Kappa Maki)

This roll is all about mastering the basics. With just cucumber, sushi rice, and nori, you’ll focus on evenly spreading rice and rolling with consistency. Slice the cucumber into thin, uniform strips and keep your hands damp to avoid sticking. Once you’ve perfected this simple roll, you’ll feel more confident tackling more complex recipes.

Spicy Tuna Roll

Spicy tuna rolls bring a bit of heat and a lot of flavor. Start by dicing sushi-grade tuna into small, uniform pieces. Mix the tuna with a blend of sriracha and mayo until it’s moist but not runny. Spread sushi rice over the nori, add the spicy tuna mixture in a line across the center, and roll gently. The creamy filling makes this roll easier to handle while delivering that signature spicy kick.

Philadelphia Roll

This roll combines cream cheese, smoked salmon, and cucumber for a rich and satisfying bite. Lay a nori sheet on your bamboo mat and spread about 1 cup of sushi rice evenly over it. Flip the nori so the rice faces down, then place strips of cream cheese, smoked salmon, and cucumber near the edge closest to you. Roll it up snugly using the mat, then slice into 8-10 pieces. The cream cheese helps hold everything together while adding a smooth texture.

Salmon Roll

The salmon roll focuses on working with raw fish. Use sushi-grade salmon and slice it into thin, even strips about ¼ inch thick. Lay the salmon strips across the rice-covered nori and roll gently, applying consistent pressure to avoid breaking the fish. This roll helps you practice handling raw ingredients with care and precision.

New York Roll

Cooked or tempura shrimp paired with avocado makes this roll a beginner-friendly favorite. If using tempura shrimp, let it cool completely to keep the roll from getting soggy. Slice larger shrimp lengthwise and cut the avocado into thin strips. The combination of firm shrimp and creamy avocado creates a satisfying texture contrast.

Tekka Maki (Tuna Roll)

This traditional roll showcases the basics of sushi-making. Start with sushi-grade tuna, slicing it into strips about ¼ inch thick and 4 inches long. Keep the tuna cold until you’re ready to roll to maintain its freshness. Tekka Maki highlights the importance of well-seasoned rice, high-quality fish, and consistent rolling technique. Master this classic roll before experimenting with variations.

Natto Roll

Natto, or fermented soybeans, has a bold flavor and sticky texture that might seem tricky at first. Use a smaller amount to start. Mix the natto briefly to activate its stickiness, but don’t overdo it. If you like, add a touch of soy sauce or mustard to enhance the flavor. This roll introduces you to traditional Japanese ingredients and textures.

Pro Tips for All Rolls:

  • Keep a bowl of water nearby to dip your hands and knife – this makes handling sticky rice much easier.
  • Use a wet, sharp knife for clean cuts.
  • Don’t overfill your rolls; starting with less makes rolling easier.
  • Cut all ingredients into thin, uniform strips for consistent results.

How to Roll Sushi Properly

With the right technique, your sushi rolls will come out firm, consistent, and ready to impress.

Rolling with a Bamboo Mat

Start by wrapping your bamboo mat in plastic wrap. This makes cleanup a breeze and keeps sticky ingredients from clinging to the bamboo. Place a sheet of nori on the mat, rough side facing up, ensuring the lines on the nori align with the bamboo slats underneath.

Spread sushi rice evenly over the nori using damp fingers, leaving about a ½-inch strip of nori bare at the top edge. This uncovered section is key for sealing the roll later. Add your fillings in a neat horizontal line across the center of the rice – be careful not to overfill, or rolling will become tricky.

Now, lift the edge of the mat closest to you and begin rolling. Use your thumbs to guide the mat while keeping the fillings in place. Apply firm pressure as you roll to compact the rice and secure the ingredients. Continue rolling away from you, pressing evenly to ensure the roll stays tight and uniform.

Rolling Without a Mat

No bamboo mat? No problem. A thick kitchen towel works just as well, especially for beginners. Wrap the towel in plastic wrap to create a smooth, non-stick surface that’s easy to clean.

"A thick towel acts just like a bamboo mat and also wipes up your mess when you’re done: win-win. Because it’s so flexible it allows you to shape and roll the rice effortlessly into a beautiful roll. Its flexibility simplifies rolling." – Minimalist Baker

If you’re out of plastic wrap, parchment paper can be a good alternative. Some even use a large Ziploc bag as a rolling surface – just lay it flat and roll as you would with plastic wrap.

The rolling process is the same: spread rice on the nori, add your fillings, then use the towel to lift and roll the sushi away from you while applying gentle, steady pressure. The towel’s flexibility helps shape the roll into a perfect round form.

In 2023, Minimalist Baker shared a tutorial on rolling sushi without a mat, showcasing the towel-and-plastic-wrap method. According to user Baylee, following the guide resulted in sushi that was "better than a restaurant."

Once your roll is formed, it’s time to seal and slice it for the best presentation.

How to Seal and Cut Rolls

After rolling, sealing the sushi properly is essential to prevent it from unraveling. Lightly dampen your fingers with water and moisten the bare strip of nori at the edge. Press it gently to seal the roll. The moisture makes the nori slightly sticky, which helps it hold together. Let the roll rest for 15-30 seconds with the seam side down to ensure it stays secure and is easier to cut.

For slicing, use a sharp, straight-edged knife. A dull blade can crush the roll and create uneven pieces. Wet the blade before each cut and clean it after to prevent rice buildup, which can tear the nori. Cut with one smooth motion – avoid sawing back and forth, as this can cause the roll to fall apart.

For thicker rolls, cut them in half first, align the halves, and then slice into even pieces. This approach ensures uniformity and makes cutting less daunting.

If you’re nervous about slicing, keep the plastic wrap on the roll and cut through it. Once sliced, remove the wrap from each piece. This trick is especially helpful for inside-out rolls or when you’re still perfecting your knife skills.

sbb-itb-7b591fe

Fixing Common Beginner Problems

Even experienced sushi makers encounter issues, but simple tweaks can help you get back on track quickly.

Rice Problems and Solutions

Sticky or mushy rice is a common struggle for beginners. This often happens due to using the wrong type of rice or skipping the rinsing process. Long-grain rice, for example, has less starch than Japanese short-grain rice, which is why it doesn’t achieve the desired sticky texture.

"Sushi rice can become sticky for several reasons… Sushi rice is typically short-grain rice, which has a higher starch content than long-grain varieties. This starch contributes to the stickiness, allowing the grains to clump together." – Assistant Bot

To fix overly sticky rice, opt for Japanese-style short-grain rice and rinse it thoroughly with cold water until the water runs clear. This step removes excess surface starch. Use slightly less water during cooking since you’ll be adding sushi vinegar later. Also, keep a close eye on the cooking time – overcooking can cause the grains to split and absorb too much water.

"Mushy or soggy rice is usually caused by two things: the rice is overcooked, and too much liquid is absorbed into the rice." – Huy Vu

When adding sushi vinegar, gently slice and fold the rice to evenly coat it without crushing the grains.

If your rice turns out dry and hard, it’s likely due to too little water or cooking at too high a heat. To fix this, add up to 1/2 cup more water and let it simmer on low heat with a tight-fitting lid.

Preventing Rolls from Falling Apart

A roll that falls apart can be frustrating. One common mistake is overfilling – too much rice or too many ingredients can make it impossible to roll the nori tightly.

To avoid this, spread a thin, even layer of rice and use a modest amount of filling. If your nori feels soft or limp, it may have absorbed moisture. Quickly toast it over an open flame or in the oven until it becomes dry and crisp, and store unused sheets in a sealed container to keep them fresh.

Rolling technique matters, too. Use steady, firm pressure with a bamboo mat to compress the roll as you go. A loosely packed roll will fall apart when sliced. For cleaner cuts, chill the roll for 10–15 minutes and use a sharp, wet knife, wiping it clean between cuts.

Ingredient Swaps and Alternatives

If you’re still having trouble, consider swapping ingredients. For instance, if you can’t find sushi-grade fish, imitation crab (surimi) is a great alternative. It’s cooked, affordable, and widely available, making it perfect for beginner-friendly options like the California roll, which combines imitation crab, avocado, and cucumber.

For a slight variation, try using cooked shrimp instead of imitation crab in a New York roll. Or, for a creamy texture, add cream cheese to a Philadelphia roll, which pairs well with smoked salmon and appeals to American tastes.

Vegetarian and vegan options are also easy to prepare. Cucumber rolls (kappa maki) are naturally plant-based, and you can get creative with fillings like avocado, pickled vegetables, or cooked sweet potato.

On a budget? Canned tuna mixed with a little mayonnaise and Sriracha works well as a substitute for fresh tuna in spicy tuna rolls. Just make sure to drain the tuna thoroughly and adjust the spice level to suit your taste.

Conclusion

Making sushi at home is easier than you might think – these eight rolls show how simple techniques can lead to delicious results.

Key Points to Remember

The secret to great sushi lies in the rice. Properly rinsing and seasoning your rice with vinegar is essential – many sushi chefs believe perfectly prepared rice is the cornerstone of quality sushi. Take your time with this step; it’s worth it.

For the best results, use a bamboo mat and a sharp knife. To keep the rice from sticking, moisten your hands with vinegared water. Roll your sushi tightly, applying gentle pressure with the mat to create a firm, well-shaped roll.

Preparation is everything. Having all your ingredients ready before you start – known as mise en place – makes the process smoother and more enjoyable. As School of Wok reminds us:

"Don’t worry about the final results, just enjoy the process and more importantly, the food."

These basics are your starting point for endless sushi-making adventures.

What to Try Next

Once you’ve mastered the basics, it’s time to explore. Try making nigiri by shaping small rice ovals and topping them with your favorite ingredients. Or dive into temaki (hand rolls), a fun and forgiving option perfect for experimenting.

Feeling adventurous? Make inside-out rolls (uramaki), where the rice is on the outside, or deconstruct your favorite rolls into a sushi salad bowl for a fresh twist. Play around with flavors – use cooked proteins like shrimp or crab, mix in veggies, or even add fruits like mango or pineapple for something unexpected.

Invite friends and family to join in. Their feedback can help you refine your technique and inspire new ideas. Consider taking a sushi-making class or hosting a sushi party to level up your skills while having fun.

The key is to keep experimenting and enjoying the process. With every roll, you’ll grow more confident and start creating your own signature combinations.

FAQs

What are some common mistakes beginners make when making sushi rolls, and how can they avoid them?

Making sushi rolls for the first time can come with a few hiccups, but these are easy to sidestep with a little guidance. One of the most common missteps is choosing the wrong type of rice. Sushi calls for short-grain Japanese rice because it has just the right stickiness and texture. If you opt for long-grain or other rice varieties, your rolls may not hold together as they should.

Another mistake beginners often make is skipping the step of thoroughly rinsing the rice before cooking. This step is crucial because rinsing removes extra starch, ensuring the rice cooks evenly and doesn’t turn out overly sticky or clumpy. On top of that, overstuffing sushi rolls or applying too much pressure while rolling can cause them to fall apart. To avoid this, stick to a moderate amount of filling, keep it centered on the rice, and roll with a light, steady hand.

With a bit of practice and attention to these small but important details, you’ll soon be crafting sushi rolls that look and taste fantastic!

How can I tell if the fish I’m using is sushi-grade and safe to eat raw?

To make sure the fish you’re using is safe to eat raw, always buy it from a reliable supplier who specializes in premium seafood. Look for labels that say sushi-grade – this means the fish has been handled and frozen according to FDA standards to remove parasites.

Fresh sushi-grade fish should smell clean and slightly like the ocean, have a bright, vibrant color, and feel firm to the touch. Avoid anything with discoloration or signs of spoilage. According to the FDA, fish meant for raw consumption should be frozen at -4°F for 7 days or -31°F for 15 hours to ensure parasites are eliminated. If you’re unsure, ask your seafood provider to confirm the fish is safe for raw use.

What can I use instead of traditional sushi ingredients like nori or sushi-grade fish?

If you’re unable to track down traditional sushi staples like nori or sushi-grade fish, don’t worry – there are plenty of creative alternatives to explore. For the wrapping, soy paper is a fantastic choice. It has a mild flavor and pairs nicely with a variety of fillings. You can also switch things up with thinly sliced cucumber or crisp lettuce leaves for a lighter, refreshing option.

As for the fish, there are plenty of cooked substitutes that work beautifully. Think shrimp tempura, smoked salmon, or even canned tuna for a convenient twist. If you’re going for vegetarian rolls, the possibilities are endless: try avocado, cucumber, roasted vegetables, or tofu. These ingredients make it easy to whip up delicious homemade sushi, no matter what you have on hand.

Related posts

How to Cut Fish for Sushi: Beginner's Guide

How to Cut Fish for Sushi: Beginner’s Guide

Cutting fish for sushi is all about precision, the right tools, and proper techniques. Here’s what you need to know to get started:

  • Key Tools: Use a Yanagiba knife for clean, smooth cuts, and a Deba knife for heavy-duty tasks like breaking down whole fish. A wooden or high-density plastic cutting board is ideal for maintaining knife sharpness.
  • Knife Care: Keep your knives sharp and clean. Always hand-wash, dry immediately, and store safely. Regular honing and occasional sharpening with a whetstone are essential.
  • Fish Preparation: Choose fresh, sushi-grade fish. Look for clear eyes, firm flesh, and a mild ocean smell. Remove excess moisture, pinbones, and trim dark or fatty areas before cutting.
  • Cutting Techniques:
    • Nigiri: Slices should be 1.5 inches wide, 3–4 inches long, and ¼ inch thick, cut at a 45° angle.
    • Sashimi: Use techniques like hirazukuri (rectangular slices) or sogigiri (thin diagonal cuts), always cutting against the grain.
    • Maki Rolls: Cut fish into ¾-inch square strips, 8 inches long, for even distribution in rolls.
  • Avoid Mistakes: Use a sharp knife to prevent tearing, maintain a steady angle for even slices, and clean your blade frequently to avoid fish sticking.

Mastering these basics will improve your sushi-making skills and enhance the taste and presentation of your dishes. Ready to dive in? Let’s get cutting!

How To Slice Fish For Sushi and Sashimi

Tools You Need for Sushi Fish Preparation

Mastering sushi preparation starts with having the right tools. Specialized equipment can make all the difference in achieving those precise, professional cuts essential for sushi and sashimi.

The Yanagiba Knife Explained

The Yanagiba (柳刃包丁) is the go-to knife for slicing raw fish in sushi and sashimi preparation. Its single-bevel blade is designed to deliver ultra-sharp, clean cuts while minimizing damage to the delicate fish cells. This precision is key to creating the smooth, glass-like slices that sushi demands.

Typically, the Yanagiba measures anywhere from 8.3 to 14.2 inches (210–360 mm), with a 10.6-inch (270 mm) blade being a popular choice for home sushi enthusiasts. Prices vary widely, starting around $50 for models like the Kai Seki Magoroku Kinju AK-1106 240 mm, and climbing to approximately $280 for high-end artisanal versions. Left-handed chefs should look for specially crafted left-handed Yanagiba knives to ensure proper blade alignment.

"The yanagiba knife is the life-blood of Japanese fish preparation. This knife helps you create pristine, glass-like cuts that professional-quality sushi demands." – Yakushi Knives

Other Tools: Deba Knife and Cutting Board

While the Yanagiba excels at slicing, other tools play vital roles in sushi preparation. The Deba knife is perfect for heavier tasks like breaking down whole fish, removing heads, and cutting through bones. Alongside the Yanagiba and Usuba knives, the Deba is considered one of the foundational tools in Japanese cuisine.

For your cutting surface, choose a wooden cutting board for its gentle, self-healing properties and natural antimicrobial benefits. Alternatively, a high-density plastic cutting board offers easy cleaning and sanitation. Whichever you choose, dedicating a board exclusively to fish preparation helps prevent cross-contamination and protects the blade’s sharpness.

Blade Care and Cleaning

Proper care of your knives is critical for both safety and performance. After each use, rinse the blade under warm water, then clean it with mild soap and a soft cloth. Always wipe from the back of the blade toward the edge to avoid dulling it. Never put Japanese knives in the dishwasher – harsh detergents and high heat can damage both the blade and handle.

Dry your knives immediately to prevent rust, and if your knife has a wooden handle, apply food-safe mineral oil to keep it in good condition. During longer cutting sessions, keep a damp cloth nearby to wipe away fish residue, ensuring clean and precise cuts throughout.

When not in use, store your knives properly – whether in a knife block, on a magnetic strip, or in individual knife covers – to avoid damage and accidents. Regular honing with a honing rod will keep the blade aligned between uses, while occasional sharpening with a whetstone (set to a 15–20 degree angle) will maintain the razor-sharp edge essential for sushi preparation. Proper maintenance ensures your tools are always ready to perform at their best.

How to Choose and Prepare Sushi-Grade Fish

Picking the right fish for sushi is crucial. Since the term "sushi-grade" isn’t officially regulated, you’ll need to confirm the quality yourself. Using your senses is a reliable way to judge freshness.

Signs of Fresh Fish

Your senses are your best guide when it comes to spotting fresh fish. Look for a mild, clean, ocean-like smell – anything too fishy is a red flag. If you’re buying a whole fish, its eyes should be clear and shiny, not cloudy or dull. The flesh should be vibrant in color, firm to the touch, and spring back when pressed. Avoid fish with any discoloration.

Labels like "sushi" or "sashimi" can indicate the fish is intended for raw consumption, but don’t stop there. Ask your fishmonger about where the fish came from and how it was handled. This extra step ensures you’re getting a safe and high-quality product.

Getting Fish Ready for Cutting

Once you’ve bought your fish, it’s best to prepare it right away. Ideally, use it the same day or within two days. Keep it on ice and refrigerate as soon as you get home. Before cutting, rinse the fish under cold water and pat it dry with paper towels. Removing excess moisture is key for both flavor and food safety. As Yuji Haraguchi explains:

"Taking the moisture out is sanitary, and it makes the fish more flavorful… a lot of people make the mistake of packing fish right after it’s filleted, and there’s a lot of moisture still left, whether it’s from the fish or from the water used to clean the fish."

After drying, check for pinbones and remove them with clean tweezers. Trim off any dark or fatty areas to create a clean, uniform piece of fish. Throughout the process, handle the fish as little as possible to avoid bacterial contamination. Make sure your workspace, tools, and hands are spotless. If you’re switching between different types of fish, sanitize your cutting board or flip it to a clean side.

Freezing for Better Cuts

Freezing fish serves two key purposes: it kills parasites and can improve texture. The FDA recommends freezing fish at -4°F (-20°C) or colder for at least 7 days to make it safe for raw consumption. Many top sushi restaurants rely on frozen fish to manage parasite risks without compromising flavor. As Davis Herron, director of the retail division at The Lobster Place, explains:

"Any wild fish except tuna species – bigeye, yellowfin, bluefin, bonito/skipjack – those wild fish need to be frozen for specific periods of time at specific temperatures to get rid of parasites."

However, home freezers typically only reach 0°F (-18°C), which is below FDA standards and can lead to large ice crystals that damage the fish’s texture. When thawing, remove the fish from vacuum packaging once it starts to soften. Wrap it in paper towels and let it finish thawing in the refrigerator.

Step-by-Step Guide to Cutting Fish for Sushi

Once your fish is prepped, it’s time to focus on the cutting techniques. Each type of sushi demands a specific approach, and nailing these cuts is crucial for both presentation and taste. Proper hand positioning and precision will make all the difference.

Cutting for Nigiri

Nigiri calls for the most accuracy since the fish slice is the star, sitting prominently atop the rice. Begin by rinsing the fish and patting it completely dry with paper towels. Careful planning of your cuts can also help minimize waste.

If you’re working with salmon, remove any outer brown layer for a cleaner appearance. The belly portion is particularly prized for its rich flavor and appealing look. Hold your knife at a 45-degree angle to the fillet and aim for slices about 1.5 inches wide, 3–4 inches long, and roughly ¼ inch thick. This angled cut ensures the perfect proportions for nigiri.

Use your non-dominant hand to support the fish as you cut. Pull the knife toward you in one smooth motion – avoid sawing back and forth. For salmon, thin slices (around 1/8 inch thick) cut at a 45-degree angle across the grain will reduce stringiness and ensure a tender bite.

Next, let’s look at how to adapt your slicing for sashimi.

Cutting for Sashimi

Sashimi cutting is all about highlighting the fish’s natural texture and flavor with clean, precise slices. Always cut perpendicular to the grain to avoid any stringiness. Chef Masaharu Morimoto offers this advice:

"Using a sharp long knife, cut the fish against the grain into thin, even pieces."

There are two key techniques for sashimi: hirazukuri and sogigiri.

  • Hirazukuri is the standard rectangular slice used for most sashimi. For softer fish like tuna, aim for slices about 7–10mm thick. Use the same smooth pulling motion as with nigiri to achieve a clean cut.
  • Sogigiri, or the "shaving cut", is ideal for firmer fish like snapper. This method produces thinner, diagonal slices that better complement the texture of white fish.

In both techniques, cutting against the grain is essential to break down connective tissues, resulting in a more tender bite. Keep your knife strokes smooth and continuous, and ensure the fish stays dry for the best results.

Now, let’s move on to cutting fish for maki rolls.

Preparing Strips for Maki Rolls

Cutting fish for maki rolls is more straightforward than for nigiri or sashimi. Since the fish will be wrapped in rice and nori, achieving perfect slices is less important than maintaining consistent size.

Aim for strips with a cross-section of about ¾ inch by ¾ inch and a length of 8 inches. These dimensions ensure the fish fits neatly inside the roll without causing unevenness. You can also use leftover scraps from your nigiri cuts as filling. Simply slice the fish into uniform strips that match these measurements for even distribution.

This method is more forgiving since the fish isn’t the visual centerpiece of the dish, but consistency is still key for a balanced roll.

sbb-itb-7b591fe

Common Mistakes and How to Avoid Them

Even with the right approach, beginners often face a few stumbling blocks when preparing sushi. These challenges usually pop up early on, but knowing what to watch out for can help you improve faster. Let’s dive into three common mistakes and how to address them.

Uneven Slices

One of the most frequent issues is inconsistent slice thickness. You might end up with one piece that’s paper-thin and another that’s thick and clunky. This often happens when the knife angle changes mid-cut or when pressure isn’t evenly applied. To fix this, focus on maintaining a steady knife angle and applying consistent pressure throughout each cut.

"The key to cutting sashimi is to keep the fish cells intact as much as possible."

Start by practicing your cutting motion without any fish – this helps build the muscle memory for smooth, uniform slices. Use your non-dominant hand to guide the fish gently, avoiding a tight grip. This technique not only improves your slicing but also enhances the overall sushi-making experience.

Torn Flesh

Another challenge is torn fish flesh, which often results from using a dull knife or cutting with the grain instead of against it. As Outfit4Events points out:

"The key to good sushi is quality ingredients, especially the right type of rice… Another essential ingredient of success in sushi preparation is a sharp sushi knife."

To avoid tearing, ensure your knife is sharp and use smooth, continuous strokes from the base to the tip of the blade. Avoid a sawing motion, as this can crush and tear the delicate fish tissue. Let the knife’s sharpness do the work, applying only minimal pressure. If your cuts start to look ragged, take a moment to hone your blade. A sharp knife not only makes cutting easier but also preserves the fish’s texture and appearance.

Fish Sticking to the Blade

Fish sticking to your knife can disrupt your slicing flow. This often happens as the blade warms up or accumulates residue during use. To reduce friction, dip the blade in cold water between cuts. Keeping a bowl of cold water nearby for quick dips can make a big difference.

Another helpful trick is to wipe the blade with a wet towel between slices to remove residue. For particularly stubborn buildup, rubbing a thin slice of daikon or ginger on the blade works well. You can also apply a very light coating of olive oil, but use it sparingly to avoid altering the fish’s flavor. Regularly cleaning the blade by dipping it in water after each cut prevents buildup and keeps the slicing process smooth. These small adjustments can go a long way in refining your technique and improving your sushi-making skills.

Plating and Presentation Tips for Sushi

Once you’ve mastered your cutting techniques, it’s time to focus on presentation – an essential part of sushi-making that turns a delicious dish into a feast for the eyes. The concept of moritsuke emphasizes that how food looks is just as important as how it tastes. As zenDine puts it:

"In Japanese culture, food presentation is considered an essential component of their cuisine, and is believed to be just as important as the taste and quality of the food."

Balancing traditional and modern plating techniques allows you to showcase your sushi in a way that respects its origins while adding your own flair. Presentation ties together the precision of cutting and the joy of eating, completing the art of sushi-making.

Classic Plating Techniques

Traditional plating focuses on simplicity, balance, and natural appeal. Odd-numbered arrangements – such as three, five, or seven pieces – are a hallmark of this style, offering visual harmony.

For sashimi, arrange slices with the larger cut facing forward, highlighting the fish’s texture and marbling. Use about one-third of the plate’s surface to avoid overcrowding and let the ingredients shine. Garnishes like tsuma (shredded daikon) and shiso leaves not only add height but also refresh the palate.

When plating nigiri, aim for contrast. Group pieces with complementary colors and arrange larger items in the center, surrounded by smaller ones. Condiments follow specific rules: place wasabi and other accompaniments at the front right of the plate, and always serve pickled ginger separately.

Modern Presentation Ideas

Modern plating takes a more artistic approach, using negative space and creative layering to make sushi visually striking.

Minimalist plates in dark tones can make the vibrant colors of fresh fish pop. Add dimension by layering ingredients – think edible nests, cucumber ribbons, or small stands to create varied heights. Incorporate microgreens, edible flowers, or even gold leaf for an elegant touch. For texture, try cucumber roses or crispy nori accents.

Asymmetry is another hallmark of modern plating. Instead of centering everything, arrange sushi pieces in flowing, organic patterns that guide the eye naturally across the plate. This approach feels dynamic and less rigid, adding a contemporary flair.

The secret to modern plating is knowing when to stop. Every element should have a purpose – whether it’s enhancing the look, texture, or flavor. Whether you lean toward classic or modern styles, the ultimate goal is the same: crafting a dining experience that celebrates both the artistry and taste of sushi.

Conclusion: Improving Your Sushi-Making Skills

Mastering sushi-making starts with precision and practice. As Chef Yoshi Okai wisely points out, "You always have to do it in one smooth stroke… You can really taste the difference if you’re doing a ton of cuts, you can feel the jagged edges in your mouth." This highlights the importance of honing proper knife techniques, as it directly impacts the quality of your sushi.

Begin with the basics – simple cuts – and gradually work your way toward crafting nigiri and sashimi. Even seasoned sushi chefs spend years perfecting their skills, so take it slow and relish the process. Learning is part of the journey, and each step brings you closer to mastering the art.

Investing in a sharp, high-quality knife is a game changer. As noted in the guide, "The sharper the knife, the easier the whole process will be." – Craftycookbook.com A well-maintained blade not only makes cutting smoother but also enhances your overall experience, turning what could be a chore into a joy.

Repetition is key. Practicing basic cuts helps develop muscle memory, making proper angles, pressure, and motion feel natural over time. With consistent effort, you’ll notice your technique becoming more fluid and confident.

Don’t stress about perfection – progress is what matters. Even your early attempts will be delicious, and the satisfaction of creating sushi with your own hands is unmatched. The beauty of home sushi-making lies in the combination of effort, creativity, and flavor.

FAQs

What’s the difference between a Yanagiba knife and a Deba knife, and when should you use each for sushi?

The Yanagiba knife is a long, narrow blade with a single-beveled edge, crafted for incredibly precise, clean cuts. It’s the go-to tool for slicing sashimi and sushi, as its design allows it to glide effortlessly through fish without causing any tearing. This makes it perfect for delicate tasks like preparing Nigiri or Sashimi, where precision is everything.

In contrast, the Deba knife features a thicker, more robust blade with a double bevel. It’s built for tougher jobs, such as filleting whole fish or cutting through small bones with ease. Think of the Yanagiba as your precision tool for slicing, while the Deba is your workhorse for breaking down or filleting fish before you start crafting sushi. Together, these knives are key to mastering sushi preparation in your own kitchen.

How can I make sure the fish I buy is safe and sushi-grade?

When shopping for fish suitable for sushi, keep an eye out for labels like sushi-grade or sashimi-grade. These terms indicate that the fish has been properly handled and frozen to eliminate parasites. In the U.S., guidelines suggest freezing fish at -4°F for at least 7 days or -31°F for 15 hours to ensure safety.

Make sure the fish is fresh by checking for bright, clear eyes, shiny skin, and a firm texture. To ensure quality and safety, always buy from a reputable source that specializes in sushi-grade fish.

What are the most common mistakes when cutting fish for sushi, and how can I avoid them?

When you’re just starting out with cutting fish for sushi, it’s easy to stumble over a few common mistakes. But don’t worry – these are simple to fix with the right techniques.

One big misstep is using a dull knife. A blunt blade can crush the fish, leaving you with uneven, messy slices. To avoid this, always opt for a sharp knife, like a Yanagiba, and make sure to keep it in top shape for those clean, precise cuts.

Another frequent error is cutting against the grain of the fish. Doing this can cause the fish to tear and mess up its texture. Instead, take a moment to identify the grain and slice with it to achieve smooth, even pieces.

Lastly, always ensure your fish is sushi-grade and properly chilled before you start cutting. This step not only guarantees safety and better flavor but also makes the fish much easier to handle. Follow these pointers, and you’ll be on your way to mastering sushi slicing in no time!

Related posts

Nigiri vs Sashimi: What's the Difference?

Nigiri vs Sashimi: What’s the Difference?

Nigiri and sashimi are two popular Japanese dishes, but they’re not the same. Here’s the key difference: Nigiri includes vinegared rice topped with a slice of raw fish or seafood, while sashimi is just thinly sliced raw fish or meat served without rice.

Quick Overview:

  • Nigiri: Hand-pressed rice with fish on top.
  • Sashimi: Pure slices of raw fish or meat, no rice.
  • Main Difference: Rice (Nigiri has it, Sashimi doesn’t).
  • Preparation: Nigiri focuses on shaping rice; sashimi focuses on slicing fish.
  • Taste: Nigiri blends rice and fish flavors; sashimi highlights the fish’s natural taste.
  • Nutrition: Nigiri has carbs from rice; sashimi is low-carb and high-protein.

Quick Comparison:

FeatureNigiriSashimi
RiceYesNo
FocusFish + vinegared ricePure raw fish/meat
CaloriesHigher (includes rice)Lower (no rice)
Eating StyleHand or chopsticksChopsticks only
CostModerateUsually higher
ExamplesTuna nigiri, salmon nigiriTuna sashimi, scallop sashimi

Whether you prefer the balanced bite of nigiri or the pure flavor of sashimi, both dishes showcase the artistry of Japanese cuisine. Let’s dive deeper into what makes each unique.

Sushi Showdown: Nigiri vs Sashimi

What is Nigiri?

Nigiri is a type of sushi that embodies the elegance of Japanese culinary tradition. The word comes from "nigirizushi", which translates to "hand-pressed sushi." It consists of a small, hand-molded mound of vinegared rice topped with a thin slice of fresh fish or seafood. What makes nigiri so special isn’t just the quality of the ingredients – it’s the skill and precision required to prepare it perfectly.

"Making nigiri is the most challenging skill a sushi chef has. It takes many years to be consistent", says Chef Chris Ono, Chef of Hansei at the JACCC.

Nigiri has its roots in the early 1800s in the Kanto region, now known as Tokyo. Back then, it was called "Edomae sushi", named after the seafood sourced from Tokyo Bay. Hanaya Yohei, the creator of this style during the Edo period, originally designed nigiri as a form of fast food. The preservation techniques used at the time were different from today’s refined methods, but the essence of simplicity and quality remains unchanged.

Nigiri Ingredients

The foundation of nigiri lies in its seasoned short-grain rice, which is shaped by hand. A slice of fish – such as tuna, salmon, or yellowtail – is placed on top, often with a touch of wasabi in between. Some variations include shrimp, grilled eel, or tamagoyaki (sweet egg omelet), and garnishes like scallions or pickled ginger may be added for extra flavor.

How to Prepare and Serve Nigiri

Making nigiri is an art that requires precision and practice. The process starts with shaping the vinegared rice into uniform mounds by hand. As Chef Chris Ono explains:

"The art of a true sushi chef is shaping the same size of nigiri rice each time and applying measured pressure ensures the rice and fish remain delicately bound".

The word "nigiri", meaning "grasping", reflects this hands-on technique. Chefs apply just enough pressure to keep the rice and fish together without crushing the rice grains. When eating nigiri, it’s traditionally enjoyed in one bite, often picked up by hand. If dipping it in soy sauce, only the fish should touch the sauce to preserve the texture and flavor of the rice. For the best taste, many recommend eating it fish-side down.

Nigiri’s simplicity and delicate presentation capture the essence of centuries of Japanese culinary tradition, offering a perfect balance of flavor and craftsmanship.

What is Sashimi?

Sashimi is a dish of thinly sliced raw fish, shellfish, or meat, served on its own without rice. The word "sashimi" translates to "pierced body", a nod to the traditional preparation methods. Unlike sushi, which always includes rice, sashimi is all about showcasing the pure, unaltered flavors of top-quality seafood.

Historical records from the 15th century reveal that sashimi was enjoyed even before the introduction of soy sauce. Its essence lies in the freshness and quality of the ingredients, making it a true celebration of the chef’s skill in selecting, handling, and presenting raw seafood. While nigiri pairs fish with carefully shaped rice, sashimi focuses entirely on the fish in its most natural form.

Sashimi often comes with a higher price tag due to the thicker cuts and larger portions. It also demands more thought and care in preparing garnishes, accompaniments, and overall presentation. Unlike the single-bite experience of nigiri, sashimi offers multiple slices of one type of fish, creating a fuller and more substantial meal.

Sashimi Ingredients

The foundation of great sashimi is high-quality seafood. Some of the most popular options include:

  • Maguro (Bluefin Tuna): This fish can weigh up to 880 pounds and is served in three distinct cuts – akami (lean), chutoro (medium fatty), and otoro (rich, fatty).
  • Ahi Tuna: Yellowfin tuna is known for its mild flavor and firm texture, while bigeye tuna has a buttery richness due to its higher fat content.
  • Hotate (Scallops): Fresh scallops are celebrated for their sweet, creamy texture.
  • Ebi (Shrimp and Prawns): Varieties include amaebi (small sweet shrimp), botan ebi (large sweet shrimp), aka ebi (red shrimp with high fat content), and kuruma ebi (Japanese tiger prawns).

Other popular choices include yellowtail, bonito, mackerel, sea bass, red snapper, squid, crab, and sea urchin. Interestingly, raw salmon only became a sashimi favorite in the mid-1980s, thanks to Norwegian salmon exports.

It’s worth noting that terms like "sushi-grade" and "sashimi-grade" are marketing labels without an official grading system. As Davis Herron, director of the retail and restaurant division at The Lobster Place fish market, explains:

"It’s a marketing term that has little significance [with respect] to actually being able to consume raw fish".

How to Prepare and Present Sashimi

Preparing sashimi is an art that requires precision and attention to detail. Two primary cutting styles are commonly used:

  • Hira-zukuri: Thick, rectangular slices for tender fish like tuna and salmon.
  • Sogi-zukuri: Thin, angled slices for firmer fish like sea bream.

To ensure tenderness, chefs cut the fish against the grain using smooth, continuous strokes. Yuji Haraguchi, owner of Osakana, highlights the importance of proper handling:

"Of course, freshness is important, but the most important thing is how it’s handled the closer it gets to the table or the customer".

Presentation plays a key role in sashimi. Seasonal garnishes, known as tsuma, such as shredded daikon, shiso leaves, and edible flowers, are used to enhance the visual appeal and aroma of the dish. These garnishes not only add flavor and texture but also have antibacterial properties.

When plating, chefs aim for balance and elegance. Fish slices are often arranged in odd numbers, with condiments placed strategically to complement the dish. The presentation incorporates height, negative space, and color contrasts to highlight the natural beauty of the seafood. As Chef Nobu Matsuhisa puts it:

"Uni is best enjoyed not only for its taste but for its beauty. Thoughtful presentation brings out the elegance of this ingredient".

Sashimi is traditionally served with soy sauce, wasabi, and pickled ginger, allowing diners to adjust the flavors to their liking. Up next, discover how these techniques can help you create stunning sashimi dishes at home.

sbb-itb-7b591fe

Nigiri vs. Sashimi: Main Differences

While both nigiri and sashimi celebrate the artistry of raw fish, they deliver entirely distinct dining experiences. Knowing their key differences can help you better appreciate each dish and decide which suits your taste and dietary preferences.

Rice vs. No Rice

The most noticeable difference between nigiri and sashimi lies in their base. Nigiri pairs thinly sliced raw fish with a small, hand-shaped mound of vinegared sushi rice. This combination creates a balance of flavors, where the rice adds a subtle tangy sweetness to complement the fish.

Sashimi, however, is all about the fish itself. Served without rice, it highlights the pure, natural flavors and textures of the seafood. The focus here is on the quality of the fish and the precision of the slicing, which is an art in itself.

The preparation techniques underscore this contrast. For sashimi, chefs prioritize precise slicing to bring out the fish’s natural elegance. Nigiri preparation, on the other hand, requires shaping rice with just the right pressure and moisture, forming a perfect base for the fish topping. This combination of techniques creates two very different culinary experiences.

Taste and Texture Differences

The inclusion (or absence) of rice shapes the flavor and texture of these dishes. With nigiri, the vinegared rice enhances the fish’s flavor, creating a harmonious balance. Sashimi, by contrast, offers the unadulterated taste of the sea, allowing the fish’s nuances to truly stand out.

Texturally, the contrast is just as striking. Nigiri combines the soft, tender fish with the slightly chewy grains of seasoned rice, creating a layered and dynamic bite. Popular nigiri toppings include tuna, salmon, yellowtail, and mackerel – fish prized for their firm texture and rich fat content. Food writer Ernesto Jose beautifully describes this interplay:

"The flavors of the three intermingle to tantalize your palate. The texture and temperature of the rice and the fish contrast with each other, a large tender piece of fish vs. the more chewy grains of rice. It is absolutely magical when done right."

Sashimi, on the other hand, is all about simplicity. Its texture is clean and smooth, emphasizing the freshness and quality of the fish.

Nutrition Facts Comparison

Nigiri and sashimi also differ in their nutritional profiles. Nigiri provides a mix of proteins and carbohydrates, thanks to the vinegared rice. Sashimi, being rice-free, is a high-protein, low-carb option, making it ideal for those on low-carb diets.

NutrientSalmon Nigiri (Per 100g)Salmon Sashimi (Per 100g)Tuna Nigiri (Per 100g)Tuna Sashimi (Per 100g)
Calories145110140105
Protein12g20g15g23g
Carbohydrates18g0g18g0g
Fat3.5g2g2g1g
Omega-3 Fatty Acids1.2g1.9g0.8g1.2g
Sodium310mg45mg300mg40mg
Vitamin D5μg8μg2μg3μg
Vitamin B123μg5μg5μg8μg

Sashimi generally offers higher protein and omega-3 fatty acid levels, along with more vitamins like D and B12. It’s also much lower in sodium, as it doesn’t include seasoned rice. For those watching their calorie intake or avoiding carbs, sashimi is often the better choice. Nigiri, however, provides a more balanced macronutrient profile, offering both protein and the sustained energy of complex carbohydrates.

As Registered Dietitian Ella Davar, RD, CDN, notes:

"The idea is to see more colors from various fish and veggies and less white color of cooked vinegared rice".

Nigiri’s rice component can make it more filling, making it a heartier option for those looking for a complete meal. Both dishes can fit into a healthy diet – your choice depends on your nutritional goals and personal preferences.

How to Make Nigiri and Sashimi at Home

Believe it or not, creating restaurant-quality nigiri and sashimi at home is entirely doable. With the right ingredients, tools, and techniques, you can master these iconic Japanese dishes and wow your family and friends. The secret lies in understanding what makes each dish special and following tried-and-true methods.

Buying Quality Fish

The heart of great nigiri and sashimi is high-quality fish. When choosing fish for raw consumption, consider three things: the type of fish, whether it’s been frozen or cured, and the potential presence of toxins. For safety, buying previously frozen fish is often recommended, as freezing kills parasites. According to FDA guidelines, most fish – except tuna – should be frozen before being eaten raw.

Start by finding a trustworthy source. Look for fish markets with strong reviews and high health standards. Don’t hesitate to ask local sushi restaurants where they get their fish. Davis Herron, director at The Lobster Place in Manhattan’s Chelsea Market, stresses the importance of proper handling throughout the supply chain.

Dr. Judy Sakanari, a parasitologist at the University of California, San Francisco, underscores this point:

"It’s best to properly freeze or cook the fish. That’s the bottom line."

When inspecting fish, look for clear eyes, firm flesh, and a mild, fresh smell. Avoid anything with a strong fishy, sour, or ammonia-like odor, or signs of discoloration or drying around the edges. Farmed fish, like salmon raised on parasite-free feed, may be safe to eat raw without freezing.

Once you’ve chosen your fish, proper handling is critical. Transport it on ice and store it in the refrigerator. Sushi-grade fish is best consumed the same day you buy it, and it should always be kept below 40°F (4°C).

After securing your fish, it’s time to set up your kitchen with the right tools and techniques.

Tools and Techniques You Need

The right tools can make all the difference when preparing nigiri and sashimi. Here’s a quick guide to the essentials:

ToolPricePurpose
21cm Japanese Knife$18For precise slicing
Sharpening Set$35To keep your knife sharp
Hangiri (Wooden Bowl)$49For mixing and cooling rice
Rice Paddle (Shamoji)$8To handle rice without sticking
Bamboo Rice Mat$8.95For general sushi preparation

A sharp Japanese knife is a must. Dip the blade in ice water between cuts to prevent sticking, and always keep the fish cold until you’re ready to slice. For sashimi, focus on the fish itself: remove bones and skin, rinse in cold water, and pat dry. Slice against the grain to create clean, even cuts. Arrange the slices on a plate with garnishes like pickled ginger and wasabi for a traditional touch.

Making nigiri adds an extra layer of skill. As Chris Ono, Chef of Hansei at the JACCC, explains:

"Making nigiri is the most challenging skill a sushi chef has. It takes many years to be consistent…the art of a true sushi chef is shaping the same size of nigiri rice each time and then using gentle but abrupt pressure to hold the rice and fish together while still making sure it melts when you eat it."

Start by preparing perfectly seasoned sushi rice. Wet your hands to prevent sticking, then scoop about 1.5 tablespoons of rice. Shape it gently into an oblong form – roughly 2 inches long and 1 inch wide. Add a small dab of wasabi on top, place a slice of fish over it, and press lightly to form the nigiri.

To make the process smoother, wet your sushi bowl (sushi oke) and rice paddle (shamoji) beforehand. This keeps the rice from sticking and ensures everything stays neat.

The effort you put into selecting quality fish is equally important when it comes to using the right tools and techniques. As Yuji Haraguchi, Owner of Osakana, points out, making sushi at home is not just rewarding but also a fun way to bring people together.

Conclusion: Choosing Between Nigiri and Sashimi

Deciding between nigiri and sashimi ultimately comes down to your personal preference: do you enjoy a harmonious combination of vinegared rice and fresh fish, or do you lean toward the pure, unadulterated taste of seafood? Nigiri offers a balanced bite, blending the subtle sweetness of rice with the fresh, clean flavor of fish.

Sashimi, on the other hand, is all about the fish. It highlights the freshness and quality of the seafood, offering a pure and straightforward experience. For those who savor the delicate nuances of different fish varieties, sashimi is an ideal choice.

Practical differences can also influence your choice. Sashimi often comes at a higher price point than nigiri, as it features larger portions of fish and is typically presented more elaborately. The way each dish is eaten varies, too: nigiri is traditionally enjoyed by hand, while sashimi is served with chopsticks. Additionally, nigiri can incorporate cooked elements, while sashimi is always raw.

If you’re preparing these dishes at home, remember that quality and technique are non-negotiable. As Hantani Sadahiko explains when discussing fish selection:

"It’s a fish that the shop guarantees is ‘safe to eat raw.’ Other than that, please cook and eat. In Japan, ‘fish for sashimi’ and other fish are sold clearly. There are no Japanese who eat fish that is not written as sashimi."

When it comes to preparation, sashimi focuses more on knife skills and presentation, while nigiri challenges you to perfect rice preparation and the art of pairing fish with rice. These distinctions reflect the broader craftsmanship involved in sushi-making.

Both nigiri and sashimi celebrate simplicity and the importance of high-quality ingredients. Whether you’re savoring the balance of rice and fish in nigiri or appreciating the unfiltered essence of seafood in sashimi, both dishes offer a window into the artistry of Japanese cuisine. Exploring both will deepen your understanding and admiration for this culinary tradition.

FAQs

How can I choose the best fish for making nigiri and sashimi at home?

To prepare nigiri and sashimi at home, start by selecting fish that is fresh and of high quality. Check for bright, clear eyes, shiny skin, and firm flesh with a clean, ocean-like aroma. Steer clear of fish with dull eyes, a slimy surface, or any unpleasant odor – these are red flags for subpar quality.

Always choose fish labeled as "sushi-grade" or "sashimi-grade". This ensures it has been carefully handled and frozen to remove parasites, making it safe for raw consumption. For the best taste and to support ethical practices, buy from trusted suppliers who emphasize responsible fishing methods.

What’s the difference in nutrition between nigiri and sashimi, and which is better for a low-carb diet?

When it comes to making low-carb choices, sashimi takes the lead. It’s made entirely of raw fish, which means it’s virtually free of carbs and low in calories – typically ranging between 30 and 50 calories per serving, depending on the type of fish you choose.

On the other hand, nigiri combines a slice of fish with a small portion of vinegared rice. While undeniably tasty, the rice adds carbohydrates, with each piece containing about 6 grams of carbs and roughly 40 to 65 calories.

So, if cutting carbs is your priority, sashimi is the way to go. It’s a straightforward, protein-rich option that aligns perfectly with a low-carb diet.

How can I prepare and present sashimi to enhance its flavor and appearance?

To make sashimi stand out, freshness is absolutely crucial. Always opt for high-quality, fresh fish because its flavor hinges on the quality. Use a sharp knife to make clean cuts, slicing against the grain to achieve the best texture. Keep your slices uniform – about 1/4 inch thick – for consistency in both taste and presentation.

When it comes to plating, arrange the sashimi in odd numbers for a more visually appealing display. Enhance the dish by adding garnishes like shiso leaves or thinly sliced daikon radish, which provide contrast and elevate the overall look. Keep the presentation simple and refined, allowing the natural beauty of the fish to take center stage. And don’t forget to handle the fish with care – using gloves or utensils instead of bare hands ensures it stays in perfect condition.

Related posts

Essential Sushi Tools: Complete Checklist

Essential Sushi Tools: Complete Checklist

If you want to make sushi at home that looks and tastes like it came from a restaurant, using the right tools is key. Here’s a simple breakdown of what you need:

  • Knives: A sharp sushi knife (like Yanagiba) is crucial for clean, precise cuts. Keep it sharp with a whetstone.
  • Cutting Boards: Use wood for knife care or plastic for easy cleaning. Keep separate boards for raw fish, meat, and veggies.
  • Rice Tools: A rice cooker with a sushi rice setting ensures perfect rice. Use a hangiri (wooden mixing bowl) and shamoji (rice paddle) to season and cool rice properly.
  • Rolling Mats: Bamboo mats (makisu) are essential for tight rolls. Cover with plastic wrap for easy cleanup.
  • Sushi Molds: Great for beginners who want consistent shapes without rolling.
  • Plating Tools: Use precision chopsticks, squeeze bottles, and garnishing tools to elevate presentation.

Quick Tip:

Start with the basics – knife, cutting board, rice cooker, and rolling mat. As you improve, add advanced tools like hangiri or garnishing knives. Proper maintenance is just as important as the tools themselves.

This guide walks you through each tool, how to use it, and tips to care for them. Whether you’re a beginner or experienced, these tools will help you make sushi that’s both delicious and visually impressive.

What Tools Do You Need to Make Sushi? | Sushi Lessons

Cutting Instruments

The art of sushi depends heavily on precision, and achieving that starts with the right tools. Japanese sushi knives are designed specifically for precise, task-oriented cuts.

Sushi Knife Types and Uses

Yanagiba knives are the cornerstone of sushi-making. These long, slender blades – typically 9 to 12 inches in length – are perfect for slicing fish for sashimi and sushi rolls. Their single-bevel design creates an incredibly sharp edge, allowing for smooth, clean cuts without tearing the delicate fish.

Many home cooks rely on a Yanagiba as their go-to knife for sashimi and sushi rolls.

Deba knives are built for heavier tasks, like breaking down whole fish and cutting through bones. They’re sturdy enough to handle tougher jobs that could damage more delicate blades.

Usuba knives are single-bevel knives made for intricate vegetable cuts. However, they require advanced skills to use effectively.

Gyuto and Santoku knives are versatile all-purpose options, making them practical choices for home chefs.

Traditional Japanese knives are often single-edged, offering a sharper, more precise cutting edge, while Western-style knives are generally double-edged. This distinction can significantly influence performance, with single-bevel knives excelling when used with proper technique.

For beginners, brands like Yoshihiro offer high-quality knives in the $100–$200 range, making them a solid starting point.

Sharpening Stones and Maintenance

Sharp knives are non-negotiable when it comes to sushi preparation. Whetstones are the preferred tool for sharpening Japanese knives, as they allow for the precision and control needed to maintain sharp edges.

To keep your knives in top shape, hone them weekly to realign the blade, and sharpen them every 1–2 months to remove dull metal. Maintaining a consistent 10–15 degree angle during sharpening is key to preserving the razor-sharp edge.

Start with a 1000-grit whetstone, soaking it for 10–15 minutes before use. Use steady, even strokes during sharpening. After each use, clean your knives with soapy water, dry them thoroughly, and store them properly. If you’re using carbon steel knives, apply a light coat of oil after cleaning to prevent rust.

Finally, pair your sharp knives with a cutting surface that protects both the blade and the food.

Cutting Boards: Materials and Hygiene

The cutting surface is just as important as the knife itself. It plays a major role in maintaining your knife’s edge and ensuring food safety. Choosing between wood and plastic cutting boards depends on your priorities for knife care, hygiene, and upkeep.

Wooden cutting boards are gentle on knife edges, helping to maintain their sharpness. Hardwoods like maple, walnut, cherry, and teak are durable and naturally resist bacteria due to their antimicrobial properties.

"Whether you’re slicing delicate fish or chopping sturdy vegetables, a good wooden cutting board makes all the difference. To keep your cutting boards in top condition and hygienic, proper maintenance is very important." – Sushi Rik, Sushi Chef and Founder of the School of Sushi

Plastic cutting boards are easy to clean and sanitize. High-quality options made from materials like high-density polyethylene (HDPE) or polypropylene (PP) are resistant to bacteria. Many plastic boards are dishwasher-safe, making deep cleaning a breeze.

To prevent cross-contamination, use separate boards for raw fish, meat, vegetables, and cooked food.

For wooden boards, wash them with mild soap and warm water, dry them thoroughly, and oil them regularly with food-grade mineral oil or beeswax. For deeper cleaning, a 1:1 vinegar-water solution can disinfect and remove odors. Replace plastic boards once they develop deep knife marks that are hard to clean.

Store your cutting boards in a dry place and check them regularly for wear. Avoid exposing wooden boards to direct sunlight or heat, and replace any board that shows excessive damage or wear.

Rice Preparation Tools

Great sushi starts with perfectly prepared rice, and achieving that consistency means using the right tools. Just like a sharp knife shapes your ingredients, these rice tools lay the foundation for authentic sushi.

Rice Cookers: Precision Made Easy

A reliable rice cooker is key to consistently perfect sushi rice. While you can use the stovetop, rice cookers simplify the process and deliver dependable results every time.

Modern rice cookers often feature fuzzy logic, a technology that automatically adjusts cooking times and temperatures to account for slight measurement errors, ensuring flawless rice. Some models even include induction heating and pressure cooking for added precision.

If you’re serious about sushi, look for a rice cooker with a dedicated sushi rice setting. This feature fine-tunes cooking to achieve the ideal texture and moisture level. Other helpful features include a non-stick pan, a dependable warm function, a timer, and clear water line markings for foolproof operation.

Here are some popular options across different price ranges:

  • Beginner-Friendly: The Aroma Housewares ARC-914SBD ($30–$40) is a solid entry-level choice.
  • Mid-Range: The Zojirushi NHS-06 ($50–$60) offers compact reliability with a 3-cup capacity.
  • Premium Models: The Zojirushi Neuro Fuzzy NS-ZCC10 ($190–$210) is highly regarded for its advanced fuzzy logic, while the Tiger JKT-D10U ($240–$260) stands out for its durability and sleek design.
  • Professional Grade: The Cuckoo CRP-P1009SW ($270–$290) offers extensive customization and a 10-cup capacity – perfect for large-scale sushi-making. In fact, Janny Man’s Asian Fusion restaurant "The Mandarin" used this model in 2025 to prepare restaurant-quality sushi rice for large groups.

When choosing a rice cooker, consider its capacity. Small 3-cup models are ideal for couples, while larger 8–10-cup models work well for families or hosting.

To get the best results, rinse your rice 4–8 times in cold water until it runs clear, removing excess starch. Use the cooker’s water line indicators or the "finger method" – the water should reach your first knuckle above the rice level. Once cooked, let the rice rest for 10–15 minutes to absorb steam and achieve the perfect texture.

After cooking, traditional tools take over to refine the rice.

Hangiri and Shamoji: The Art of Rice Mixing

Once your rice is cooked, traditional tools like the hangiri (a wooden rice mixing bowl) and shamoji (a rice paddle) play a key role in perfecting its flavor and texture. The hangiri’s wide, flat base allows you to spread the hot rice for quick cooling while adding sushi seasoning. The wood absorbs excess moisture, preventing sogginess and keeping the rice at its ideal hydration level.

Most traditional hangiri are made from cypress or cedar with copper or stainless steel hoops. These materials offer natural antibacterial properties and add a subtle aroma to the rice. A quality hangiri typically costs at least $75, with prices ranging from $28 to $230 depending on size and craftsmanship.

The shamoji works hand-in-hand with the hangiri. The proper mixing technique involves a gentle side-to-side cutting motion, which coats each grain with seasoning without crushing it. This slicing and folding motion ensures even seasoning and preserves the rice’s texture.

Preparation is important for these tools. Soak your hangiri in water for at least 30 minutes before use to prevent sticking and reduce absorption of the vinegar mixture. For new hangiri, season them by soaking in a rice vinegar solution overnight. While mixing, fan the rice to cool it quickly and give it the characteristic shine sushi rice is known for. Ideally, sushi rice should be served at 98.6°F (37°C). To keep it fresh, cover the rice with a damp cloth between uses.

Maintaining these tools is simple: wash your hangiri with warm water only – avoid soap, as it can damage the wood. Dry it thoroughly before storing it in a well-ventilated area, away from direct sunlight. If the stainless steel hoops loosen due to wood contraction, flip the hangiri upside down and gently push the hoops back into place, using a mallet if needed.

sbb-itb-7b591fe

Rolling and Shaping Tools

When it comes to sushi-making, having the right rolling tools can take your creations from looking homemade to professional-grade. Once your rice is perfectly seasoned and ready, these tools help transform it into beautifully crafted sushi rolls.

Bamboo Mats: The Classic Choice for Rolling Sushi

The bamboo rolling mat, or makisu, is a must-have for anyone serious about sushi. Thanks to its unique design – flexible in one direction and firm in the other – it allows for straight, tightly packed rolls that hold their shape well. The tight weave of the bamboo slats is especially useful for creating compact maki rolls.

And here’s the best part: quality bamboo mats are incredibly affordable. Some popular options include:

  • Makisu Bamboo Sushi Mat (10.5"): ~$2.20, rated 4.7/5
  • Emperor’s Select Natural Bamboo Sushi Rolling Mat (9.5" x 9.5"): ~$1.00, rated 4.8/5 (based on 32 reviews)
  • Wtpncil 4-piece set: ~$6.99, rated 4.4/5

Bamboo mats aren’t limited to sushi-making. They’re also handy for shaping soft foods like Japanese omelets, adding versatility to your kitchen tools.

Pro Tip: Before spreading rice on your mat, cover it with plastic wrap. This simple step prevents rice from sticking to the bamboo and makes cleanup a breeze. It’s especially helpful for inside-out rolls like California rolls, where rice covers the outer layer of the nori.

Caring for Your Bamboo Mat:

  • Wash and dry it thoroughly before the first use.
  • After each session, rinse it with warm water (no harsh detergents) and dry it completely.
  • Store it away from heat, and if you use it frequently, consider replacing it periodically to maintain hygiene.

If rolling sushi by hand feels daunting, sushi molds offer a convenient alternative for consistent results.

Sushi Molds: Precision Made Easy

For those who want uniformity without the practice required for traditional rolling, sushi molds are a fantastic option. These molds come in various shapes – nigiri, circles, triangles, and more – making it easy to experiment with creative presentations.

Bamboo Mats vs. Molds:

  • Bamboo mats are favored by professionals for their ability to evenly distribute rice and their natural flexibility during rolling. They also have antimicrobial properties, though they require more meticulous cleaning and maintenance.
  • Sushi molds, typically made of plastic, are easier to clean and more resistant to moisture. However, they’re less durable, and scratches on the surface can trap bacteria over time.

Cost Comparison:

  • Bamboo mats: ~$0.80 to $8.80
  • Plastic molds: ~$0.30 to $4.70

Ultimately, the choice depends on your priorities. Bamboo mats are ideal for those aiming for restaurant-quality sushi, while molds are great for casual home cooks seeking convenience. Whichever tool you choose, proper care is essential. For wooden tools like bamboo mats, applying food-safe mineral oil occasionally can help prevent drying and extend their lifespan.

Using the right rolling tools is a key step toward creating sushi that looks as good as it tastes. Whether you go traditional with a bamboo mat or opt for the ease of molds, these tools set the stage for picture-perfect rolls.

Presentation and Finishing Tools

Making sushi that tastes amazing is only part of the challenge – how you present it can take your dish to the next level. With the right tools for plating and finishing, you can transform your sushi into a visual masterpiece. The secret? Precision and attention to detail. Every element on the plate should serve a purpose, whether it’s enhancing flavor, texture, or visual appeal.

Once you’ve nailed the rolling and cutting process, the final step is all about professional presentation.

Plating Tools and Techniques

Moribashi, or plating chopsticks, are a must-have for placing garnishes and sushi pieces with precision. Unlike standard chopsticks, these are longer and have fine tips, giving you better control for detailed work.

Plating tongs, like the Mercer Culinary Straight Precision Plus models, are another great option. These come in two versions: an 11-3/4" model for $10.99 and a Fine Tip version for $9.89. They allow you to position delicate sushi components without damaging them.

Squeeze bottles are perfect for adding sauces with precision. Whether it’s sriracha mayo, eel sauce, or spicy mayo, these bottles help you create clean, artistic designs. The OXO Chef’s Squeeze Bottle (Small) costs about $5.95, or you can grab a 2-piece set for $11.95.

Stacking rings and geometric molds are excellent for adding structure and height to your plating. For example, Mercer Culinary offers stainless steel ring molds in various sizes. A 3" x 1.75" ring costs $5.50, while a 2" x 3" version is priced at $5.44. These tools are ideal for keeping loose ingredients like diced avocado or cucumber neatly contained.

Silicone brushes are handy for applying glazes or cleaning up excess moisture on plates. The Mercer 6-Piece Silicone Brush Set, priced at $42.99, includes brushes in different sizes for various tasks – from delicate sauce work to tidying up plate edges.

Pro tip: Use white plates for your sushi presentation. The neutral background makes the vibrant colors of sushi ingredients – like the green of avocado, the orange of salmon, and the deep red of tuna – stand out beautifully.

Slicers and Garnishing Tools

Clean cuts and precise garnishing are just as important as plating. Avocado slicers are great for creating consistent slices for rolls or fan-shaped garnishes. These tools ensure uniform thickness, giving your dish a polished look.

Garnishing knives are perfect for crafting intricate designs on vegetables and other garnishes. Whether you’re making cucumber flowers, radish roses, or creative carrot cuts, these knives give you the precision needed to elevate your presentation.

The cutting technique itself is crucial. Dominic Audy, an expert with over 25 years of experience cooking Japanese food at home, emphasizes the importance of a sharp blade:

"You need a super sharp knife. One-sided Japanese blades are definitely the best for this task… but otherwise something with a thin blade will do a better job than a too wide chef knife."

For the best results, moisten your knife blade with vinegared water before slicing. Use a single, smooth motion for each cut – avoid sawing back and forth – and wipe the blade with a damp cloth between slices. Aim for uniform pieces, typically about 1 inch thick.

The yanagiba knife is a standout tool for sushi preparation. As Yakushi Knives explains:

"The Yanagiba knife works way beyond the reach and influence of basic slicing and stands as the perfect blade that creates pristine sashimi and sushi matching traditional Japanese standards."

This long, thin, single-beveled knife is ideal for achieving the clean cuts that make sashimi and nigiri look professionally crafted.

Effective plating should strike a balance: simple enough to replicate consistently but stylish enough to impress. Consider the harmony of flavors, textures, colors, and techniques on the plate. Keep garnishes functional and relevant to the dish, and always clean your plates of smudges or stray food before serving. These small details are what separate amateur presentations from professional ones.

Conclusion: Building Your Sushi Toolkit

When building your sushi toolkit, take it step by step and avoid unnecessary spending. Start with the essentials, and as your skills improve, gradually expand your collection. As sushi chef Jin-san wisely shares:

"You see, I have several Sashimi knives that cost $1,000, $2,000, but you know what? Neither of them hardly makes an appearance at the sushi bar. These $15 knives do the work just fine because I sharpen them well."

This advice underscores a crucial point: technique and proper maintenance often outweigh the need for high-priced equipment. A well-maintained, budget-friendly knife can perform just as well as an expensive one.

Begin with core tools like a sharp gyuto, a dependable rice cooker, a bamboo rolling mat, a sturdy cutting board, and a shamoji. These basics set the foundation for mastering advanced techniques discussed throughout this guide.

That said, quality tools can enhance your experience. For instance, professional chefs report that properly maintained Japanese knives can speed up prep work by as much as 40% compared to standard Western knives. Japanese knives, crafted with harder steel (typically rated 58–65 on the Rockwell scale), also maintain their sharpness longer, reducing the need for frequent sharpening.

Sushi-making is about more than just technique – it’s an interactive and enjoyable process. As Yuji Haraguchi, owner of Osakana, puts it:

"Making sushi is fun and interactive. It’s a great way to have a party with friends or family."

With the right tools and consistent care, what might seem daunting becomes an engaging and rewarding activity. Start with the basics, maintain your equipment diligently, and expand your toolkit as your confidence grows. A well-cared-for set of tools will always outperform neglected, premium gear, helping you create authentic, high-quality sushi every time.

FAQs

What tools do I need to start making sushi at home as a beginner?

To start making sushi at home, you’ll need some key tools to get the job done:

  • A bamboo rolling mat (makisu) to shape your sushi rolls
  • A sharp knife for cleanly slicing fish and vegetables
  • A rice cooker or a sturdy pot to prepare sushi rice
  • A rice paddle (shamoji) to mix and spread the rice evenly
  • Sheets of nori (seaweed) for wrapping your rolls

Additionally, having plastic wrap can make rolling easier, and using high-quality rice vinegar will help you season your sushi rice perfectly. With these tools, you’ll be all set to create sushi that looks and tastes just as good as what you’d find in a restaurant!

How can I keep my sushi knives sharp and in great condition?

To keep your sushi knives in top shape, always wash them by hand using warm water and mild soap immediately after use. Avoid soaking them, as this can cause damage. Once cleaned, dry the blades thoroughly with a soft cloth to prevent rust or staining.

Sharpening your knives regularly is key. Use a whetstone, starting with a medium grit (about 1000) to sharpen, and finish with a fine grit (3000–6000) to polish. Aim for a sharpening angle between 10° and 15° to achieve the best edge.

Store your knives in a dry, well-ventilated place, such as a knife block or sheath, to prevent scratches. If you have carbon steel blades, applying a thin layer of food-grade mineral oil can help protect them from rust. With proper care, your sushi knives will stay sharp and ready for flawless cuts!

What’s the difference between a bamboo rolling mat and sushi molds, and which one is better for beginners?

The key difference between a bamboo rolling mat (makisu) and sushi molds comes down to their purpose and ease of use. A bamboo mat gives you more control and flexibility, letting you roll sushi tightly and adjust the amount of filling to your liking. While it does take some practice to get the hang of it, the results are more traditional and visually polished. The downside? Cleaning can be a hassle since rice tends to get stuck in the small gaps between the bamboo slats.

On the flip side, sushi molds are designed with beginners in mind. They simplify the process, making it easy to create uniform shapes without much effort or skill. However, they have their limitations – overfilling the mold can lead to sushi that falls apart, and there’s less room for customizing the filling.

If you’re just starting out, sushi molds are a convenient way to dive in. But for those looking to refine their technique and make authentic rolls, a bamboo mat is worth the effort.

Related posts