Archive | Uncategorized RSS feed for this section

10 Best Sushi Knives for Home Cooks

10 Best Sushi Knives for Home Cooks

Here’s the deal: A sharp, well-made sushi knife can make all the difference in slicing fish, prepping vegetables, and creating clean, precise cuts. Whether you’re a beginner or an experienced home cook, there’s a knife for every budget and skill level.

Quick Picks:

  • Best for Beginners: Victorinox Fibrox 8" Chef’s Knife ($49.95) – Affordable, versatile, and easy to maintain.
  • Best for Precision: Dalstrong Phantom 9.5" Yanagiba ($199.99) – Single-bevel blade for perfect sashimi slices.
  • Best All-Purpose: Shun Classic 8" Chef’s Knife ($149.95) – Great for fish, vegetables, and sushi rolls.
  • Budget-Friendly Sashimi Knife: Kai Wasabi Black Yanagiba 8.25" ($34.59) – A steal for sashimi enthusiasts.
  • Best for Vegetables: Tojiro DP Nakiri 6.5" ($79.95) – Ideal for precise vegetable prep.

What to Look For:

  • Blade Type: Single-bevel (for precision) vs. double-bevel (for versatility).
  • Steel: High-carbon steel stays sharper but needs care; stainless steel is low-maintenance.
  • Handle Comfort: Ensure a secure grip for safety and control.

Quick Comparison Table

KnifePriceBlade TypeBest ForMaintenance Level
Shun Classic 8" Chef’s Knife$149.95Double-bevelAll-purpose sushi prepModerate
MAC Professional 8" Gyuto$139.95Double-bevelFish slicing, rollsModerate
Tojiro DP Nakiri 6.5"$79.95Double-bevelVegetable prepLow
Misono UX10 8.2" Gyutou$189.00Double-bevelPrecision fish workLow-Moderate
Dalstrong Phantom 9.5" Yanagiba$199.99Single-bevelSashimi slicingHigh
Sakai Takayuki 165mm Deba$165.00Single-bevelFish filletingHigh
Victorinox Fibrox 8" Chef’s$49.95Double-bevelAll-purpose, budgetLow
Korin Nickel Damascus Sujihiki$275.00Double-bevelPrecise slicingModerate-High
TUO Boning Knife 7"$89.99Double-bevelFish preparationLow-Moderate
Kai Wasabi Black 8.25" Yanagiba$34.59Single-bevelSashimi, raw fishModerate

Summary:

Choose a knife based on your needs and skill level. Beginners can start with affordable, versatile options like the Victorinox Fibrox or Tojiro DP. For advanced sushi enthusiasts, single-bevel knives like the Dalstrong Phantom or Sakai Takayuki Deba offer unmatched precision. Proper care – hand washing, drying, and regular sharpening – is crucial to keep your knife in top shape.

Best KNIFE for SUSHI – Which One’s Right for You? with The Sushi Man

1. Shun Classic 8-Inch Chef’s Knife

Shun

The Shun Classic 8-Inch Chef’s Knife blends Japanese craftsmanship with modern innovation, making it an excellent all-purpose tool for sushi enthusiasts. Whether you’re slicing fish or prepping vegetables, this knife is a reliable companion for home cooks aiming to perfect their sushi skills.

Blade Construction and Performance

Crafted with precision in mind, the blade features a VG-MAX cutting core surrounded by 68 layers of stainless Damascus cladding. This design creates a razor-sharp 16° double-beveled edge with a Rockwell hardness of 60–61. Weighing just 7.2 oz (205 g), it’s lightweight enough to reduce hand fatigue during extended use. The blade’s gentle curve facilitates smooth rocking motions, ensuring safe and efficient slicing while keeping your knuckles out of harm’s way.

Best Uses for Sushi Making

This knife shines in sushi preparation, excelling at tasks like slicing sashimi-grade fish, cutting nori, and prepping vegetables. Its precision-ground, etched blade minimizes sticking, allowing delicate ingredients – like sticky rice and fresh fish – to release cleanly. Its award-winning design is a testament to its quality and functionality.

Care and Maintenance Requirements

Proper care is essential to maintain the knife’s performance. Always hand wash it with warm water and mild soap, avoiding citrus-based cleaners or bleach, and dry it thoroughly to prevent corrosion.

Shun knives are designed for smooth slicing motions – avoid using them for up-and-down chopping.

To keep the blade sharp, regularly hone it with a Shun Combination Honing Steel. Use a wooden or medium-firm synthetic cutting board to protect the edge, and avoid cutting frozen foods, bones, or other hard materials to prevent chipping.

Value and Performance

At $169.95 (down from $213.00), this knife delivers exceptional performance for its price. It boasts a 4.8-star rating from 64 reviews, with 97% of users recommending it. Both home cooks and professionals praise its sharpness, elegant finish, and overall reliability. Plus, Shun offers a lifetime free sharpening service (customers only pay for shipping), adding to its long-term appeal.

2. MAC Knife Professional Series 8" Gyuto

The MAC Knife Professional Series 8" Gyuto is a shining example of Japanese craftsmanship meeting modern culinary needs. Lightweight and meticulously designed, it’s a fantastic tool for anyone passionate about making sushi at home. Let’s dive into its standout features and why it’s a favorite among sushi enthusiasts.

Blade Construction and Steel Quality

The MAC MTH-80 is crafted from molybdenum-enhanced high-carbon steel, which undergoes sub-zero tempering for added durability. Its 7.88-inch blade, measuring 2.5 mm in thickness, extends to an overall length of 12.63 inches and boasts a Rockwell hardness rating of 59. What sets this knife apart is MAC’s signature grinding technique, which gives the blade a V-shaped tapered profile. Each side is sharpened to a precise 15-degree angle, resulting in a razor-sharp 30-degree edge.

Specialized Features for Sushi Preparation

This knife is packed with features tailored for sushi preparation. The dimpled (Granton) blade surface minimizes sticking, which is especially useful when working with delicate fish or sticky sushi rice. Weighing just 6.5 oz, it’s much lighter than most German knives, making it easier to handle during intricate tasks. Its narrow blade and flatter edge geometry are perfect for slicing sashimi-grade fish or performing rock chop techniques.

The knife also features a Pakkawood handle, which offers a comfortable, secure grip. Whether you’re creating paper-thin slices of sashimi or finely julienning vegetables, this knife delivers precision and control – essential for maintaining the integrity of your ingredients.

Professional Recognition and Performance

The MAC Mighty MTH-80 has earned high praise from professionals and publications alike. It’s been named the top chef’s knife by The New York Times Wirecutter, CNET, Epicurious, and Food & Wine. Esteemed chefs like Thomas Keller of Per Se and Eric Ripert of Le Bernardin trust MAC knives in their professional kitchens.

"The Mac has a very nice evenly balanced feel to it between the weight of the blade and the handle." – Hunter Lewis, editor-in-chief, Food & Wine

This balance and precision make it a standout choice for home sushi chefs as well.

Maintenance Requirements

Proper care is essential to keep this knife in top condition. Hand washing and thorough drying are a must to prevent rust or staining. Avoid cutting bones, frozen foods, or hard squash to protect the delicate edge. Regular honing with a ceramic rod will help maintain sharpness, and professional sharpening once or twice a year ensures it performs like new.

"It’s almost a disservice to say any Japanese brand is low-maintenance. You can’t just put them gently in the sink and leave them with the water." – Michael Behn of Moshi Moshi Knife Sharpening

Value and Customer Satisfaction

At $154.95, the MAC Professional Series offers an impressive combination of quality and affordability. With a 4.7 out of 5-star rating from 1,895 Amazon reviews, customers frequently highlight its long-lasting sharpness and professional-grade performance. Whether you’re a home cook or a seasoned chef, this knife is an excellent investment for sushi preparation.

3. Tojiro DP Nakiri 6.5" Vegetable Knife

The Tojiro DP Nakiri 6.5" Vegetable Knife is a must-have for anyone serious about precision in vegetable preparation. Its rectangular blade is specifically designed to handle vegetables with ease and accuracy, making it a fantastic tool for home sushi chefs. Unlike the all-purpose knives mentioned earlier, this one is all about precision and efficiency.

Blade Construction and Steel Quality

This knife features a VG10 alloy core, wrapped in 13 layers of chrome stainless steel for added durability and protection. The VG10 steel is known for its sharpness and resistance to wear, while the stainless steel cladding enhances its longevity. With a Rockwell hardness rating of 60–61 HRC, it’s built to keep its edge sharp, even with regular use.

The blade itself is 6.5 inches long, with a 2 mm spine and a weight of 7.2 oz. Its double-bevel edge, sharpened to a fine 9–12 degrees per side, ensures an incredibly sharp cutting experience.

Designed for Vegetable Prep

What sets the Tojiro DP Nakiri apart is its focus on vegetable preparation. Its tall, rectangular blade is perfect for vertical chopping, while the flat edge profile makes smooth chopping motions effortless. Whether you’re slicing vegetables paper-thin or cutting uniform julienne strips, this knife delivers precision every time. The handle includes an internal weight plate, ensuring the knife stays balanced for better control during intricate tasks.

Trusted by Professionals and Home Cooks

The Tojiro DP series is widely recognized for offering top-notch performance at a reasonable price – around $91.00. Both professional chefs and home cooks praise its sharpness, balance, and reliability.

Maintenance and Care

To keep the knife in peak condition, hand wash it with mild soap, dry it immediately, and avoid dishwashers. Regular sharpening with a medium-grit whetstone – about once or twice a month – will help maintain its razor-sharp edge. Always use wooden or soft plastic cutting boards to prevent the blade from dulling prematurely, and steer clear of hard surfaces like glass or granite.

Thanks to its VG10 core and stainless steel cladding, the knife is relatively easy to maintain. However, like all high-quality Japanese knives, it benefits from careful handling and proper upkeep.

4. Misono UX10 8.2" Gyutou

The Misono UX10 8.2" Gyutou is a standout tool for anyone serious about making sushi at home. Designed for precision and performance, this knife blends traditional Japanese craftsmanship with the reliability of Swedish stainless steel. It’s a top-tier choice for home cooks who want their sushi-making experience to rival that of a professional kitchen.

High-Quality Swedish Steel

At the heart of the Misono UX10 is its blade, crafted from Sandvik 19C27 Swedish stainless steel, a material known for its purity and sharpness. This steel ensures a razor-sharp edge that holds up over time, thanks to its evenly distributed carbides. With a Rockwell hardness of 59–60 HRC, the blade offers excellent edge retention, reducing the need for frequent sharpening. Weighing just 5.8 oz (165 g) and featuring an ultra-thin 0.07-inch spine, the knife strikes the perfect balance between durability and ease of use.

Unique Edge Design

What sets this knife apart is its 70/30 asymmetrical edge geometry, which mirrors the single-bevel design found in traditional Japanese knives. This unique edge not only enhances precision but also makes the knife versatile enough for various cutting tasks. The convex grind reinforces the edge, improving both sharpness and durability. However, this design does require specific sharpening techniques. Hollow-ground dimples along the blade help reduce drag, making it easier to achieve smooth, clean slices – perfect for sashimi and other delicate cuts.

Professional Performance in Your Kitchen

The Misono UX10 has earned glowing reviews from users, boasting a 4.7 out of 5-star rating on Amazon from 154 customers. Every reviewer recommends it, which speaks volumes about its quality. Grace Kelly, Senior Editor at Serious Eats, calls it a "STUNNER" with an "elegant blade" that is "super, super sharp", underscoring its appeal to both professionals and home cooks.

Proper Care and Maintenance

To keep the Misono UX10 performing at its best, follow these care tips:

  • Always hand wash and dry the knife immediately after use with a soft cloth.
  • Avoid dishwashers, as they can damage the blade and handle.
  • Refrain from cutting bones or frozen foods, as the hard steel may chip.
  • Use Japanese whetstones for sharpening, but consider professional sharpening if you’re not familiar with maintaining a convex grind.
  • Apply a thin layer of mineral oil for long-term storage to prevent corrosion.

The knife’s black pakkawood handle, paired with a nickel silver bolster, is water-resistant and requires minimal upkeep.

A Worthwhile Investment

Priced between $192 and $399.50, depending on the retailer, the Misono UX10 is an investment in quality. Its professional-grade design and performance make it a favorite among dedicated home cooks. For left-handed users, Misono offers custom versions with a left-handed edge geometry. This knife bridges the gap between professional sushi tools and home kitchen convenience, delivering the precision and reliability needed to create exceptional sushi at home.

5. Dalstrong Phantom Series 9.5" Yanagiba

The Dalstrong Phantom Series 9.5" Yanagiba brings professional sashimi slicing to your kitchen. Specifically crafted for creating clean, precise slices of raw fish, this knife makes it possible to achieve restaurant-quality results at home. With its 9.5-inch blade, it strikes the perfect balance – long enough for smooth cuts, yet easy to handle even in smaller spaces.

Traditional Single-Bevel Design

This Yanagiba features a single-bevel edge, sharpened on one side while the other side is slightly concave. This design not only enhances precision but also adds a natural non-stick quality, allowing fish to release effortlessly. Originating from the Kansai region of Japan, the Yanagiba is a cornerstone of Japanese culinary tools.

"The Yanagiba knife is best for slicing raw fish, especially for the preparation of sashimi and nigiri sushi dishes where the goal is to have cut surfaces that are smooth, shiny and perfectly even in order to highlight the delicate flavors and textures of the fish."

  • Japanese Knives Guide

The name "Yanagiba", meaning "willow leaf blade", reflects its long, slender shape, which typically ranges from 8.3 to 14.2 inches. This unique design ensures exceptional slicing precision and performance.

Exceptional Slicing Performance

What makes the Yanagiba stand out is its ability to slice through fish in a single, fluid motion without the need for sawing. By cutting on the pull stroke, it minimizes cell damage, leaving the fish’s surface smooth and intact.

The Dalstrong Phantom Series uses ice-tempered stainless steel, known for its durability and edge retention. The high chrome content resists stains and reduces food sticking, while the knife’s balanced weight and slight heft make it easy to glide through fish – even those with tougher bones. Beyond sashimi, the pointed tip and slim profile make it versatile for tasks like filleting small to medium fish and removing skin from fillets, reducing the need for multiple knives during preparation.

Learning the Technique

Using a single-bevel knife like the Yanagiba requires a shift in cutting technique. Right-handed users should pull the knife slightly to the left while slicing, while left-handed users will need a specially designed left-handed version for proper alignment. The knife’s balanced design helps guide your cuts along the natural contours of the fish, making practice and precision key to achieving the best results.

Proper Care and Maintenance

To keep this blade in peak condition, careful maintenance is essential. Hand wash it immediately after use with warm water and mild soap, dry it thoroughly, and occasionally apply a thin layer of mineral oil to protect the blade. Always store it in a protective sheath to preserve its delicate edge.

Sharpening is crucial: use a whetstone every 3 to 6 months, setting the angle between 15–20 degrees. Regular honing with a rod will help maintain alignment between sharpenings. Stick to wooden or plastic cutting boards, and avoid cutting bones, frozen foods, or placing the knife in the dishwasher to prevent damage.

6. Sakai Takayuki 165mm Deba

Sakai Takayuki

The Sakai Takayuki 165mm Deba is a fish-butchering knife that brings the artistry of traditional Japanese craftsmanship right into your kitchen. Priced at $139.00, this blade is hand-forged by master blacksmiths in Sakai – a city with a knife-making legacy that stretches back generations. It’s an exceptional tool for sushi preparation, ensuring clean and precise processing of whole fish for a polished presentation.

Built for the Task of Fish Butchering

This 6.5-inch knife is designed with a thick, wide blade that weighs in at 280 grams (9.9 oz). The spine tapers from 8.3 mm at the base to 2.5 mm at the tip, offering a balance of strength and precision. Forged using Yasuki White Steel and crafted with the kasumi method, it features a single-bevel edge and a Rockwell hardness of 59, ensuring impressive sharpness and durability .

Tailored for Fish Preparation

The Sakai Takayuki Deba excels at tasks like filleting whole fish, cutting through cartilage, and handling light bones with ease. Its pointed tip allows for meticulous work around fish bones and joints, while the blade’s weight simplifies more demanding cuts. In February 2025, sushi chef Mincheol S. shared:

It is a knife that I am very satisfied with in terms of openness, stability, and sharpness.

One reviewer even noted using it in a ramen shop to process salmon, successfully cutting through vertebrae and cartilage. This knife’s ergonomic design complements its performance, making it a reliable choice for professional and home kitchens alike.

Traditional Handle for Comfort and Control

The knife’s U-shaped magnolia wood handle, paired with a water buffalo horn bolster, provides a secure and comfortable grip. This traditional Japanese design ensures excellent balance and control, which is especially important when working with the knife’s substantial weight and performing intricate cuts.

Maintenance Tips for Longevity

Because it’s made of carbon steel, the Sakai Takayuki Deba requires careful upkeep to prevent rust. Always hand wash and dry it immediately after use, and for longer storage, apply a thin coat of food-grade mineral oil . In April 2025, home cook Peter P. commented:

This carbon steel deba knife is fantastic and a joy to use at home. With proper care, this will last decades.

To preserve its edge and finish, use wooden or plastic cutting boards, avoid cutting frozen foods, and sharpen it regularly with a whetstone.

sbb-itb-7b591fe

7. Victorinox Fibrox 8" Chef’s Knife

If you’re looking for a sushi knife that combines affordability with solid performance, the Victorinox Fibrox 8" Chef’s Knife is worth considering. Priced at just $46.34, this knife offers professional-level cutting power without stretching your budget. Its versatility makes it a reliable choice for slicing fish or chopping vegetables for sushi accompaniments.

Stainless Steel Built for Everyday Tasks

Made with high-carbon stainless steel, this knife features a 15° double-bevel edge, ensuring precision for a variety of kitchen tasks. Whether you’re slicing through sushi rolls or filleting salmon, its sharp edge delivers consistent results.

Performance That Stands Out

America’s Test Kitchen has high praise for this knife, highlighting its ability to handle a wide range of tasks with ease:

Our longtime inexpensive favorite remains a pleasure to use. With a sharp, gently curved blade, it effortlessly dispatched every task we set before it, mincing garlic precisely and breaking down chicken and dense butternut squash with authority. Its light weight and rounded spine made it easy to wield for long periods, and its textured plastic handle was comfortable to grip for hands of all sizes.

Thanks to its lightweight design, the knife minimizes hand fatigue, even during extended prep sessions. Whether you’re preparing a quick dinner or tackling a week’s worth of meal prep, this knife is up to the challenge.

Easy Maintenance for Busy Kitchens

One of the standout features of the Victorinox Fibrox is its low-maintenance design. The stainless steel blade resists rust and staining, so you don’t have to worry about the meticulous care often required for carbon steel knives. Its slip-resistant Fibrox handle, made from thermoplastic elastomer, provides a secure grip even when wet. While the knife is NSF certified and dishwasher safe, hand washing with mild soap and warm water is recommended to preserve its edge.

Great Value That Lasts

With a 4.7-star rating from over 1,150 Amazon reviews, this knife is built to endure. According to the manufacturer, its lifespan is up to 60% longer than that of standard knives. The edge holds up for 1–2 weeks of heavy use, and the forgiving steel makes sharpening straightforward. For home cooks who want dependable performance at an affordable price, the Victorinox Fibrox 8" Chef’s Knife is a smart pick, perfect for sushi prep and beyond.

8. Korin Nickel Damascus Sujihiki 9.4"

The Korin Nickel Damascus Sujihiki 9.4" is built for precision, delivering paper-thin slices perfect for sashimi and sushi rolls. Its long, thin blade glides effortlessly through delicate ingredients, ensuring smooth, uninterrupted cuts. Let’s take a closer look at its construction and care requirements.

A Blade Forged with Damascus Steel

What sets this knife apart is its Damascus steel construction, a hallmark of durability and sharpness. The blade is crafted from multiple layers of steel, folded and fused to create a strong, razor-sharp edge. This meticulous process enhances the blade’s consistency, ensuring it performs at a professional level. With a Rockwell hardness rating of 60–63, it embodies the precision and sharpness synonymous with Japanese knives.

Precision Cutting for Sushi and More

The 9.4-inch blade is designed for precision slicing, making it an excellent choice for sushi and sashimi preparation. Its thin profile allows for single, fluid strokes that minimize drag, reducing the risk of tearing delicate fish like salmon or tuna. Beyond sushi, it’s equally effective for carving cooked meats, offering versatility in the kitchen.

Caring for Your Damascus Steel Knife

Owning a Damascus steel knife requires a bit more effort, but the payoff is well worth it. Here’s how to keep your Sujihiki in peak condition:

  • Cleaning: Always hand wash and dry the knife immediately after use to prevent rust or staining.
  • Oiling: Apply a food-safe mineral oil to the blade regularly to maintain its finish.
  • Sharpening: Use a whetstone to sharpen the knife, preserving the integrity of its layered construction. Stick to a 20° angle and apply even pressure.
  • Honing: Between sharpening sessions, use a honing steel to keep the edge aligned.
  • Storage: Store the knife in a protective sheath or knife block to protect both the blade and the intricate Damascus pattern.

With proper care, the knife only requires sharpening every six months to a year, depending on usage. While it demands a higher level of maintenance than standard stainless steel knives, the precision and longevity it offers make it a worthwhile investment for sushi enthusiasts and home chefs alike.

9. TUO Boning Knife 7"

The TUO Boning Knife 7" is a must-have for anyone serious about sushi-making at home. Though advertised as 7 inches, its actual blade length is 6.5 inches, offering precise control for deboning and filleting. Its sharp, pointed tip and slender blade are designed to navigate around bones with ease, making it a perfect addition to your sushi knife collection.

Flexible Blade for Greater Control

The flexible blade adapts to the natural contours of fish, allowing for maximum yield and precision. This flexibility gives you better control during delicate tasks like removing fish skin or working around irregularly shaped bones. Whether you’re filleting fish for sashimi or preparing a whole fish for sushi rolls, this knife’s adaptability ensures clean, efficient cuts without unnecessary waste.

Precision for Sushi Perfection

The pointed tip is ideal for piercing fish skin, while the slim blade ensures clean, precise cuts perfect for sashimi. It’s particularly effective for removing pin bones from salmon or working with smaller fish, maintaining the delicate texture and appearance of the flesh with every slice.

Maintenance Tips for Longevity

To keep your knife in peak condition, wash it with warm, soapy water using a nonabrasive sponge, and dry it thoroughly – especially near any wooden parts. Store it safely on a magnetic strip or in a sheath to protect the edge. Sharpen the blade with a whetstone every 2–3 months and hone it before each use.

When sharpening, avoid electric sharpeners, as they can damage the thin blade. Instead, gently run the blade along a whetstone until it achieves a smooth, sharp edge. With proper care, this knife will perform impeccably – even slicing effortlessly through something as delicate as a ripe tomato.

The TUO Boning Knife’s precision and flexibility make it an indispensable tool for detailed sushi preparation, perfectly complementing other sushi knives in your kitchen.

10. Kai Wasabi Black Yanagiba 8.25"

The Kai Wasabi Black Yanagiba 8.25" is a standout choice for slicing sashimi, offering professional-grade performance at a wallet-friendly price. Available for just $34.59 on Amazon, this Japanese-made knife is perfect for home cooks aiming to refine their sushi-making skills. Let’s explore what makes it such a reliable tool for both beginners and seasoned chefs.

Traditional Single-Bevel Edge for Precision

This knife features a traditional single-bevel design, sharpened to an exact 16° angle. Its flat, unsharpened side ensures perfect guidance with every cut, allowing the knife’s weight to create flawlessly thin sashimi slices as it glides through fish.

"This is the quintessential sushi slicing knife" – Kai Housewares

Durable High-Carbon Stainless Steel Blade

The blade is crafted from high-carbon stainless steel with a hardness rating of 58.0 HRC, ensuring excellent edge retention and resistance to corrosion. At 8.25 inches, it offers the ideal length for handling delicate sashimi cuts with ease.

Comfortable and Hygienic Handle Design

The D-shaped handle, made from a blend of polypropylene and bamboo powder, provides a secure and comfortable grip. Its natural antibacterial properties add an extra layer of hygiene, making it both practical and safe for food preparation.

What Users Are Saying

User feedback speaks volumes about the knife’s quality. With an impressive 4.5 out of 5 stars from 3,411 Amazon reviews, customers often highlight its sharpness and craftsmanship. Professional chef Serenidy P. noted in January 2024 that it "makes ribbons of fish for sushi", while another reviewer, Clay H., praised the single-bevel edge for its precision and effortless performance.

Care Tips for Longevity

To keep this knife in peak condition:

  • Hand wash with warm water and mild soap, then dry immediately.
  • Store on a magnetic strip or in a protective cover.
  • Sharpen regularly with a Japanese whetstone at a 15–20° angle.
  • Use wooden or plastic cutting boards to prevent damage.
  • Apply food-safe camellia oil for added rust protection.

The Kai Wasabi Black Yanagiba 8.25" combines affordability with exceptional quality, making it an excellent addition to any home cook’s kitchen arsenal. Whether you’re a beginner or a seasoned sushi enthusiast, this knife is a game-changer for preparing sashimi and sushi with precision.

Comparison Table

The table below highlights the key features of 10 popular sushi knives, making it easier to find one that fits your sushi preparation needs.

KnifePriceBlade MaterialEdge TypeLengthBest ForMaintenance Level
Shun Classic 8" Chef’s Knife$149.95VG-MAX DamascusDouble-bevel8"All-purpose sushi prepModerate
MAC Professional 8" Gyuto$139.95High-carbon steelDouble-bevel8"Fish slicing, roll cuttingModerate
Tojiro DP 6.5" Nakiri$79.95VG-10 stainlessDouble-bevel6.5"Vegetable preparationLow
Misono UX10 8.2" Gyutou$189.00Swedish stainless steelDouble-bevel8.2"Precision fish workLow-Moderate
Dalstrong Phantom 9.5" Yanagiba$199.99High-carbon steelSingle-bevel9.5"Sashimi slicingHigh
Sakai Takayuki 165mm Deba$165.00White Steel #2Single-bevel6.5"Fish filleting, deboningHigh
Victorinox Fibrox 8" Chef’s$49.95Stainless steelDouble-bevel8"Budget-friendly all-purposeLow
Korin Nickel Damascus 9.4" Sujihiki$275.00Damascus steelDouble-bevel9.4"Precise slicingModerate-High
TUO 7" Boning Knife$89.99German steelDouble-bevel7"Fish preparationLow-Moderate
Kai Wasabi Black 8.25" Yanagiba$34.59High-carbon stainlessSingle-bevel8.25"Sashimi, raw fishModerate

Single-bevel knives, like the Dalstrong Phantom and Sakai Takayuki Deba, deliver cleaner, precise cuts, ideal for tasks like sashimi slicing or filleting. However, they demand more skill and upkeep. On the other hand, double-bevel knives, such as the Shun Classic and MAC Professional, are easier to use and more versatile, making them great for a variety of sushi prep tasks.

When it comes to materials, high-carbon steel blades offer sharper edges but require diligent maintenance to prevent rust. Stainless steel knives, like the Victorinox Fibrox, are more forgiving and easier to care for, though they may not hold their edge as long.

Prices range widely, from $34.59 for the Kai Wasabi Black to $275.00 for the Korin Nickel Damascus Sujihiki. For most home chefs, the sweet spot lies between $80 and $150, where options like the Tojiro DP and MAC Professional strike a good balance between quality and ease of care.

If you’re looking for a specialized tool for tasks like filleting fish, consider options like the Sakai Takayuki Deba. For those who prefer a multi-purpose knife, the Shun Classic or Victorinox Fibrox can handle a variety of sushi prep tasks with ease. Choose a knife that matches your skill level and maintenance preferences to make your sushi-making experience enjoyable.

Conclusion

Picking the right sushi knife boils down to aligning your choice with your experience level, budget, and cooking aspirations. Here’s a quick rundown of the options discussed:

  • For beginners, versatile and forgiving knives like the Victorinox Fibrox ($49.95) or the Tojiro DP Nakiri ($79.95) are excellent starting points. These double-bevel knives are easier to maintain and sharpen, making them ideal for those just starting their sushi-making journey.
  • For intermediate cooks, knives like the Shun Classic ($149.95) or MAC Professional Gyuto ($139.95) strike a great balance between quality craftsmanship and ease of upkeep. They offer outstanding performance and durability for home chefs looking to step up their game.
  • For advanced enthusiasts, single-bevel knives such as the Dalstrong Phantom Yanagiba ($199.99) or Sakai Takayuki Deba ($165.00) provide the precision and authenticity of traditional Japanese blades. However, these require more skill and careful maintenance to use effectively.

It’s important to remember that spending more doesn’t always mean better results at home. Even budget-friendly knives can perform beautifully when properly cared for.

Speaking of care, maintaining your knife is crucial for long-term performance. Always hand wash, dry immediately, store safely, and sharpen regularly. Use wooden or plastic cutting boards to protect the blade edge, and never put your knife in the dishwasher.

"Japanese chefs believe our soul goes into our knives once we start using them. You wouldn’t put your soul in a dishwasher!" – Masaharu Morimoto

FAQs

What’s the difference between single-bevel and double-bevel sushi knives, and which one is better for making sushi at home?

The key difference between single-bevel and double-bevel sushi knives lies in how they’re sharpened, which directly affects their performance when preparing sushi.

Single-bevel knives, like the yanagiba, are sharpened on just one side. This unique design allows for exceptionally precise and clean cuts, making them ideal for slicing delicate fish and crafting elegant sushi or sashimi. These knives are a staple in traditional Japanese cooking but are usually designed specifically for right- or left-handed users, which can make them less adaptable.

On the flip side, double-bevel knives are sharpened on both sides, offering greater versatility and being easier to use for most home cooks. While they’re more beginner-friendly and suitable for a variety of kitchen tasks, they don’t quite match the precision of single-bevel knives when it comes to handling fine ingredients for sushi. Ultimately, the choice comes down to your experience level and whether you value precision or ease of use more.

What’s the best way to care for my sushi knife to keep it sharp and rust-free?

To keep your sushi knife in excellent shape, wash it by hand with warm water and mild soap right after using it. Steer clear of dishwashers – they can harm or dull the blade. After washing, dry the knife completely with a soft cloth to avoid rust.

If your knife is made of high-carbon steel, consider adding a thin coat of food-safe mineral oil to the blade after drying for added protection. Store it in a dry, ventilated spot, like on a magnetic strip or inside a sheath, instead of a damp knife block. Regular honing and occasional sharpening will keep the blade sharp and ready for precise sushi slicing.

What should I consider when choosing the best sushi knife for my skill level and cooking style?

When choosing a sushi knife, consider your skill level, the type of sushi you plan to make, and the knife’s features. If you’re just starting out, a Santoku or gyuto knife is an excellent choice. These knives are versatile and user-friendly, making them suitable for a wide range of kitchen tasks. Once you’re more confident, you could try specialized knives like the Yanagiba for precise fish slicing or the Deba for filleting and preparing fish.

Pay close attention to the knife’s length and weight. For sashimi, longer blades (around 8–12 inches) work best, while lighter knives provide better control and precision. You’ll also want to think about the blade material – stainless steel and carbon steel each have their pros and cons in terms of sharpness, durability, and upkeep. Most importantly, pick a knife that feels comfortable in your hand and matches your sushi-making goals.

13 Common Sushi Making Mistakes to Avoid

13 Common Sushi Making Mistakes to Avoid

Making sushi at home can be fun, but it’s easy to make mistakes that ruin your efforts. From choosing the wrong rice to mishandling fish, these errors can lead to sushi that’s messy, unsafe, or just doesn’t taste right. Here’s a quick guide to avoid the most common pitfalls:

  • Rice Issues: Use Japanese short-grain rice (like Koshihikari), rinse it thoroughly, and stick to a 1:1 rice-to-water ratio for cooking.
  • Fish Selection: Only use sushi-grade fish from trusted sources and handle it properly to ensure safety and flavor.
  • Rolling Problems: Don’t overstuff rolls, and apply gentle, even pressure with a bamboo mat.
  • Knife and Tool Care: Use sharp knives for clean cuts and keep your bamboo mats clean to avoid bacteria.
  • Seasoning and Serving: Don’t oversalt rice, misuse wasabi, or dip rice into soy sauce. Serve sushi fresh and at the right temperature.

Top BEGINNER SUSHI MISTAKES (and How to Avoid Them) with The Sushi Man

Getting Sushi Rice Right

Rice is the backbone of sushi – its texture, flavor, and structure depend on getting this essential component just right. Even the freshest fish can’t save sushi if the rice is too sticky, too dry, or crumbles apart. To make sushi that truly shines, you need to master the art of selecting, preparing, and cooking the rice.

Using the Wrong Type of Rice

Not all rice works for sushi, and using the wrong type can throw off your entire dish. Authentic sushi requires Japanese short-grain rice, prized for its stickiness and texture. This rice has a high starch content, with approximately 80% amylopectin, which helps the grains bind together perfectly, creating a stable base for toppings without falling apart.

"Rice in sushi is not just any type of rice but a special variety of short-grain rice that is sticky and has a unique flavor."

Among short-grain varieties, Koshihikari is considered the gold standard. Known for its balance of stickiness, softness, and natural sweetness, it pairs beautifully with fish. In 2016, Japan dedicated 535,000 hectares to growing Koshihikari rice. For those in the U.S., options like Tamaki Gold and Tamanishiki are excellent and widely available. Look for packages labeled "shinmai" (new crop) to ensure freshness, as sushi rice is best when used 6 months to 1 year after harvest.

Avoid medium-grain rice like Calrose or long-grain varieties such as jasmine or basmati, as these lack the necessary starch to hold sushi together. Once you’ve chosen the right rice, the next step is just as crucial: rinsing.

Skipping the Rinsing Process

Skipping the rinsing process might seem like a harmless shortcut, but it can ruin your sushi rice. Unrinsed rice can turn gummy because of the excess starch coating the grains. Proper rinsing ensures the rice’s texture stays ideal for sushi.

As Brita Lundberg from Lundberg Family Farms explains:

"When grains of rice rub against each other in processing or packaging, the friction creates a superfine powder of starchy residue that coats the exterior of each grain."

This residue can cause clumping and even alter the flavor of the rice, overpowering the delicate taste of the fish. To rinse correctly, place the rice in a fine-mesh sieve under cold running water. Gently stir the rice and continue rinsing for 1–2 minutes, changing the water multiple times until it runs much clearer. Eric Huang from Pecking House also notes:

"Rinsing that off helps to keep the rice separated as individual grains, creating the more fluffy texture desirable in most Asian cuisines."

Wrong Water-to-Rice Ratios

Even with the right rice and proper rinsing, the water-to-rice ratio can make or break your sushi. Too much water leads to mushy rice, while too little leaves it hard and undercooked. Sushi rice needs a firmer texture than regular steamed rice to properly absorb the sushi vinegar.

Namiko Hirasawa Chen from Just One Cookbook advises:

"To achieve the perfect texture, we need to cook rice for sushi a bit firmer than regular table rice. Use exactly a 1-to-1 ratio of rice to water by volume to allow for the additional moisture the cooked rice will absorb from the sushi vinegar."

Start with a 1:1 ratio of rice to water by volume, and soak the rinsed rice for 20–30 minutes before cooking. This helps the grains maintain their shape and absorb the vinegar evenly. Keep in mind that factors like the freshness of the rice and your cooking method (rice cooker or stovetop) may require slight adjustments. For reference, one rice cooker cup (150 grams) of uncooked short-grain rice yields about 2¼ cups (330 grams) of cooked rice.

Dr. Jae Choi, Chef-founder of Jakitori Jinbei, highlights the importance of precision:

"The biggest mistake people make when preparing sushi rice is overcooking or undercooking the rice."

Choosing and Handling Fish Properly

Good fish is the backbone of any sushi dish. Mishandling it can ruin both the flavor and safety of your meal.

Using Non-Sushi-Grade Fish

"Sushi-grade" is more of a marketing term than an official standard, but it does hint at fish that meets FDA guidelines for safe raw consumption. These guidelines include freezing the fish at -4°F (-20°C) for at least 7 days or at -31°F (-35°C) until solid, followed by storage for 15 hours. Davis Herron, director of the retail and restaurant division at The Lobster Place fish market, explains:

"It’s a marketing term that has little significance [with respect] to actually being able to consume raw fish."

Certain fish, like tuna (bigeye, yellowfin, bluefin, and bonito/skipjack) and farmed salmon raised on parasite-free feed, are often exceptions to these freezing rules. Yuji Haraguchi, owner of Osakana in Brooklyn, stresses:

"Of course, freshness is important, but the most important thing is how it’s handled the closer it gets to the table or the customer."

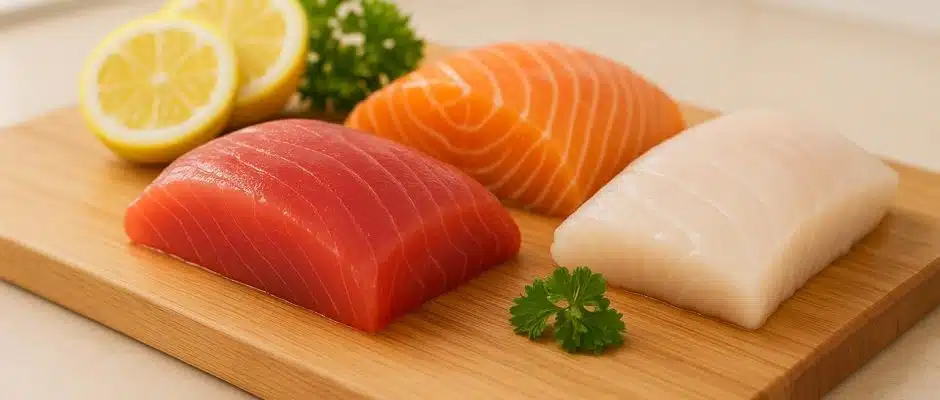
When shopping, look for labels like "sushi grade" or "sashimi grade" and buy from trusted fishmongers or specialty stores. High-quality fish should have clear eyes, red gills, firm flesh, no slime, and a clean seawater smell – not an overly "fishy" odor. Ensure it’s stored on ice, and don’t hesitate to ask how fresh it is. While premium fish may cost more, it’s worth it for both safety and taste.

Once you’ve picked your fish, slicing it correctly is just as important for achieving the best results.

Poor Fish Slicing

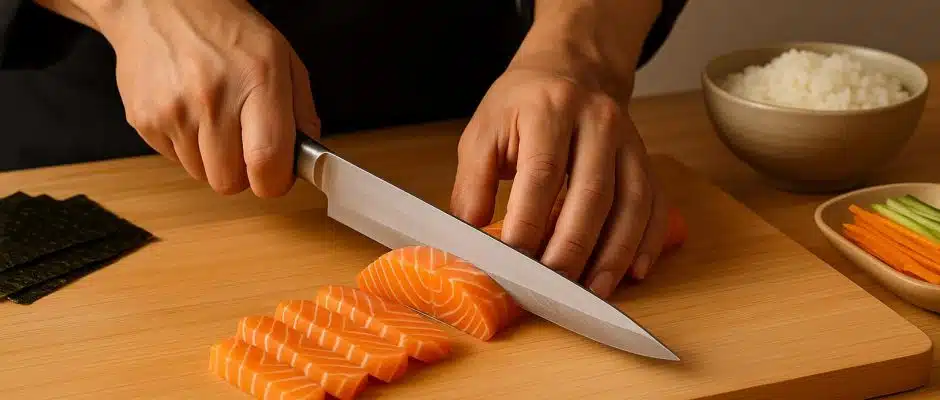
A sharp knife is your best friend here. Always slice against the grain in one smooth motion, moving from the base of the blade to the tip, rather than sawing back and forth. Start by rinsing and patting the fish dry, then choose the type of cut based on your dish – whether it’s for nigiri, rolls, or sashimi. Use your non-dominant hand to steady the fish as you slice. For softer fish like tuna, aim for slices that are 7–10 mm thick. A typical sashimi slice should weigh about 15–20 g (0.5–0.7 oz) per piece. Proper slicing can elevate your sushi from homemade to restaurant-level quality.

Precision cutting is only part of the equation. Keeping everything clean and safe is just as critical.

Cross-Contamination Risks

Handling raw fish comes with risks, so strict hygiene is non-negotiable. Keep fish at 40°F (4°C) or below and use it within two days. Thaw it slowly in the refrigerator, and sanitize all surfaces and tools immediately after handling raw fish. A refrigerator thermometer can help ensure proper storage temperatures. For longer storage, wrap the fish tightly in plastic, foil, or moisture-proof paper before freezing.

To prevent bacteria from spreading, wash your hands with soap and warm water for at least 20 seconds after handling raw food. Clean cutting boards, dishes, utensils, and countertops with soap and hot water, and sanitize surfaces with a solution made from one tablespoon of unscented chlorine bleach mixed with a gallon of water.

If you’re in a rush, you can thaw fish faster by sealing it in a plastic bag and submerging it in cold water. Alternatively, use your microwave’s defrost setting, but only if you plan to cook it immediately. While preparing, keep the fish chilled and serve it as soon as possible to preserve both its flavor and texture. By following these safety practices, you’ll not only protect your ingredients but also ensure your sushi-making experience is a success.

Fixing Sushi Roll Construction Errors

Nailing the perfect sushi roll at home requires more than just great rice and fresh fish – it comes down to how well you construct the roll itself. Even with top-notch ingredients, poor technique can leave you with sushi that’s messy or falls apart. Two common pitfalls to watch out for are overstuffing your rolls and using the wrong amount of pressure with your bamboo mat. Let’s dive into how to fix these issues.

Overstuffing Rolls

It’s tempting to load up your sushi roll with all your favorite ingredients, but overdoing it can cause major problems. Too much filling makes it hard to close the roll, can cause it to split, and muddles the flavors.

"I always recommend a 1:1 ratio of rice to other ingredients. While this isn’t essential for everybody, the quantity of ingredients inside a maki roll is crucial to maintain balance."

Chef Masaharu Morimoto suggests aiming for a 1:1 ratio of rice to fillings – about ½ cup each per roll. For ease, try using roughly ⅓ cup of fillings and five scoops of rice, leaving about 1 inch of nori free at the top to seal the roll. When spreading the rice, make sure to leave that inch of nori bare – it’s key for keeping everything together.

For the fillings, cut them into ¼-inch pieces to avoid bulging and ensure a smoother roll. Press a shallow groove into the rice before adding the fillings to help them sit securely. If you’re making uramaki (rolls with rice on the outside), leave about ½ inch of the rice-free edge on the far side of the nori to make sealing easier.

And if your roll just refuses to close properly? No worries – turn it into a hand roll instead. It’s a practical and delicious way to salvage your sushi without the stress.

Wrong Bamboo Mat Pressure

Once you’ve nailed the ingredient proportions, the next step is mastering the right amount of pressure with your bamboo mat. Too little pressure results in a loose roll that falls apart, while too much pressure can crush your ingredients and ruin the texture.

To start, lift the edge of the mat nearest to you and fold it over the fillings in the center. Use your thumbs underneath the mat while curving your other fingers gently over the top to apply even, light pressure along the roll. As you roll it away from you, give a gentle squeeze to compress the rice just enough to hold everything together. Be careful not to let the mat or plastic wrap get caught in the roll as you work.

Once the roll is formed, rotate it 90° and apply gentle pressure again to firm up its shape. This extra step helps ensure the roll stays intact and makes slicing and presentation much easier.

sbb-itb-7b591fe

Seasoning and Condiment Best Practices

Getting the flavors just right is key – perfectly cooked rice and fresh fish can fall flat without proper seasoning. Follow these tips to bring out the best in your sushi.

Over-Salting Rice

Too much salt can ruin your rice. Instead, use a sushi vinegar blend with a 1:5:1 ratio of salt, sugar, and rice vinegar. For every 500 grams of uncooked rice, about 60 ml of this blend works well.

When mixing the vinegar blend into the rice, measure carefully and resist the urge to adjust prematurely. As the rice cools, it absorbs the flavors, balancing them out. Home cook Phillippa Molnar shared her experience:

"When I added the sugar and everything to the rice I panicked thinking it tasted too sweet, but then the rice absorbed it and the flavour became more subtle like it was meant to be."

If you’re using pre-seasoned rice vinegar, tweak the added sugar and salt accordingly. Some chefs recommend adding konbu (kelp) while cooking the rice to bring in natural umami and reduce the need for extra salt. Once cooked, cool the rice quickly and gently fold in the seasoning to keep the texture light and fluffy. This method is also highlighted in Just One Cookbook’s updated sushi rice recipe.

Misusing Wasabi and Soy Sauce

When it comes to wasabi, less is more. Apply a small, pea-sized amount directly onto your sushi rather than mixing it into soy sauce. Combining the two can dull the wasabi’s heat and the clean, salty flavor of the soy sauce. If the chef has already added wasabi to your sushi, taste it first before deciding if you need more.

When dipping sushi, always dip the fish side into the soy sauce. This prevents the rice from soaking up too much salt and ensures the soy sauce enhances the flavors rather than overpowering them.

If you have access to fresh wasabi – grated straight from the stem – enjoy it as is to savor its delicate flavor. Using condiments sparingly allows the natural taste of the fish, rice, and other ingredients to take center stage. These practices not only elevate your sushi but also set the stage for mastering proper care of your sushi tools.

Using and Caring for Sushi Tools Correctly

Once you’ve nailed the techniques for preparing rice and fish, taking care of your tools becomes the next crucial step to perfecting your sushi craft. Even the freshest ingredients can fall flat if your tools aren’t in top shape. Professional sushi chef Rik from the School of Sushi emphasizes this point:

"As a sushi chef, I cannot do without my Japanese knives. They are my most important tools, and without them I simply cannot make the fine, precise cuts that sushi requires."

The Problem with Dull Knives

Using a dull knife can ruin your sushi. It crushes the fish and creates uneven cuts, which not only affects the presentation but can also alter the texture.

To keep your Japanese knives sharp, use a sharpening stone and maintain a consistent 15–20° angle throughout the sharpening process. Consistency is key to achieving a smooth, even edge. After sharpening, make it a habit to clean your knife properly. Wipe it down after every use, rinse with warm water and mild soap, and dry it immediately to prevent rust.

Avoid putting Japanese knives in the dishwasher. The high temperatures and harsh detergents can dull or even chip the blade. Whether your knife is made from high-carbon steel or stainless steel, hand washing is essential to preserve its sharpness and functionality.

Keeping your knives sharp not only ensures safety but also improves the overall quality and appearance of your sushi.

Keeping Bamboo Mats Clean

A dirty bamboo mat can be a breeding ground for bacteria, as it traps rice, fish oils, and moisture.

To prevent this, clean your bamboo mat right after each use. Hand wash it with warm, soapy water, making sure to scrub between the slats to remove stuck rice and debris. Never soak the mat or run it through the dishwasher – this can cause the bamboo to split or weaken the binding threads .

Once clean, dry the mat thoroughly. Shake off any excess water, then let it air dry completely before storing it. Keep it away from direct sunlight or high heat, as these can cause the bamboo to crack.

Pro tip: Before rolling sushi, cover your bamboo mat with plastic wrap or slide it into a gallon-sized plastic bag. This simple step prevents rice from sticking to the mat, making cleanup much easier – especially when making inside-out rolls.

Presentation and Serving Considerations

When it comes to sushi, presentation and serving play a big role in enhancing the experience. There’s an old Japanese saying: "You eat with your eyes first." This reminds us that how food looks can be just as important as how it tastes. Embrace the natural beauty of imperfection, a concept often referred to as wabi-sabi. Instead of aiming for perfect symmetry, try arranging your rolls in clusters or scattering them creatively. Use contrasting colors and seasonal accents, like edible flowers, to create a visually appealing display that invites your guests to dig in. Also, remember to serve sushi at the right temperature to maintain both its flavor and safety.

Proper storage is equally important. Sushi should be kept between 32°F and 38°F and eaten within 24 hours to ensure it stays fresh and safe to consume.

Serving Ginger the Right Way

Presentation isn’t just about visuals – how you use condiments can also elevate the experience. One common mistake is misusing pickled ginger (gari). Ginger should never be placed on top of sushi or mixed into soy sauce. Its purpose is to act as a palate cleanser, helping you reset your taste buds between different types of sushi. This is especially useful when moving from bold flavors, like sea urchin or conger eel, to more delicate varieties.

To make the most of ginger, simply nibble on a small piece between different sushi types. Avoid putting it directly on your sushi or dipping it into soy sauce. Think of it as a way to refresh your palate between bites. When serving sushi to others, present the ginger on a separate small plate or in a designated section of the platter. This subtle detail helps signal its intended role.

"If you have mastered sushi rice and have perfected your rolling technique, you will no doubt be wondering how best to present and serve sushi to your guests. In Japan, we say that you also eat with your eyes, so presentation is as important as how a dish tastes. Arranging sushi is an enjoyable part of the process and it doesn’t need to be too complicated." – Yuki’s Kitchen

Conclusion: Key Points for Better Sushi

Creating memorable sushi at home starts with nailing the basics and steering clear of common pitfalls. It all begins with properly prepared Japanese short-grain rice – rinsed until the water runs clear and seasoned with a well-balanced blend of sushi vinegar.

When it comes to fish, choose sushi-grade options that smell fresh, look vibrant, and feel firm to the touch. A sharp knife is essential for clean, precise cuts that maintain the fish’s texture and elevate the overall presentation.

Rolling sushi requires patience and a steady hand. Use gentle, even pressure to achieve tightly rolled perfection. As Anastacia Song, Executive Chef at Kumi, notes:

"Bamboo Makisu is a favorite of mine as they tend to be lighter, allowing you to control how much pressure is exerted onto your rolls."

If traditional rolls seem intimidating, start with temaki (hand rolls) to build confidence. These foundational techniques apply to every stage of sushi-making, ensuring each piece reflects care and attention.

Don’t overlook the small details – apply condiments sparingly, and lightly toast your nori to enhance both texture and flavor. As Min Kim, Executive Chef at Mizumi in Wynn Las Vegas, wisely advises:

"Be prepared for your first few attempts to not turn out exactly how you expect."

He also encourages experimentation:

"You must be creative and try different ways and styles until you find something that fits you the best."

FAQs

How can I make sure my sushi rice has the perfect texture and flavor?

To get sushi rice with just the right texture and flavor, start by rinsing the rice thoroughly under cold water. Keep rinsing until the water runs clear – this step washes away excess starch, which helps keep the rice from clumping. Once rinsed, let the rice soak in water for about 30 minutes. This soaking step ensures the rice cooks evenly. When you’re ready to cook, stick to a 1:1 ratio of rice to water. After cooking, let the rice sit off the heat for about 10 minutes to steam.

While the rice is still warm, mix in a seasoning blend made from rice vinegar, sugar, and salt. Use a rice paddle or wooden spoon to gently fold the mixture into the rice. Be careful not to mash the grains – you want them to stay intact. Finally, spread the seasoned rice in a wide bowl or wooden tub and let it cool to room temperature. This cooling process not only improves the texture but also gets the rice perfectly prepped for rolling sushi.

How do I choose and handle fish safely for homemade sushi?

To make sushi safely at home, it’s crucial to start with the right fish. Look for fish labeled sushi-grade or sashimi-grade – this means the fish has been frozen to eliminate parasites. According to the FDA, fish should be frozen at -4°F for at least 7 days or at -31°F for 15 hours to meet safety standards.

When shopping, pay attention to the fish’s appearance and texture. Fresh fish will have clear, bright eyes, shiny skin, and firm flesh. Steer clear of fish with dull colors, a mushy feel, or any visible frost or ice crystals, as these are signs of poor quality or improper storage. Once you bring the fish home, store it in the refrigerator at 40°F or lower until you’re ready to use it.

Hygiene is just as important. Always work with clean tools, sanitize your surfaces, and wash your hands thoroughly to prevent contamination. Safe handling and cleanliness are essential for making sushi that’s both safe and delicious.

How can I improve my sushi rolling skills to make my rolls look more professional?

To make sushi rolls that are both visually appealing and structurally sound, start by perfecting your rice. It should be cooked just right – sticky enough to hold together but not overly soft or mushy. Proper seasoning is also key to achieving the authentic flavor.

Using a bamboo mat is essential for precision. Place your fillings neatly in the center, and roll with gentle, even pressure. Be mindful not to overfill, as too much can cause the roll to break apart.

When rolling, tightly tuck the edge of the nori (seaweed) over the fillings, ensuring the ends are secure to avoid any spills. Once rolled, lightly squeeze to firm it up and slice with a very sharp knife for clean, smooth cuts. With consistent practice, these steps will help you create sushi rolls that are not only delicious but also look like they belong in a top-tier sushi restaurant!

Related posts

Quick & Clean Sushi at Home: The Revolutionary Baking Paper Method

Quick & Clean Sushi at Home: The Revolutionary Baking Paper Method

Introduction:

The transition from rice preparation to sushi rolling is notoriously messy and time-consuming, often slowing down home chefs and taking a chunk of the fun out of the sushi-making process. But what if there was a way to bypass the sticky fingers and scattered ingredients? Enter the baking paper method—a quick, clean, and efficient way to prepare sushi at home. This technique ensures that once you’re ready to roll, everything from the rice to the fillings is perfectly in place, allowing you to create beautiful sushi without the usual hassle and mess.

Step-by-Step Guide:

Step 1: Size Your Baking Paper

Prepare Your Paper: Start by sizing your baking paper to match the nori sheets you plan to use. If you’re using half a nori sheet, cut your baking paper to the same size. This ensures that your sushi rice will fit perfectly on the nori without any overhangs or shortages, creating the ideal base for your rolls.

Step 2: Prepare Multiple Sheets

Ready Your Supplies: Depending on how many rolls you intend to make, prepare the same number of baking paper sheets. Having all your sheets cut and ready streamlines the process, allowing you to maintain a steady workflow without interruptions for cutting more paper.

Step 3: Apply the Sushi Rice

Layer the Rice: Evenly spread the sushi rice over each sheet of baking paper. Use just enough rice to cover the paper, which should be the right amount for each roll. This step is crucial for achieving uniformity in your sushi rolls, ensuring each bite is as good as the last.

Step 4: Stack and Store

Organize for Efficiency: Once each baking paper sheet is covered with rice, stack them on top of each other. This method not only saves space but also keeps the rice sheets ready to be used. You can easily access the rice sheets one by one as you assemble your sushi rolls, keeping the process neat and orderly.

Step 5: Transfer the Rice

Flip and Align: Carefully flip the rice-covered baking paper onto your sheet of nori. Ensure the rice is evenly aligned with the edges of the nori for a perfect roll. This step helps in creating a seamless layer of rice, essential for well-formed sushi.


Step 6: Peel Away the Paper

Reveal the Rice Layer: Gently peel off the baking paper from the rice. This should leave a beautifully even layer of sushi rice on the nori. The non-stick nature of baking paper makes this step satisfyingly simple, maintaining the integrity of your rice layer without any sticking.

Step 7: Ready to Roll!

Efficient Rolling: With your nori now perfectly covered with rice, you’re ready to add your fillings and roll. What typically takes 1-2 minutes of spreading rice and cleaning sticky hands, you’ve completed in just about 3 seconds using this method. This not only makes the sushi-making process cleaner but also significantly faster, allowing you more time to enjoy your creations.

Conclusion: Effortless Sushi Rice Application

Enjoy the Simplicity: With the rice now perfectly covering the nori, you’ve achieved a clean, uniform base for your sushi roll in just seconds—and your hands are still clean! This technique significantly reduces the mess typically associated with sushi making, allowing you to enjoy the process and the eating all the more.

This approach not only enhances the efficiency of making sushi at home but also makes the process more enjoyable by minimizing cleanup and preparation time.


Savoring Tradition: The Hidden Delight of Saba Bo Sushi

Savoring Tradition: The Hidden Delight of Saba Bo Sushi

If you think you’ve tasted everything the sushi world has to offer, let me introduce you to a culinary gem that might have slipped under your radar: Saba Bo Sushi. This pressed mackerel sushi breaks away from the familiar rolls and nigiri, offering bold flavors and a meticulous preparation that promises a unique and unforgettable dining experience.

History and Tradition

Saba Bo Sushi is more than just a dish—it’s a journey back in time to ancient Japan. Centuries ago, preserving fish was both an art and a necessity. Chefs discovered that vinegar not only extended the shelf life of mackerel but also enhanced its natural flavors. By pressing vinegared mackerel over seasoned rice and occasionally adding a delicate layer of kombu (kelp), they created a dish that was both practical and delectable. This method intensified the fish’s taste, embedding Saba Bo Sushi firmly in the tapestry of traditional Japanese cuisine.

The Art of Preparation

Crafting Saba Bo Sushi is a labor of love that demands precision and care. It starts with the freshest cured mackerel and perfectly seasoned rice. The mackerel, rich and shimmering, is carefully layered atop the rice. Using a wooden mold called an oshizushihako, the sushi is gently pressed into a compact block. This technique isn’t just about shaping; it’s about melding flavors and textures into harmony. The pressing process infuses the tangy vinegar notes with the umami depth of the mackerel, resulting in a mosaic of taste that’s then sliced into bite-sized pieces—each one a testament to culinary artistry.

A Taste to Remember

Your first bite of Saba Bo Sushi is nothing short of revelatory. The tang of vinegar greets your palate, quickly followed by the savory richness of the mackerel. The rice adds a subtle sweetness, tying all the flavors together in a harmonious blend. The texture is equally captivating—the firm pressed rice contrasts with the silky, melt-in-your-mouth quality of the mackerel. It’s a sensory experience that lingers, inviting you to savor every nuanced note.

Witness the Craftsmanship

Watching a skilled chef prepare Saba Bo Sushi is like observing a well-rehearsed dance. Each step, from curing and slicing the mackerel to pressing and slicing the sushi, is performed with deliberate care. The chef’s hands move with confidence and grace, highlighting a deep respect for tradition and ingredients. If you ever have the chance to watch this process—whether in person or through a captivating video—seize it. It offers a deeper appreciation for how simplicity and complexity intertwine in Japanese cuisine.

Have you ever had ‘Saba Bo’ Sushi?
byu/Comprehensive-Pen-93 inFoodVideoPorn

Why You Should Try It

In a world where sushi has become global and sometimes gimmicky, Saba Bo Sushi stands as a beacon of authenticity. It’s often overshadowed by its more popular cousins like California rolls or tuna nigiri, but those who seek it out are rewarded with a flavor profile that’s both robust and refined. Trying Saba Bo Sushi is like tapping into a piece of history—a culinary tradition that has been perfected over generations. Whether you order it at an authentic sushi bar or take on the rewarding challenge of making it at home, it’s a must-try for anyone passionate about sushi.

Conclusion

Saba Bo Sushi isn’t just another item on a sushi menu; it’s a heartfelt expression of Japanese culinary heritage. If you’re ready to expand your sushi horizons and indulge in something truly special, let this be your next gastronomic adventure. Its distinctive preparation and memorable flavors not only set it apart but also earn it a cherished spot in any food lover’s repertoire. So go ahead—embrace the tradition, savor the flavors, and let Saba Bo Sushi captivate your senses.

"Irasshaimase"! -What do they yell when you enter a Japanese restaurant?

“Irasshaimase”! -What do they yell when you enter a Japanese restaurant?

What do they yell when you enter a Japanese restaurant?

You should be familiar with some Japanese phrases whether you’re dining with newly made Japanese friends, dining at a Sushi bar, or having a lunch meeting with a new Japanese customer. The majority of Japanese will forgive you if you do not grasp their practices and traditional words, but you display excellent manners and respect to others by adopting standard etiquette. “Irasshaimase” is an example of such a phrase.

Most travelers encounter the phrase “Irasshaimase!” (いらっしゃいませ!), which translates as “Welcome to the business!” or “Please come in!” within minutes of arriving in any Japanese restaurant. It is simply one of the numerous traditional Japanese techniques of extending a warm welcome to new clients on a formal basis. After saying Irasshaimase, the waitress or waiter will inquire about the number of individuals in your group before escorting you to your assigned table.

If you have ever traveled to Japan, you will be familiar with the phrase. Not once, but on numerous occasions. Several times over, its pitch can fluctuate from high and short to low and gruff, depending on the situation. The phrase is universal whether spoken by a single female staffer at a prestigious department shop or a group of chefs at a run-down Ramen restaurant. At any time of day or night, you can hear it shouted with complete apathy, or it can be said with great enthusiasm, volume, and joy of life that you could think you have accidentally walked into your own Japanese birthday bash.

What does Irasshaimase mean?

The question is, though, what the word actually means and where it came from. The phrase “Irasshaimase!” is a more formal variant of the phrase irasshai, which is an imperative version of the polite verb irassharu (), which literally translates as “to be/come/go.” The ‘mase’ ending is frequently put to the end of words in order to make them more courteous. It is simple to believe, given the fact that there are so many other methods to be friendly, why not add one more to the list? Marketplace vendors first used the phrase to get customers to come to their particular stand in a marketplace.

Over time, it has evolved into a standard greeting that can be found in practically every restaurant and retail outlet throughout Japan. Customers can hear it from outside supermarkets, inside shops, at checkout counters, petrol stations, the sale stands, and wherever else that staff has the opportunity to shout it out.

What do you have to say in response to Irasshaimase?

You are under no obligation to react; however, you can simply use a customary greeting like

  • Ohayo gozaimasu. (It means Good morning)
  • Konnichiwa (it means Hello in the daytime)
  • Konbanwa (it means Good evening).
  • Alternatively, you might simply nod as a casual bow.

Irasshaimase is simply a greeting you get when you walk into a restaurant or a store. You are under no obligation to tell anything. No, there isn’t any expectation on your part that you will answer.

Why make sushi at home?

Why make sushi at home?

Why Make Sushi At Home?

If you’re looking for fun ways to make this weekend special, whether for a group of close friends or a cool, unique, date-night activity, making sushi at home is the perfect activity for a unique get-together. Going out to sushi is amazing, but it can be expensive and crowded, with long wait times and not a lot of choices. Sushi making at home is a fun skill to learn, that you can share with your friends and family. If you have the right tools, a little background information, and don’t care about getting your kitchen slightly messy, at-home sushi making might just be your next favorite weekend activity.

It’s Chefs Choice, And You Are The Chef

The great thing about making sushi at home is that you get to choose what you want in your roll. This is great for those of us who have specific dietary needs and/or want to pick just exactly what is going into your rolls and onto your nigiri. When having a group over for a sushi-making night, ask what they’d like in their rolls, get as creative as you want, with spicy mayo, ponzu sauce, and lots of soy sauce.

What You Need To Make Sushi At Home

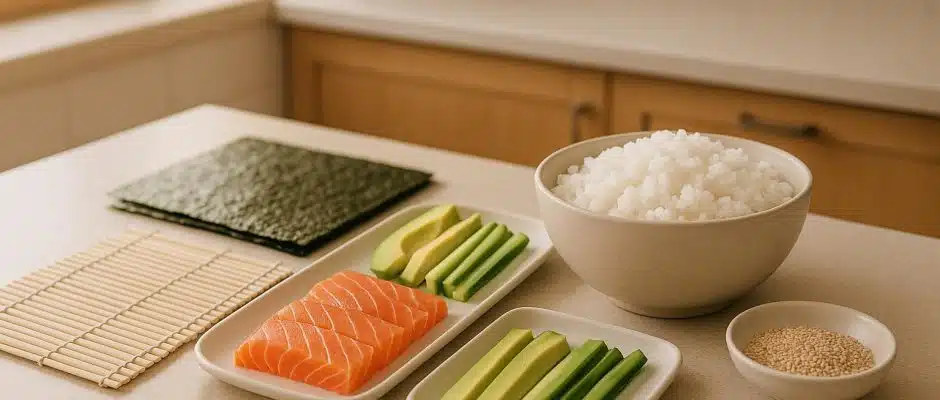
You don’t need a sushi recipe per se, however, there are things you’ll need to make your sushi night successful. Many websites sell sushi-making kits, including Make My Sushi, which has bamboo sushi rolling mats, which are essential for rolling the seaweed, around the rice and your choice of filling. These kits also come with chopsticks, rice paddles, and rice spreaders although if necessary you could probably use what you have on hand. Your sushi rice recipe is also important, sushi rice is often confused with white rice, but in reality, they’re quite different. Rice vinegar is what gives sushi rice its delicious and unique flavor, it also makes it a bit stickier which helps you to create your rolls.

Your Sushi Fish Must Be High Quality

One of the most important things to realize when making sushi at home is that the quality of fish must be sashimi or sushi-grade. This keeps you from making rolls that taste overly fishy or even worse could make you sick. If you’re just starting, consider trying a veggie roll, with slivered carrots, cucumber, avocado, and just about anything else that you can think of.

Technique For Sushi Making

Remember, like any new skill you’re going to get better with time, so don’t get discouraged if it doesn’t look perfect on your first try. Part of the fun of sushi making is that some of your rolls will look professional and others, maybe not so much. Be sure to have a can-do attitude and laugh it off if one of your rolls falls apart. When you’re making your roll, time is of the essence, the longer the rice sits on top of seaweed the more wilted it will become and the harder it will be to roll.

Sushi making is an incredible activity for friends and family, and we can’t wait to see what you create!

Can You Make Sushi at Home

Can You Make Sushi at Home and Take It to the Next Level?

A traditional Japanese dish made with rice and fresh fish, Sushi is one of the most popular dishes in the world. Going to a Japanese restaurant and binging on these tasty delights can be quite expensive though. It can even leave you and your friends asking each other “can you make sushi at home?”

Sushi is not only one of the most popular dishes in the world, but it is also one of the most misunderstood food items there is. Misunderstood in terms of what it really is and how the rest of the world sees it as it should if you get my drift.

Kinds of Sushi

If asked what Sushi looks like, most people would describe a roll of rice with fillings wrapped in seaweed. Technically, this is not incorrect; however, their definition of what Sushi is is just touching the surface of this delicate and wonderfully tasteful morsels.

Sushi, in fact, is the collective term that applies to the dish that uses vinegar-flavored rice garnished with raw fish, eggs, and seafood. In the strict sense, Sushi does not have to come in the usual rolls that people are accustomed to. They can come in any of the following five types:

1. Sashimi
Any fish that is used for Sushi rolls can be made into Sashimi. Sashimi is just the meat that you would use without the rice. The fish meat can either be served cold and raw or cooked, like Unagi.

2. Nigiri
This type of Sushi consists of a ball of Sushi rice with toppings. These toppings can be cooked or raw but, like Sashimi, the food used for toppings are the same as Sushi rolls.

3. Maki
This is the usual Sushi roll that you are familiar with; rice and filling wrapped in seaweed.

4. Uramaki
This is the inverted form of Maki with the rice outside and the seaweed and fillings inside.

5. Temaki
This is a unique Sushi type as it is almost a Maki but it is rolled into a cone instead of the cylindrical shape that Maki possesses.

This Is How You Roll

Focusing on Maki, or Sushi rolls, it mainly used rice and several kinds of fillings to create a tasty delight. These rolls often pass through a Sushi roller that is traditionally made of bamboo and looks like a mat.

  1. To create a Sushi roll, you would need to spread the mat out and lay down your nori, or seaweed, wrapper.
  2. Scoop the rice into the nori and spread it out leaving an allowance of about an inch on all borders.
  3. Lay down the fillings on one side of the mat, over the rice, of course.
  4. Turn that same side over to cover the fillings with the rice and compress.
  5. In a rolling motion, compress the rice each turn until you reach the other edge.
  6. You should have a tightly packed sushi roll at this time but compress it some more to prevent it from breaking up.
  7. Slice the roll, about an inch thick per segment.
  8. Serve with wasabi, soy sauce, and pickled ginger.

Types of Sushi Rolls

The identity of your Maki or Sushi roll is dependent on the fillings that you use. Here are some popular Sushi rolls and the fillings that they have.

  • Crunch Roll
    Fresh and spicy tuna, crispy seaweed and shrimp tempura.
  • Tiger Roll
    Avocado, cucumber, tobiko and shrimp tempura.
  • Rainbow Roll
    Crab sticks, avocado, cucumber, fresh tuna, avocado, salmon, shrimp and yellowtail fish.
  • Dynamite Roll
    Yellowtail fish, bean sprouts, carrots, shrimp tempura, cucumber, avocado, chile and spicy mayo.
  • California Maki
    Crab sticks, avocado, cucumber and sesame seeds.
  • Dragon Roll
    Eel, crab, cucumber and eel sauce.
  • Vegetable Roll
    Cucumber, carrots, scallion, avocado, cream cheese, and asparagus.
  • Shrimp Tempura Roll
    Avocado, tempura flakes, eel sauce and shrimp tempura.
  • Spicy Tuna Roll
    Spicy tuna, mayo and chili sauce.

Tips and Tricks

Any dish nowadays has their set of tips and tricks that make life easier and takes the recipe to a whole new level.

  • Be Creative
    The fillings don’t necessarily have to be raw fish and seafood; you can make it kid-friendly by using prepared food like Spam and bacon as substitutes for the filling and the wrap. Not only will you be introducing kids to international cuisine, but you can sneak in a vegetable or two to make it healthier.
  • Wrap It Up
    Place a plastic wrap between the bamboo and your nori to make your rolls cleaner. This prevents any mess up, and it also prolongs the life of your bamboo mat, especially since you don’t have to clean it as much.
  • Season It
    Much of the flavor in Sushi rolls come from the filling, but it helps if the Sushi rice is well-cooked and perfectly seasoned. Use rice vinegar when you can, but you can substitute white vinegar instead. The taste will be different of course.
  • Roll It and Squeeze It
    Just like the movie Karate Kid, you need to roll and repeatedly squeeze to get the perfect roll. Roll the mat, squeeze everything in and repeat until you reach the other end of the mat.
  • Do Not Be Afraid
    Sushi rolls can’t kill unless you have an allergic reaction to shrimp, so don’t feel bad if the first one doesn’t come out right.
  • No Nori, No Problem
    If you find yourself out of nori, or seaweed, you can always substitute other wrapping materials like thinly sliced cucumber, and carrots, layered like a mat or bacon lined up like pigs on a farm.
  • On the Side
    Never forget to serve Sushi with usual sides and condiments used like Tobiko, Masago, and Wasabi, as well as pickled vegetables, dumplings and miso soup.

Can You Make Sushi at Home?

The question now is not “can you make sushi at home?” but rather “how creative can you make it?” Rolling the perfect Sushi rolls require a lot of practice, but this time, practice means getting to eat a lot of your samples. Keep your Sushi knife sharp and your bamboo mats clean but never forget to enjoy the process and, of course, the end product. Share them with loved ones—or not.

best sushi rolls for beginners

Best Sushi Rolls for Beginners: Roll Them Out!

Sushi making was all the rave when this particular Japanese dish first became popular, and it is no different today as more and more Sushi stores and craft shops sprout on every corner. More and more people want to learn how to do it on their own as well, and the popularity of the best Sushi rolls for beginners is a sure sign of that.

Traditional Sushi making is deeply rooted in Japanese culture, and while you may not be able to duplicate the exact methods that Sushi masters use, you can easily make Sushi wherever you are with some help from tools that you can buy at a novelty shop or a specialty store.

Three of the Best Sushi Rollers

Among the tools used to make Sushi, a Sushi roller is one of the most important as it lets you form your Sushi into the perfect rolls that they should be. Here are three of the best Sushi rolls for beginners that are available on the market.

1. JapanBargain S-1574, Sushi Roller Bamboo Mat

JapanBargain

The JapanBargain S-1574, Sushi Roller Bamboo Mat weighs about 1.6 ounces and measures 9.5 inches x 9.5 inches x 0.1 inches. This Sushi mat is made of 100% natural bamboo and is completely reusable. However, it is much safer to handwash this item rather than place it in a dishwasher as the strands might break and cause damage.

Pros

  • This is a bamboo mat made of high-quality materials that ensure it will last for a long time, even with constant use.
  • Rolling Sushi rolls with this mat is easy, and you can even press it comfortably without having to worry about breaking the nori lining or squeezing the fillings out.
  • You can use the JapanBargain S-1574 bamboo for other things aside from rolling Sushi rolls, like squeezing grated vegetables dry for salads and carb substitute.

Cons

  • The JapanBargain S-1574 is a little smaller than expected, which means you have to make more rolls even if you’re just going to feed a couple of your friends.
  • Once wet, this bamboo mat tends to produce splinters, and it feels flimsy after a while.
  • The JapanBargain S-1574 bamboo mat can be hard to wash, especially when the rice has dried and stuck to the bamboo. A way to get around this problem though is to place a film of cling wrap in between the bamboo and the seaweed or rice. This keeps the rice off and your mat clean.

2. POAO Sushi Roller Kit

POAO Sushi Roller Kit

The POAO Sushi Roller Kit or the “Sushi Bazooka” is a portable Sushi maker that molds rice and Sushi rolls for you. Instead of you rolling rice and stuffing around to get the perfect roll, this device lets you layer rice and stuffing and then molds them into the perfect circular roll that you push out on one end.

This kitchen device measures 11.81 inches x 1.77 inches x 2.76 inches and weighs about seven ounces. This kit is made of food-grade plastic. The roller also comes with easy-to-follow instructions.

Pros

  • The POAO Sushi Roller Kit is easy to use and makes Sushi making faster.
  • This easy-to-use roller allows you to play around with the fillings, from traditional shrimp and fish to a more modern SPAM and mango.
  • The Sushi Bazooka makes Sushi rolls faster than a traditional bamboo mat; the shape is more consistent as well.
  • This Sushi roller kit makes for a good party companion as it gives birth to more Sushi rolls faster, and it is quite interesting enough to become a conversation piece on its own.

Cons

  • This Sushi roller does mold the rice, but it does take a little bit more than needed to get a more compressed and stable Sushi roll.
  • Sushi rolls that are “ejected” from the Sushi Bazooka tend to break apart easily, especially if it is not compressed enough.

3. Easy Sushi 3.5 cm Roller

Easy Sushi 3.5 cm Roller

The Easy Sushi 3.5 cm Roller is made of food-grade plastic and is dishwasher-safe. It comes with one roller and a traction sheet that can be replaced as needed. The roller itself measures 9.5 inches in length and works with different kinds of wraps, from plastic to rice paper and seaweed.

The Easy Sushi roller can make a party-sized Sushi platter in a matter of minutes, and clean-up is a breeze. The product itself is made in France, and it creates professional looking rolls.

Pros

  • Sushi rolls created with the Easy Sushi roller always come out looking perfect, and its visual appeal adds to the fresh flavor that each roll packs in.
  • This Sushi roller is easy to use and is completely mess-free. Even washing it is a breeze.
  • The Sushi rolls that come out of the Easy Sushi are packed tight with freshness. The rolls are squeezed in as well, making the fillings pop out in every bite, just like how traditional Sushi would.

Cons

  • The Easy Sushi roller works best with the rice rolled in another layer, like seaweed or rice paper but if you would just be using rice and then the filling, you are in for a messy afternoon. It is recommended that you use a sheet of cling film to put some distance between the roller and the rice.
  • The Easy Sushi roller rolls Sushi about an inch or so in diameter which is very small especially for California Maki and the likes. This may be good for Sushi recipes that require very few ingredients, but it is not suited for those that require more.

The Best Sushi Rolls for Beginners

The JapanBargain S-1574, Sushi Roller Bamboo Mat is one of the best Sushi rollers on the market today. The other two Sushi rollers in the list have incredible features as well, and they do save you some time when it comes to the number of Sushi rolls produced per minute.

However, nothing beats being able to compress your rice rolls to the size that you want, using whatever fillings you can think of. You can adjust the size of the Sushi roll as necessary, and you can be creative as well with what filling you use. It might take some more effort to make the perfect rolls, but it is satisfying to know that you can do it.

Rolling Sushi the traditional way also lets you connect with what you are doing, filling in the cracks and crevices with love and care as you roll along. As with any food that we have painstakingly prepared for our friends and loved ones, it always brings a warm and tingly feeling knowing that they will appreciate our effort and that they would enjoy what we have prepared for them.

Best Sushi Knife for Your Kitchen

Best Sushi Knife for Your Kitchen

If you are an authentic sushi chef or a sushi enthusiast with chef aspirations, then you ought to consider investing in a quality knife. You might think that any knife could do the job, but that is simply not true. Some knives are designed to cut bread, steaks, and butter only. So, if you want to perfect your art, or prepare your favorite dish with ease and finesse, then you ought to consider getting the best sushi knife.

The price is always a consideration when choosing among several options. While this may be a delineating factor, it should not be the only reason you decided to buy something.

You should choose to buy a sushi knife because of make, design, durability, and ease of use. The last thing you will want to do is to buy a sushi knife tomorrow and then go in search of another a few days later. Hence, the purpose of this article is to help you find the best sushi knife for your kitchen.

Best Sushi Knife: Our Top Choices

We have selected three sushi knives that we believe have good quality and you can consider purchasing once you have decided to buy a special knife for your sushi making activities.

Soufull Professional Sashimi Sushi Knife

This professional sushi knife by Soufull is a razor sharp knife that has a blade that is made of Japanese stainless steel material that has a surgical grade. It has a gray leather wooden handle and comes sheathed in a gift box that is double riveted and durable. The product’s length is 12.8 inches, width is 1.2inches, height is 0.1 inches, and weight is less than one pound.

Soufull Professional Sashimi Sushi Knife

Pros:

  • Made of high-quality material: It is two times harder than comparable knives, and the handle has been designed with durability and balance in mind.
  • Sharp blade: The knife’s blade is sharp enough to slice through your raw fish with no pressure. It also has really good edge retention, so you don’t have to worry much about losing control of your knife when slicing.
  • Maintains the quality of fish: This product is sharp enough which makes it possible to retain the form of the fish even if you cut it too thinly. Likewise, since it is specifically designed for slicing sashimi, the taste of the fish will not be altered.
  • Good customer relations: Product comes with a service card and there is a customer support department that you can contact.
  • Effortless handling: This product is easy to handle because its low weight which makes it possible for you to feel less tired after slicing a lot of fish.

Cons:

  • Single-edged knife: This design is good for slicing fish, but it is not suitable for cutting or chopping.
  • Blade length is quite short: You might be slightly disappointed with this knife as the steel does not go all to way to the bottom of the knife’s handle. This may cause some of you to experience some difficulty when attempting to balance the knife
  • Loses its sharpness: The knife is sharp initially, but after repeated use, the blade is not as sharp as you would want it to be and this can be an issue for some.

Lucky Cook Sashimi Sushi Knife

Its manufacturer has described this 10-inch knife as being the perfect tool to use if you want to fillet or slice fish or cut sushi and sashimi. The Lucky Cook Sashimi Sushi Knife has a stainless steel blade but maintains a traditional wooden handle that gives it an authentic Japanese-style knife look. Additionally, it has been made with strict compliance to the standards of Japanese.

Lucky Cook Sashimi Sushi Knife

Pros:

  • Multipurpose knife: It filets, cuts, and slices fish without damaging its meat making it possible for you to serve your family, friends, or guests with dishes that have a great presentation.
  • Quick process: The design of the knife’s blade which is long, asymmetric and narrow allows you to complete sushi-related processes with fewer movements and effort.
  • Meets Japanese standards: Japanese require high-quality knives when preparing sushi and this knife fits the bill of what is acceptable. Such means that it has a sharp blade, a good balance and a wooden handle that gives the user a good grip on the tool.

Cons:

  • Not a full tang knife: This knife does not have handled pieces on its blade because the manufacturer focused on meeting the traditional Japanese designs.
  • Thick blade: For some professional chefs, the blade may be a little thicker than what you are used to getting in high-end knives which requires a little attention to handling as too much pressure can damage the fish.

Dalstrong Yanagiba Sushi Knife

The Dalstrong Yanagiba Sushi Knife is nine inches in length and has a Japanese inscription on the 3.5mm-thick, long, and narrow blade. While the other knives come with gift boxes, this premium knife comes sheathed. The black handle that has a D shape is hand polished and made from Spanish pakkawood and laminated for a perfect grip. Added to the look of the knife is a hint or brass and copper.

Pros:

  • Produces high-quality slices: The narrow and sharp blade is perfect for slicing fish as thin as paper without damaging the meat. Likewise, since the blade is tapered, the slices will be precise.
  • Ease of use: The thickness of the blade and its tapered design allows you to separate the sliced piece away from the large piece of fish without hassles.
  • Good blade: The blade was ice tempered, so it has good edge retention and is resistant to stain and corrosion.
  • Comes with accessories: This knife comes packed with a polishing cloth, a sheath, and a gift box.

Cons:

  • Not suitable for left-handers: The knife’s handle is D shaped making the knife more suitable for right-handed people.
  • Thick blade: The blade might not work for people who are used to putting too much pressure when working.

Final Conclusion

Choosing the best knife for your sushi will be easier than getting the perfect one. As you can see, each knife has it’s unique selling point, but each also has its drawbacks. Thus, when your concern is budget, the Soufull knife will be the best option.

On the other hand, when it comes to authenticity, you should opt for Luck Cook. If the price is not a deciding factor and you are for elegance, then you can get yourself the Dalstrong Knife.

How to Cut Sushi Like a Boss: The Secrets Behind Making Sushi

How to Cut Sushi Like a Boss: The Secrets Behind Making Sushi

If you are reading this, we assume that it is because you either love to cook, or you just love sushi and want to know how to cut sushi yourself as eating out every night is probably not a wise economic decision. If you are just a consumer of sushi, the chances are that you are unaware of the sushi process or its history. Such is also essential to know so that you will have an idea why the food is cut in a particular manner.

Sushi is a Japanese dish that seems easy to make because of its simplicity. However, before you get a wild hair and decide that you want to make your own sushi, there are a few basic things you should understand like what it is, how it is prepared and what is used in its preparation in terms of ingredients and tools.

For general information and as a rule of thumb, if you were to prepare sushi at home, you should not keep it in your fridge for more than a twenty-four hour period. Even having it for two days might be a bit of a stretch.

Making Sushi

Basically, sushi is a dish of flavored rice that can be served with vegetable or raw seafood. The fresh seafood will include marine species like shrimp, tuna, mackerel, halibut, albacore and yellowtail fish. If you were uncertain, now you are sure of what it is.

There are actually different types of sushi like nigiri-zushi, tekkamaki, kappamaki, inari-zushi, and norimaki. These cater for a variety of tastes and some are even vegetarian. Even so, the technique used and the rules in making sushi will always be the same.

  • The Right Tools

The art of sushi making comes down really to using the right tools. If you want to cut the fish, then you need to have a knife with a really thin blade. The knife should be able to cut your fish without destroying the meat.

Usually, Sashimi knives are used to cut sushi and fish since they have a sharp edge and are able to slice fish thinly. Some not only have a sharp blade but the blade tends to be thin and pointed. Apart from having a quality sushi knife, you should also have a roller, and it will be best to have a sushi-making set of knives.

  • The Right Fish

Since you want to cut sushi like a professional, you need to get the right fish along with the right tools. You will be eating raw fish, so it is crucial that you buy a fish that is frozen as the freezing temperatures would help kill bacteria and parasites that could cause you sickness. The fish that you chose should be fresh, and its eyes should be clear and not cloudy. To ensure that the fish is fresh, hold it up since fresh fish stay straight and older fish flop.

  • The Process

To make sushi, the fish is cut into blocks and then further into thin slices at a specific angle and thickness. Assuming that your rice has already been prepared, some people will spread the rice on a Nori (seaweed) that is lying on top of a sushi maker (a roller) and then place the cut fish on top of it. Once everything is layered, it is then rolled and cut.

How to Cut Sushi: A Helpful Guide

Assuming that you have the fish, preferably tuna, you should know how to identify the different parts of the fish namely the belly or toro and the red meat area. The less lean areas are preferred because they have a high amount of fat.

The Steps

  1. Cut off the triangular tip and then cut the tuna into blocks of Saku for the sushi. The head, tail, and fins are not to be included in the cutting process. The blocks of tuna will be shaped differently.
  2. After which, remove the tendons and skin from the fish. If you are unfamiliar, the tendons are white items and go to the skin of the tuna.
  3. Now that you have your blocks, you have to cut the fish into even thinner slices, which is about quarter of an inch, in a direction that is against the grain and at a thirty-degree angle. You should always pull your knife backward when slicing the fish.

Some Important Notes

Deciding how thick to cut may be a challenge because if the fish is cut too thin, then you will lose the flavor of the fish. Then at the same time, you don’t want your fish to be too thick since that will be a hassle when you decide to roll the cut fish.

A good idea will be to have two sizes, slices that are thick and slices that are thin. Once your fish and rice are prepared, you are ready to roll, and you can cut your nori into six pieces.

If you fail at cutting sushi, you shouldn’t give up trying because a constant practice is the best key to achieving the perfect cut of the fish. You can also choose to watch several video tutorials to have a more precise concept.

If you do not usually work in the kitchen, then ask someone who is to help and teach you. Sushi knives are very sharp, and you can injure yourself if you don’t know what you’re doing and have never used knives on fish before.

Final Words

We cannot emphasize too much that if you want to know how to cut sushi like a professional chef, you must first consider the things that you need to get which is a good knife with a really sharp blade. Sashimi knives can be inexpensive, and they can be expensive as well. If you are not going to make sushi regularly, then you should not invest in a knife that is too expensive. Nonetheless, you must still consider its quality.

Cutting fish to make sushi is a fun activity and the instructions are simple to follow. You just have to make sure that you understand how to do the proper angle and thickness. In addition, you should learn how to handle a sushi knife before even attempting to use it.