

About inside out sushi
The inside out sushi roll (or Uramaki, 裏巻), is more common in the west than in Japan and is very popular in western sushi bars.
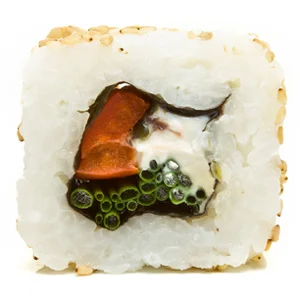
What makes the inside out roll unique is the fact that the sushi rice is in the outside and the nori is on the inside, wrapping the filling. Having the rice out and the nori in is what makes a sushi roll “inside out”.
how to make inside out sushi
Wrapping the rolling mat
Hoping you are using the “one side round and one side flat” rolling mat. A different kind of rolling mat has both sides round – I find the results of the second kind less impressive. Cover the rolling mat with a plastic wrap starting with the round side, and ending with it. Make about 2-3 full rounds of wrapping.
After you are done wrapping, roll the mat to squeeze out all the air locked inside the wrapping. If needed – poke it with a toothpick to let the air out.
Break point
Take a nori sheet, and break it down the middle. If it does not break easily it might mean the nori is old and may have soaked in humidity. You can toast it over a flame until crisp again.
Place the nori sheet on the rolling mat abut 5 cm from the edge, with the rough side of the nori facing upwards. This is a good brand of nori to use.
The turn over
Get both your hands wet and make a ball of rice, using a handful of rice (you can always add more rice later, but drawing out rice is a bit complicated once you’ve put it on the nori). Place the ball of rice in the middle of the nori and start spreading the rice, pressing it down gently, until it is equally spread along the nori sheet.
You should now have a 1 cm high, equal layer of rice on top of the nori. If needed, add some more rice – just remember to keep it even. Flip the nori over so that the rice is facing the mat and the smooth side of the nori is facing upwards.
Can you fill this?
Now it’s time to place a slice of fish (preferably no more than one) on the edge of the nori, along with 1-3 pre-cut slices of vegetables (carrot, cucumber, green onion, asparagus, and so on.. allow yourself to get wild on this matter)..
5.”Commence the rolling sequence”
Using the closer edge of the rolling mat, close the nori around the filling – making a rectangular shaped hill and tighten it from above.
Continue the rolling sequence
Move forward, continue rolling in the rectangular hill steps, keeping it tight with every move until you reach the end of the nori.
Put pressure on the roll from all three sides at all time, especially on stops to allow it to roll tightly.
And… cut!
Use a wet, sharp knife to cut the roll in to little sushi units. 6-8 units per roll – that’s your call.
Some folks cut off the ends of the sushi roll and throw it away assuming it is less presentable. If you ask me that’s a huge waste, but that is entirely your call.
“So, how can I start…?”
Well, the best thing is to get a rolling mat and nori. For more sushi equipment and ingredients to start with – Check out our sushi e-Store, for sushi kits and more.
You might also want to know how to prepare sushi rice, or to read more about sushi grade fish for your sushi roll.


Glad I came across this. I’ve been considering to learn making sushi, now I know weher to start. Thanks for the guide. Quite timely for me.
Interesting read! I’m going to visit the sushi store any time soon to get the necessary equipment. I’m sure I can start my journey to sushi making with this guide. Thank you so much.
cheap b&Ƅ jerssey uk nfl jerseys authentic cheap
specifically, what prevents the rice from sticking to the sushi mat? (ive made a traditional california roll previously with nori on the outside. the rice i used was extremely pesky without water, and i feel that that preventing the rice from sticking to the mat (or the plastic wrap) would require over-watering the role. Can anyone clear this up?
I just did a sushi making class and we used just a tiny little spray of Pam on our hands and the plastic coated mat. Super easy to make inside out rolls and very delicious too!
Sushi without Nori Role, very creative I like it