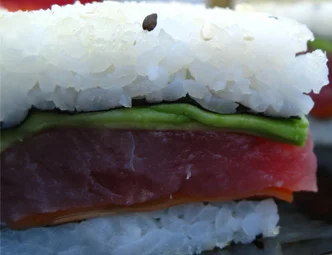
How to make a ‘Sushi Sandwich’?
1.”Break point”
Take a nori sheet, and break it down the middle. If it doesn’t break easily, it’s either old, or not such a good brand of nori to work with. Place the nori sheet on the dry cutting board with the rough side of the nori facing upwards.
2.”The turn over”
Get both your hands wet and make a ball of rice, using about a handful of rice (you can always add more rice later, but drawing out rice is a bit complicated once you’ve put it on the nori). Place the ball of rice in the middle of the nori and start spreading the rice, pressing it down gently, until it is equally spread along the nori sheet. You should now have a 1cm high, equal layer of rice on top of the nori. If needed, add some more rice – just remember to keep it even. Flip the nori over so that the rice is facing the mat and the smooth side of the nori is facing upwards.
3.”The wall”
Yes, a wall. You need to build a “wall of rice” around half the nori as illustrated below. The rice wall needs to be about 2cm wide and 2cm high. Make it higher or shorter depending on the amount of filling you will be using.
4.”Filling”
Fill the half nori you just surrounded with a wall with the fillings of your choice. Salmon and avocado makes a classic choice, and was the inspiration for this illustration. You can cut the filling small or big, it doesn’t matter as long as it is evenly spread inside the rice wall.
5.”Close”.
This is the “complicated” part: Hold the end of the nori which is without filling on it, lift, and close it on top of the other end of the nori so it fits exactly on top of the rice wall.
6. “Tightening”
Use a bamboo mat wrapped in saran tape to tighten the “structure” from all directions. In the illustration it shows how to tighten only two sides of it. You’ll need to rotate it 90 degrees and press it on the two other sides.
7. “Cut and serve”
Use a wit knife to cut along both diagonals, and serve with soy sauce, pickled ginger and wasabi.
Enjoy!


My husband and I tried making this tonight. Your illustrations were very helpful and made constructing the “sandwich” quite easy. We’re beginners but our sushi sandwiches came out great and we’ll definitely be making them again.
The “close” part actually took me longer time to get through but I’m glad I was able to come up with something whole – Sushi Sandwich. Thanks for these recipes.
Thanks for the Sushi Sandwich recipes. I tried it out after going through the recipes here but the “close” aspect was where I got confused and couldn’t continue. I wish you could throw more light on that. Thank you.